How to Do a Bleach Bath on Hair: The Complete Step-by-Step Guide
A bleach bath is the gentlest way to lift unwanted color, fade brassy tones, or prep hair for a lighter shade — without the intensity of a full bleach application. Here’s exactly how to mix, apply, and recover from one safely at home.
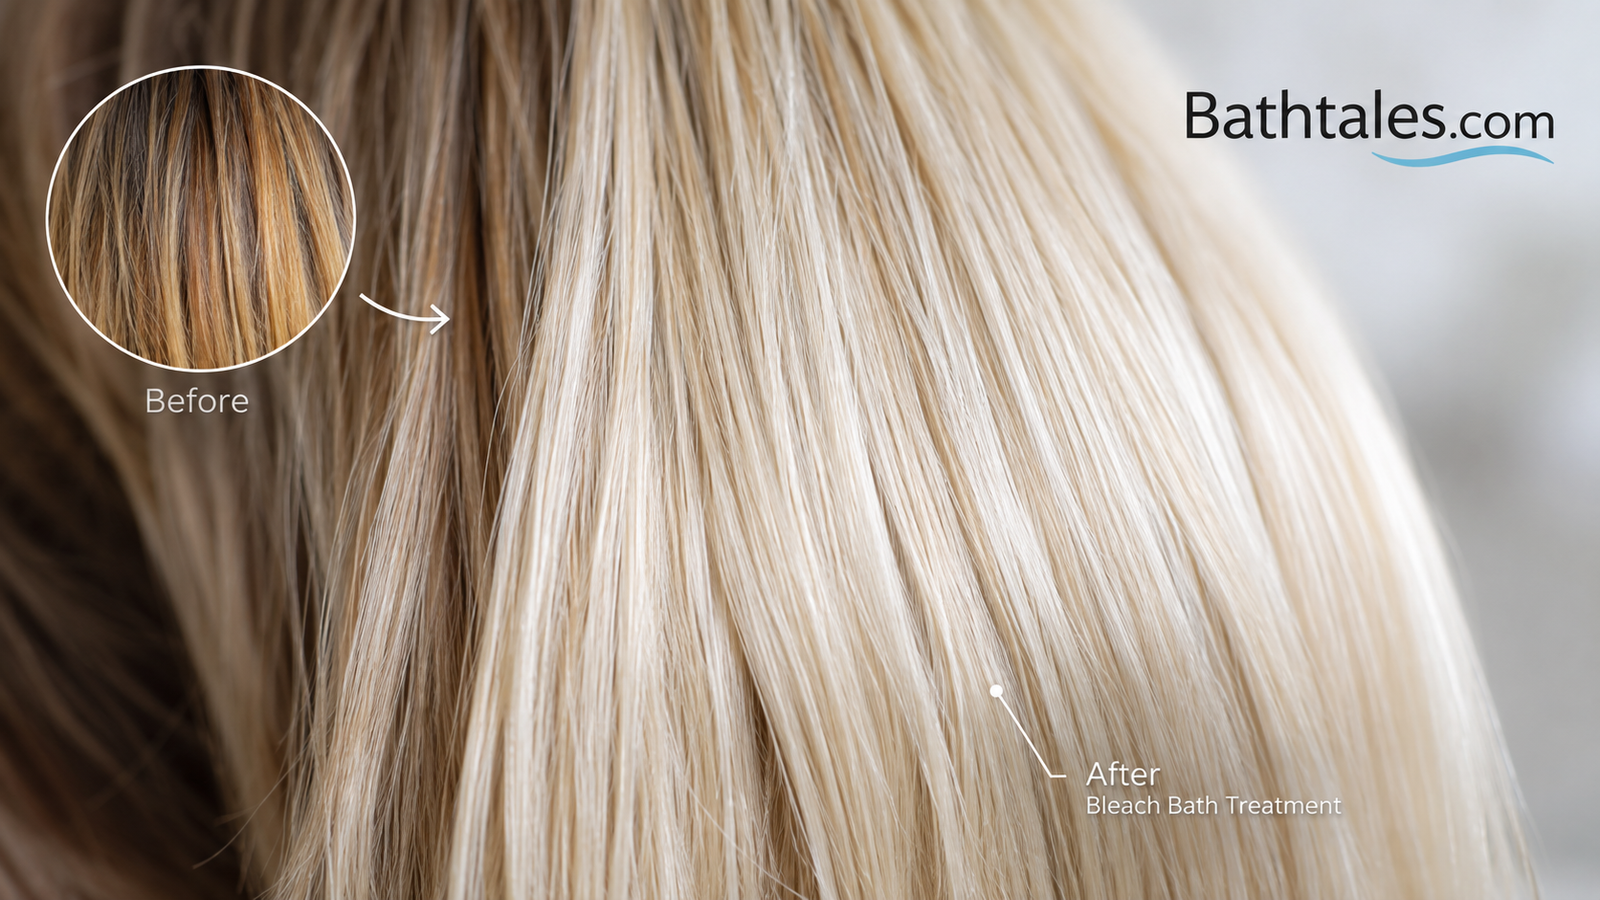
If you’ve ever colored your hair and ended up with a shade that’s too dark, too brassy, or just plain wrong, you’ve probably heard someone recommend a “bleach bath.” Unlike a traditional bleach application — which is mixed thick and painted onto dry, sectioned hair — a bleach bath is a diluted, shampoo-based version of the same lightening process. It’s slower, gentler, and far more forgiving, which makes it one of the most useful tools in a colorist’s kit for fixing color mistakes without stripping hair to straw.
This guide walks through exactly what a bleach bath is, when it makes sense to use one, how to mix and apply it correctly, and how to protect your hair’s condition throughout the process. Whether you’re trying to fade an over-dark box dye or gently lift tone before a fresh color, the steps below will get you there with far less damage than reaching for full-strength bleach.
It’s a technique that’s been part of professional color correction for a long time, but it’s also gained a following among people managing their color at home, largely because it offers a middle path between “live with a color you don’t love” and “strip everything with a harsh full bleach service.” Understanding exactly how it works — and where its limits are — makes it much easier to get a predictable, controllable result the first time, rather than treating it as a last-resort experiment.
1. What Is a Bleach Bath for Hair?
A bleach bath is a mixture of lightening powder (bleach), a low-volume developer, and a gentle shampoo, applied to hair the way you’d apply a regular shampoo — worked through damp hair, left to process for a short window, then rinsed. Because the bleach is diluted into shampoo rather than mixed to full strength, it lifts color more slowly and more evenly, which reduces the risk of harsh, patchy, or overly damaged results.
The technique is popular for a few specific situations: fading a dye job that turned out darker than intended, softening brassy or muddy tones left over from a previous color, evening out patchy color before a redo, or gently prepping hair that’s already been colored for a new, lighter shade. It is not typically the method colorists reach for when lifting virgin, never-colored hair by several levels — for that, a full bleach application still does the job faster and more predictably.
Why Diluting Bleach Changes the Result
Bleach lightens hair by oxidizing melanin, the pigment naturally present in the hair shaft as well as the pigment deposited by hair dye. In a full-strength application, that oxidation reaction runs at maximum speed, which is exactly what you want when the goal is several levels of lift. Diluting the same bleach into shampoo lowers the concentration of the active lightening agents that reach each strand, which slows the reaction down considerably. The trade-off is straightforward: you sacrifice some raw lifting power in exchange for a process that’s far easier to control, far more forgiving of small application inconsistencies, and much less likely to leave hair in the “cotton candy” texture that comes from overprocessing.
This is also why a bleach bath tends to lighten hair more evenly than people expect. Because the mixture is worked through the hair the way shampoo is — massaged in, distributed with fingers or a brush, rather than painted on in neat sections — it naturally reaches every strand with roughly the same amount of product. Full bleach applications can end up slightly heavier in some spots and lighter in others depending on how carefully sections were painted; a bleach bath sidesteps a lot of that inconsistency simply because of how it’s applied.
2. Bleach Bath vs. Full Bleaching: What’s the Difference?
The core difference comes down to concentration and control. A full bleach application is mixed to a thick, spreadable consistency and applied section by section to dry hair, giving it maximum lifting power. A bleach bath dilutes that same lightening chemistry into a shampoo base and works through damp hair all at once, which slows the reaction and spreads it more evenly across every strand.
| Factor | Bleach Bath | Full Bleach Application |
|---|---|---|
| Lifting power | Mild to moderate (1–2 levels) | Strong (2–5+ levels) |
| Application method | Worked through damp hair like shampoo | Painted onto dry, sectioned hair |
| Damage potential | Lower, more even | Higher, especially with repeated use |
| Best for | Fading color, softening tone, prepping for redo | Significant lightening from a darker base |
| Precision at the root | Lower — not ideal for root-only work | Higher — can be sectioned precisely |
| Typical processing time | 10–20 minutes | 20–45 minutes |
In practice, many colorists use a bleach bath as a “reset” step — a way to soften a color mistake enough that a corrective color will actually take evenly, without going all the way back to a full bleach-and-tone process.
3. Who Should (and Shouldn’t) Try a Bleach Bath at Home
Good candidates
- Hair that’s overly dark from a recent semi- or demi-permanent color
- Brassy, muddy, or uneven tone from a previous lightening service
- Hair in reasonably healthy condition, without heavy prior bleaching
- Situations where only a mild, even lift is needed
Proceed with caution or skip
- Hair that has been bleached multiple times already
- Hair that feels gummy, overly stretchy, or is breaking when wet
- Anyone with scalp sensitivities, open irritation, or a known allergic reaction to bleach
- Hair that was recently treated with henna, metallic dyes, or certain box-dye formulas — these can react unpredictably with bleach
If your hair is already fragile, a strand test and a consultation with a professional colorist is worth the extra step before mixing anything at home. Bleach — even diluted — is still a chemical process, and skipping a patch or strand test is one of the most common ways an otherwise simple bleach bath turns into a bad hair day.
How Hair Type Changes the Approach
Not every head of hair responds to a bleach bath the same way, and adjusting your expectations by hair type helps avoid surprises.
| Hair Type | What to Expect | Adjustment |
|---|---|---|
| Fine, low-density hair | Lifts noticeably faster than average | Use a lower developer volume and check every 2–3 minutes |
| Thick, coarse hair | Lifts more slowly, may need longer processing | Slightly higher developer volume, still checked frequently |
| Curly or textured hair | Can be more prone to dryness post-treatment | Prioritize a bond-repair mask and reduce future processing frequency |
| Previously relaxed or permed hair | More porous, absorbs bleach unevenly | Shorter processing time, gentler ratio, extra conditioning |
4. What You’ll Need
Gathering everything before you start keeps the process moving quickly, which matters because timing is one of the most important variables in a bleach bath.
| Item | Why It Matters |
|---|---|
| Bleach powder (lightener) | The active lifting agent — a gentle, dust-free formula is easier to control |
| Low-volume developer (10–20 vol) | Activates the bleach; lower volumes are gentler and better suited to a bath |
| Clarifying or basic shampoo | The base the bleach is diluted into |
| Non-metallic mixing bowl | Metal can react with bleach chemistry |
| Tint brush or applicator | Helps distribute the mixture evenly through sections |
| Gloves | Non-negotiable skin protection |
| Timer | Precision matters more here than with a full bleach |
| Deep conditioner or bond-repair treatment | Needed immediately after rinsing |
| Old towel and clips | Sectioning and cleanup |
It’s worth resisting the temptation to substitute a full-strength box bleach kit for these individual components. Pre-mixed kits are formulated for painting onto dry hair at a thicker consistency, and trying to dilute one on the fly with shampoo is much harder to get right than starting with bleach powder and developer sold separately. Buying the components individually also lets you control the developer volume precisely, which is one of the biggest levers you have for keeping a bleach bath gentle.
5. How to Do a Bleach Bath — Step by Step
Follow these steps in order. Because timing and even distribution matter more in a bleach bath than in a full application, read through the whole process once before you begin mixing anything.
Do a Strand Test
Snip a small, hidden section of hair and mix a tiny batch of your bleach bath solution to test on it first. Watch how quickly it lifts and check that the strand doesn’t feel damaged or overly stripped after rinsing and drying. This single step prevents the vast majority of at-home bleach bath disasters.
A small, hidden strand isolated and treated with a test batch of the mixture.
Section and Protect the Scalp
Divide hair into four workable sections and clip them out of the way. Apply a scalp-barrier cream along the hairline and part lines to reduce irritation, since the mixture will come into some contact with the scalp as it’s worked through.
Four clipped sections with scalp-barrier cream applied along the hairline.
Mix the Bleach Bath Solution
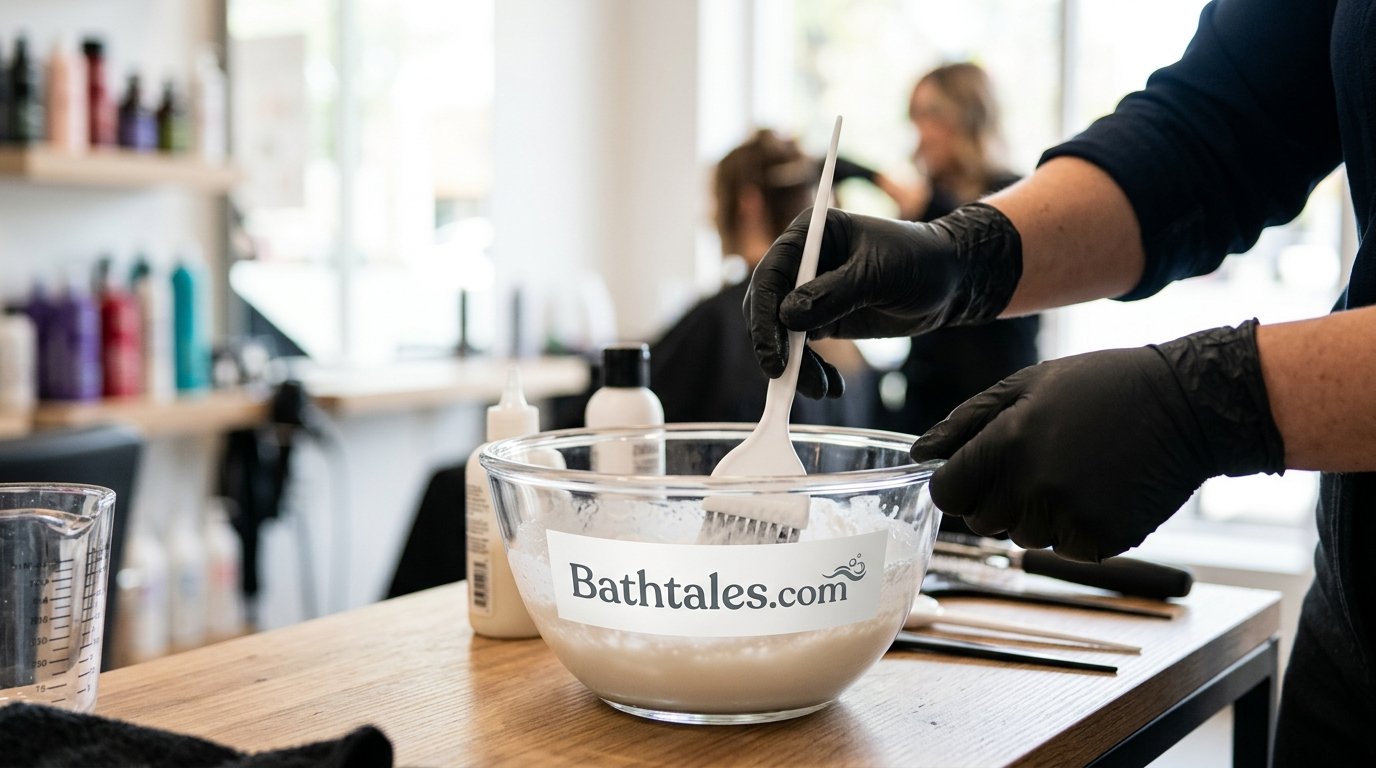
In a non-metallic bowl, combine bleach powder, low-volume developer, and shampoo in the ratio you tested earlier (see the ratio guide below). Stir until the mixture is smooth and lump-free — it should have the consistency of a slightly thick shampoo, not a paste.
Bleach, developer, and shampoo combined to a smooth, shampoo-like consistency.
Apply Through Damp Hair
Work the mixture through damp (not soaking wet) hair one section at a time, starting at the mid-lengths and ends unless you’re specifically trying to lift the roots too. Use a tint brush or your gloved hands to distribute it evenly, making sure every strand within a section is coated.
Mixture applied section by section with a tint brush for even coverage.
Set a Timer and Monitor Closely
Start timing as soon as the first section is applied. Check the hair’s lift every few minutes by gently rubbing a small piece with a paper towel — bleach baths process faster than most people expect, and checking often is the difference between a soft fade and an unintentional level-jump.
Regular timed checks prevent over-processing during the bleach bath.
Rinse Thoroughly and Condition Immediately
Once you’ve reached the desired level of lift, rinse with cool to lukewarm water until it runs clear, then follow immediately with a deep conditioner or bond-repair treatment. Skipping this step is one of the fastest ways to end up with straw-like texture the next day.
A thorough rinse followed immediately by a reparative conditioning treatment.
Why the Order of Operations Matters
Each of these six steps exists to solve a specific failure mode that shows up again and again in bleach bath horror stories. The strand test catches formulas that lift too fast or too slow for a particular head of hair before any real damage is done. Sectioning keeps the application organized enough that no strand gets missed or double-treated. Mixing to a shampoo-like consistency, rather than a thicker paste, is what keeps the bleach bath gentler than a full application in the first place — a mixture that’s too thick behaves more like standard bleach and processes accordingly. Applying to damp rather than soaking-wet hair matters because excess water dilutes the mixture unpredictably as it’s worked through, throwing off your carefully chosen ratio. And the final rinse-and-condition step is what determines whether hair feels soft the next morning or brittle and rough — bleach doesn’t fully stop working the instant it’s rinsed away unless the hair’s pH is brought back into balance, which a good conditioner or bond-repair treatment helps do.
6. How to Bleach Bath Hair to Remove Unwanted Color
When the goal is specifically fading an over-dark or off-tone dye job, the process above stays largely the same, with a few adjustments that make color removal more effective.
Focus the Mixture on Mid-Lengths and Ends First
Unwanted color usually sits most heavily where the original dye was concentrated — typically mid-lengths and ends for at-home box dye applications. Apply there first, then move to the roots only if the color there needs lifting too, since roots often process faster due to natural warmth from the scalp.
Expect to Repeat, Not Overprocess
If one bleach bath doesn’t fully remove the unwanted tone, it’s almost always safer to let hair rest for several days to a week and repeat the process, rather than pushing processing time longer in a single session. Multiple gentle sessions consistently produce a better result — and less damage — than one aggressive one.
Tone Immediately After Lifting
Removed color often reveals warm, brassy, or orange undertones underneath. A purple or blue toning shampoo, or a demi-permanent toner, applied right after the bleach bath neutralizes that warmth before it has a chance to set in.
Box Dye vs. Salon Color: What Changes
Box dye formulated for at-home use often contains a higher concentration of pigment molecules designed to deposit heavily and resist fading, which is part of why it’s notoriously harder to lift than salon-applied color. If the color you’re trying to remove came from a box dye, budget for the possibility of needing two or three gentle bleach bath sessions spaced a week apart rather than expecting full removal in one pass. Salon-applied semi- or demi-permanent color, by contrast, is generally formulated to fade more predictably and often responds to a single bleach bath session, especially if it’s still relatively fresh.
What “Removed” Actually Looks Like
It’s worth setting realistic expectations: a bleach bath fades and lifts pigment, but it rarely returns hair all the way back to its pre-color state in one session, particularly with darker box dye shades. A more realistic goal is softening the color enough that it reads as a natural, wearable shade, or enough that a corrective color can be applied evenly on top without the old color bleeding through and muddying the new one.
7. Bleach Bath Mixing Ratios
Ratios vary depending on how much lift you need and how gentle you want the process to be. These starting points are commonly used as a baseline — always adjust based on your strand test results.
| Goal | Bleach | Developer | Shampoo |
|---|---|---|---|
| Very gentle fade | 1 part | 1 part (10 vol) | 2 parts |
| Moderate color removal | 1 part | 1 part (20 vol) | 1 part |
| Stronger lift (healthy hair only) | 1 part | 1.5 parts (20 vol) | 1 part |
Lower developer volumes (10) are gentler and better suited for fine, fragile, or previously bleached hair. Higher volumes (20) lift faster but increase both the speed and the risk of overprocessing — reserve them for hair in solid condition.
It helps to think of these ratios as a starting point rather than a fixed formula. Water hardness, the specific brand of bleach you’re using, ambient room temperature, and even how recently hair was last washed can all shift how quickly a given ratio lifts. This is exactly why the strand test from Step 1 matters so much — it lets you calibrate the ratio and timing to your actual hair, in your actual bathroom, rather than relying purely on a chart.
8. Processing Time and Monitoring Guidelines
Most bleach baths process meaningfully faster than a full bleach application. A typical session runs 10 to 20 minutes, but the only reliable way to know when to stop is by checking the hair itself, not the clock.
| Check-in Time | What to Look For |
|---|---|
| 5 minutes | Slight softening of tone; too early to judge final result |
| 10 minutes | Visible lift beginning on most hair types |
| 15 minutes | Noticeable fade; check closely for your target shade |
| 20+ minutes | Maximum recommended time for most at-home bleach baths — rinse regardless of result |
If hair hasn’t lifted enough by the 20-minute mark, it’s better to rinse, condition, wait several days, and repeat than to extend processing further.
9. Aftercare: Toning, Conditioning, and Repair
What happens in the 24–72 hours after a bleach bath has a major impact on how hair looks and feels long-term.
Immediate Aftercare
Rinse with cool water, apply a bond-repair or deep conditioning mask, and avoid heat styling the same day if possible. If brassiness shows up, a purple or blue toning shampoo applied at this stage works especially well since the hair’s cuticle is still slightly open.
The Following Week
Space out washing where you can, switch to a sulfate-free shampoo, and add a leave-in treatment or hair oil to reduce moisture loss. Avoid any additional chemical services — including further lightening — for at least a week to let the hair’s structure stabilize.
Signs Your Hair Needs Extra Recovery Time
Pay attention to how hair feels once it’s dry, not just how it looks while wet. Hair that feels gummy or overly elastic when stretched, that’s shedding more than usual when brushed, or that’s developing noticeable split ends within days of the treatment is signaling that it needs a longer recovery window before any further chemical processing. In those cases, lean more heavily on protein and moisture treatments in rotation, and push back any planned toning or additional lightening by another week or two.
Building a Simple Recovery Routine
A workable routine for the two weeks following a bleach bath looks like: a bond-repair or protein treatment in week one, a deep moisture mask in week two, sulfate-free shampoo throughout, and a heat protectant used every time hot tools come out. This kind of structured aftercare is what separates hair that bounces back quickly from hair that stays dry and brittle for months.
10. Common Bleach Bath Mistakes and How to Avoid Them
Mistakes to avoid
- Skipping the strand test entirely
- Mixing the bleach too thick, essentially turning it into a full application
- Leaving the mixture on far past the recommended time window
- Applying to hair that’s already fragile from prior bleaching
- Not conditioning immediately after rinsing
- Combining with other chemical treatments in the same week
What to do instead
- Always test on a hidden strand first
- Keep the mixture at a shampoo-like consistency
- Check progress every 3–5 minutes without exception
- Assess hair condition honestly before starting
- Have a deep conditioner ready before you rinse
- Give hair at least a week of rest between chemical services
Most of these mistakes trace back to the same root cause: treating a bleach bath like it’s risk-free simply because it’s gentler than a full application. It’s still bleach, and it still requires the same careful attention to timing, consistency, and hair condition that any lightening service does — just with a slightly wider margin for error than a full bleach application allows.
11. Bleach Bath vs. Other Color-Removal Methods
A bleach bath isn’t the only option for fixing unwanted hair color. Here’s how it stacks up against the other most common approaches.
| Method | Speed | Damage Risk | Best For |
|---|---|---|---|
| Bleach bath | Moderate | Low–Moderate | Gentle, even fading |
| Color-removing shampoo (clarifying/vitamin C) | Slow | Very low | Very mild, recent semi-permanent color |
| Chemical color remover | Fast | Low (non-lightening) | Removing artificial color without lifting natural pigment |
| Full bleach application | Fast | High | Significant lightening from a dark base |
For most “my dye came out too dark” situations, a bleach bath sits in a useful middle ground — stronger than a clarifying wash, gentler than a full lightening service.
12. Long-Term Hair Maintenance After a Bleach Bath
Lightened hair — even gently lightened hair — needs a slightly different maintenance routine going forward.
- Switch to a sulfate-free, color-safe shampoo and conditioner
- Use a weekly deep-conditioning or bond-repair mask
- Reduce heat styling frequency, or always use a heat protectant
- Refresh toner every few weeks to keep brassiness in check
- Trim regularly to stay ahead of any dryness at the ends
- Space out future lightening services by at least four to six weeks
With the right aftercare routine, hair that’s been through a bleach bath can stay soft, healthy, and well-toned for months at a time.
A Sample Monthly Maintenance Schedule
| Week | Focus |
|---|---|
| Week 1 | Bond-repair treatment; minimal heat styling |
| Week 2 | Deep moisture mask; toning shampoo as needed |
| Week 3 | Trim ends if dryness is showing; continue sulfate-free routine |
| Week 4 | Reassess tone and condition before scheduling any further lightening |
Treating maintenance as an ongoing routine, rather than a one-time fix right after the treatment, is what keeps lightened hair looking intentional rather than damaged as the weeks go on.
Frequently Asked Questions
What exactly is a bleach bath for hair?
It’s a diluted mixture of bleach powder, developer, and shampoo applied to hair like a wash-through treatment, used to gently lift or fade unwanted color rather than lighten hair dramatically.
How long should you leave a bleach bath in your hair?
Most bleach baths process in 10 to 20 minutes. Check progress every few minutes rather than relying on a fixed time, since hair type and porosity change how quickly it lifts.
Does a bleach bath damage hair less than regular bleach?
Generally, yes. Because the bleach is diluted and applied more evenly, a bleach bath tends to be gentler than a full-strength application, though it’s still a chemical process and can cause damage if overprocessed.
Can you do a bleach bath on already bleached hair?
It’s possible but riskier. Previously bleached hair is more porous and fragile, so a strand test and shorter processing time are especially important, and in some cases it’s better to skip further lightening until hair recovers. Porous hair also tends to absorb the bleach bath mixture faster than virgin hair, which means it can reach its target lift in a shorter window than you’d expect — another reason frequent checking matters more than following a fixed timer.
Will a bleach bath remove semi-permanent color completely?
It can significantly fade most semi-permanent color, though full removal sometimes takes more than one gentle session rather than a single aggressive treatment.
What developer volume is best for a bleach bath?
10-volume developer offers a gentler, slower lift, while 20-volume works faster but with more risk. Most at-home bleach baths are safer starting with 10-volume, especially on fine or fragile hair.
Why did my hair turn orange or yellow after a bleach bath?
Warm undertones are a normal part of the lightening process and become visible as darker pigment lifts. A purple or blue toning shampoo applied right after neutralizes that warmth.
Can I do a bleach bath on my roots only?
It’s possible, but precision is harder to achieve than with a full application, since the diluted mixture spreads more easily. Many people find it easier to apply the bleach bath to lengths and ends first, then assess whether roots need separate attention.
How often can you safely repeat a bleach bath?
Most guidance suggests waiting at least a week between sessions to let hair recover, rather than repeating within the same day or the next day to force faster results.
Should I condition before or after a bleach bath?
Conditioning happens after, not before. Applying the mixture to damp (not overly conditioned) hair allows for more even processing, and deep conditioning is essential immediately following the rinse.
Can a bleach bath fix patchy or uneven hair color?
Yes — this is one of its most common uses. The diluted, wash-through application method tends to even out patchiness better than trying to re-dye directly over uneven color.
Is it safe to bleach bath hair at home without a colorist?
It can be done at home if hair is in reasonably good condition and a strand test is performed first, but hair that’s already damaged, chemically treated with multiple services, or reacting unpredictably is safer left to a professional.
The Bottom Line
A bleach bath is one of the most controllable ways to fade unwanted hair color without the intensity of a full lightening service. The keys to a good result are the same every time: test first, mix to a shampoo-like consistency, monitor constantly, and condition immediately afterward. Take it slow, repeat gently if needed, and your hair will thank you for it.
Shop Everything You Need