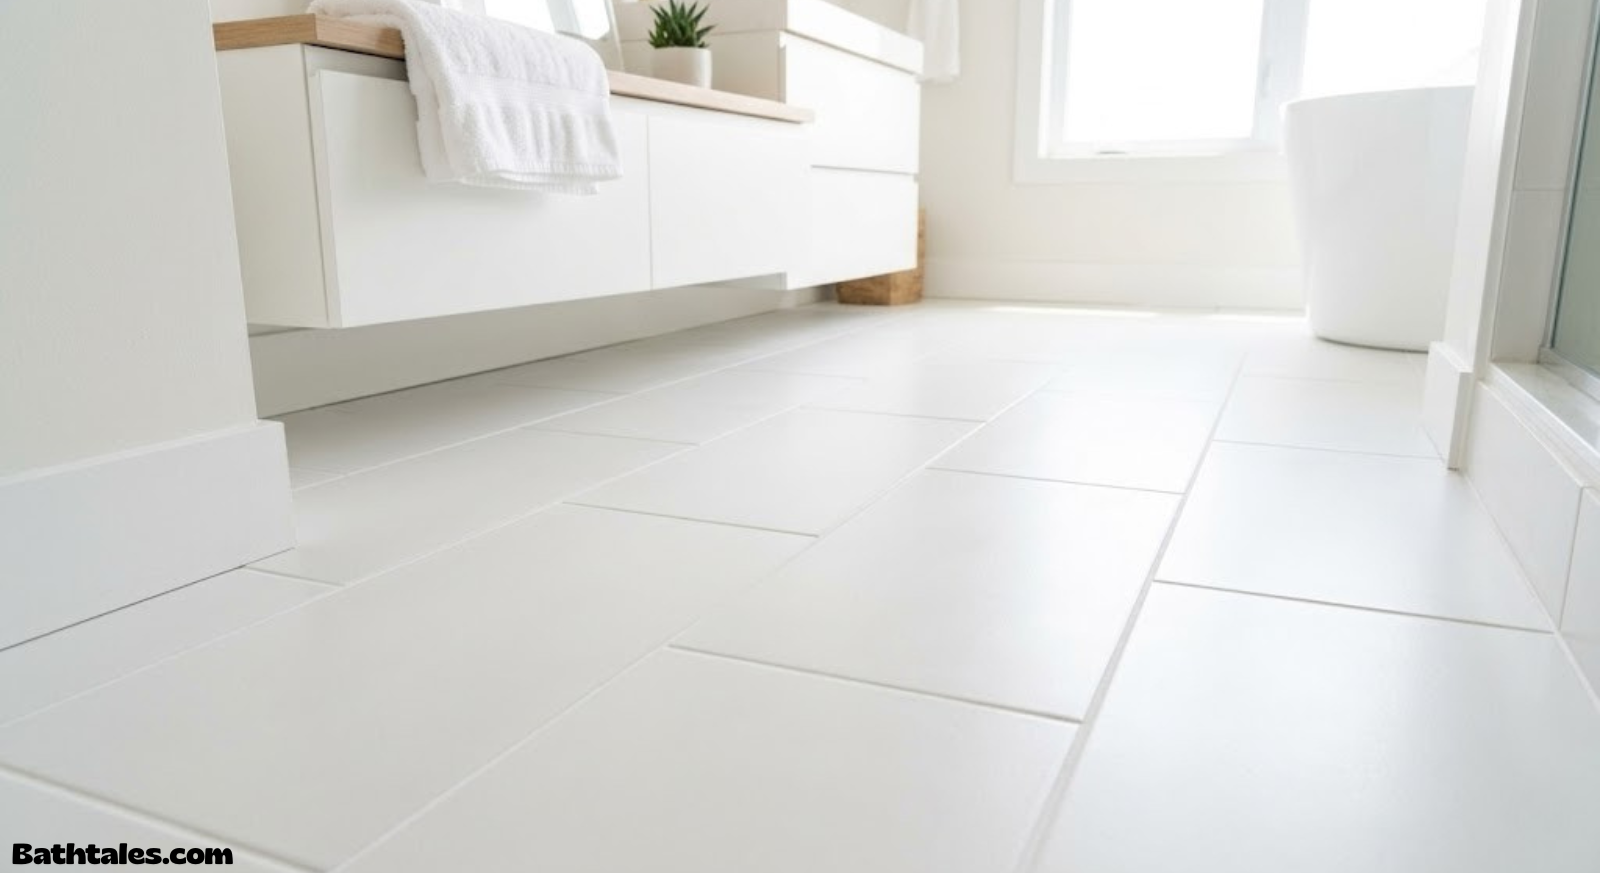
A no-scrub soak can turn grungy grout lines like these back to near-white in under an hour.
How to Clean Grout Without Scrubbing (Methods That Actually Work)
If your knees and knuckles are done fighting with a toothbrush, good news: grout doesn’t need brute force. It needs the right chemistry, the right dwell time, and a little patience. Here’s exactly how to get grout clean without scrubbing — using methods that lift stains out instead of grinding them in.
Why Grout Gets So Dirty in the First Place
Grout is porous. Unlike the glazed tile around it, grout is essentially a sponge made of sand, cement, and (sometimes) polymer additives. Every time water sits on it, a tiny amount seeps into that porous surface and carries soap residue, body oils, dust, and minerals along with it. Over weeks and months, that residue builds up in layers you can’t rinse away — which is exactly why plain water and a rag stop working.
Bathroom grout is usually the worst offender because it deals with soap scum, humidity, and mildew all at once, while kitchen grout tends to collect grease and food particles. Either way, the dirt isn’t just sitting on the surface — it’s embedded a millimeter or two deep, which is why scrubbing alone often just polishes the top layer while the gray stays put.
That’s the whole secret to cleaning grout without scrubbing: you’re not trying to physically remove dirt with friction. You’re trying to dissolve or lift it chemically, then rinse it away. Once you think of it that way, every method below makes a lot more sense.
What You’ll Need Before You Start
None of these methods require special tools. A few household items and one optional cleaner cover almost every situation:
- Oxygen bleach powder (like OxiClean or a generic sodium percarbonate powder)
- Baking soda and white vinegar
- 3% hydrogen peroxide (the standard brown-bottle drugstore kind)
- A spray bottle
- A soft-bristle broom or squeegee (not for scrubbing — for spreading and rinsing)
- An old towel or microfiber cloth
- Rubber gloves and, ideally, a window open or fan running for ventilation

Check Price on Amazon
Method 1: The Oxygen Bleach Soak
This is the most reliable no-scrub method for genuinely stained, gray grout, because oxygen bleach releases oxygen bubbles as it dissolves — those bubbles physically lift dirt out of the pores of the grout for you, so you never have to.
1Mix the Oxygen Bleach Paste
Combine oxygen bleach powder with warm water until it forms a paste roughly the texture of pancake batter. Spread it directly onto the grout lines with a spoon or old spatula, keeping it off the tile face where possible.
Applying oxygen bleach paste directly into the grout channel, avoiding the glazed tile face.
2Let It Sit (Don’t Touch It)
Walk away for 15–20 minutes. This dwell time is the entire point of the method — it’s the oxygen bubbles doing the work that a brush normally would. Keep the area ventilated and keep pets and kids out during this window.
Oxygen bleach bubbling gently inside the grout lines during the dwell time — no agitation needed.
3Rinse with Hot Water
Pour or mop hot water over the area and squeegee it toward a drain, or wipe it up with a damp towel if it’s a floor without a drain nearby. You’ll see the paste turn gray or brown as it lifts away — that’s the stain leaving the grout, not the grout itself breaking down.
Hot water rinse carries the dissolved grime out of the grout lines and toward the drain.
Pros
- Best results on genuinely stained/gray grout
- Color-safe on white and light grout
- Cheap — one tub lasts months
Cons
- Needs 15–20 minutes of dwell time
- Powder can be messy to mix
- Not effective on true mold staining alone
Method 2: Steam Cleaning
A steam cleaner uses heat and pressurized vapor instead of chemicals, which makes it the go-to no-scrub option for people who want to avoid bleach entirely — including households with kids, pets, or sensitivities to fumes.
1Fill and Heat the Steamer
Fill the steam cleaner’s reservoir with water and let it reach full pressure — most units take 30–60 seconds. Attach the narrow grout or detail nozzle if one came with your unit.
The steam unit builds pressure before the nozzle is aimed at the grout line.
2Glide Along the Grout Lines
Move the nozzle slowly along each grout line, holding it about an inch away. The heat loosens grime on contact — you’re not pressing or scrubbing, just gliding at a steady pace, roughly one foot every 3–4 seconds.
Slow, even movement along the grout line lets steam heat penetrate before you move on.
3Wipe Away the Loosened Grime
Follow a step or two behind with a microfiber cloth to absorb the moisture and lifted dirt. No pressure needed — the cloth is just collecting what the steam already loosened.
A dry pass with microfiber cloth removes the moisture and grime the steam already broke loose.
Method 3: Baking Soda & Vinegar Foaming Reaction
This is the most budget-friendly method and works well on light, everyday grime rather than deep set-in stains. The foaming reaction between the two ingredients does the lifting, so timing matters more than pressure.
1Layer Baking Soda, Then Vinegar
Sprinkle a thin layer of dry baking soda directly onto the grout lines, then spray or drizzle white vinegar over the top. It will foam immediately — that reaction is lifting debris out of the porous surface.
The foaming reaction between baking soda and vinegar loosens grime without physical agitation.
2Wait for the Foam to Settle
Give it 5–10 minutes for the fizzing to fully stop. Longer dwell time doesn’t add much benefit here since the reaction itself is short-lived, unlike oxygen bleach.
3Wipe and Rinse
Wipe the residue away with a damp cloth, then rinse with clean water so no chalky baking soda film is left behind.
Method 4: Hydrogen Peroxide Spray
Plain 3% hydrogen peroxide is a gentle, no-scrub option that’s particularly good at brightening grout without the fumes of bleach-based products. It’s slower than oxygen bleach but very safe for daily-use surfaces.
1Spray Directly on the Grout
Fill a spray bottle with plain 3% hydrogen peroxide and saturate the grout lines generously, letting it pool slightly in the recessed lines.
A generous spray of hydrogen peroxide saturating the grout line before it sits.
2Let It Sit for 30 Minutes
Peroxide works more slowly than oxygen bleach, so give it a full 30 minutes. You’ll often see a faint fizz on darker stains — that’s a good sign it’s working.
3Rinse Thoroughly
Rinse with warm water and dry with a towel. Because peroxide breaks down into water and oxygen, there’s no residue to worry about.
Method 5: No-Scrub Commercial Grout Cleaners
If DIY mixing isn’t your thing, a dedicated spray-and-walk-away grout cleaner is a reasonable shortcut. Look for labels that specifically say “no scrub” or “foaming” — those are formulated with the same lifting principle as the oxygen bleach method, just pre-mixed and stabilized.

Check Price on Amazon
These products are best for upkeep — using one weekly on already-clean grout is often enough to prevent the deep staining that eventually needs a full oxygen bleach soak.
Method Comparison at a Glance
| Method | Best For | Dwell Time | Cost |
|---|---|---|---|
| Oxygen Bleach Soak | Deep, gray/stained grout | 15–20 min | Low |
| Steam Cleaning | Chemical-free households | None (instant) | Medium–High (equipment) |
| Baking Soda + Vinegar | Light, everyday grime | 5–10 min | Very low |
| Hydrogen Peroxide | Gentle brightening | 30 min | Very low |
| Commercial No-Scrub Spray | Maintenance cleaning | 10 min | Low–Medium |
Sealing Grout After Cleaning
Once grout is genuinely clean and fully dry (24 hours is a safe window), applying a penetrating grout sealer closes up those pores so future dirt has a much harder time settling in. This single step is why some households only need to deep-clean grout once or twice a year instead of monthly.

Check Price on Amazon
Preventing Grout Stains Going Forward
- Squeegee shower walls and floors after each use to stop water from sitting in the grout lines
- Run the bathroom fan or crack a window for 20–30 minutes after showers to cut down on mildew-friendly humidity
- Do a quick weekly peroxide or no-scrub spray pass instead of waiting for stains to set in
- Reseal grout every 6–12 months depending on how much foot and water traffic the area gets
A lot of this overlaps with general bathroom upkeep — how to make a bath comfortable and best bathroom cleaners both touch on routines that keep grout from getting to the “deep clean” stage in the first place.
Mistakes That Make Grout Cleaning Harder
When to Call a Professional
If grout has visible black spots that keep returning within days of cleaning, that’s often mold growing beneath the surface rather than surface staining — a job better suited for a professional or a targeted mold treatment. The same goes for grout that’s crumbling, cracked, or pulling away from the tile, since no cleaning method fixes structural damage.
For persistent black spotting specifically, how to get rid of bathroom mold is worth reading before assuming it’s just a stain.
Natural & Chemical-Free Grout Cleaning
A lot of people search for a no-scrub method specifically because they want something they don’t have to Google-check for safety warnings first. If that’s you, the good news is that “natural” and “no-scrub” overlap almost completely — the same lifting principle that makes oxygen bleach or peroxide work without a brush also applies to gentler, plant-based options.
Castile soap diluted in warm water is a mild but genuinely useful starting point for grout that’s dingy rather than stained. Because castile soap is an oil-based cleanser, it’s particularly good at breaking down the body-oil and soap-scum film that builds up in shower grout. Mix about a tablespoon of liquid castile soap into two cups of warm water, saturate the grout lines with a spray bottle, let it sit for ten minutes, and rinse. It won’t touch deep gray staining the way oxygen bleach will, but for weekly upkeep it’s a genuinely chemical-free option that’s safe around kids and pets.
Lemon juice is another natural option, though it comes with a caveat: it’s acidic, so it behaves more like a milder version of vinegar. It can brighten light grime and cut through soap film, but it should never be used on natural stone tile, and it shouldn’t sit for more than a few minutes on any grout, since prolonged acid exposure can slowly erode the cement binder in grout over repeated use. If you want an acid-based natural cleaner, a short-contact lemon juice spray followed by an immediate rinse is the safer way to use it.
For people who want zero synthetic ingredients at all, a thick baking soda paste on its own — without vinegar — can be spread onto grout, left for 15 minutes, and then rinsed with a hot water pour. It’s slower than the foaming vinegar version, but because there’s no acid involved, it’s gentler on both grout and the surrounding tile, and it’s the safest of the DIY natural options to use on natural stone.
The tradeoff with every natural method is speed: they generally need longer dwell times and repeated applications compared to oxygen bleach, and none of them will fully reverse grout that’s already gone gray or black. Think of the natural methods in this section as ideal for weekly maintenance cleaning, and the oxygen bleach or steam methods above as the ones to reach for when grout has crossed into “actually stained” territory.
Using a Magic Eraser on Grout (Does It Count as Scrubbing?)
Melamine foam sponges — the generic name behind branded “magic eraser” products — come up constantly in grout cleaning searches, and they deserve an honest answer: technically, using one does involve light physical contact, so it sits in a gray area between a true no-scrub method and traditional scrubbing. But it’s worth including here because the mechanism is completely different from scrubbing with a stiff brush.
Melamine foam works through micro-abrasion at a microscopic level — the foam itself is made of tiny, rigid, glass-like fibers that act almost like extremely fine sandpaper. That means it doesn’t need pressure or repeated back-and-forth strokes the way a grout brush does; a single light pass, almost like wiping, is often enough to remove surface grime. For people who find the dwell-time methods above too slow, or who just want to spot-treat a few dirty patches instead of soaking a whole floor, a damp melamine sponge run once over problem areas is a reasonable middle ground.
There are two real downsides to know about before relying on this method. First, melamine foam is genuinely abrasive at a microscopic level, which means repeated heavy use can dull glossy tile finishes and, over months of frequent use, slightly wear down softer or unsealed grout. Second, it only removes what’s on the very surface — it does nothing for grime that’s already soaked a few millimeters into the pores, which is the majority of what makes grout look gray in the first place. That’s why it works best as a finishing touch after one of the soak-based methods above, not as a replacement for them.
When a Magic Eraser Makes Sense
- Spot-treating a few stubborn marks after a soak
- Quick touch-ups between deeper cleans
- Surface-level soap scum on shower walls
When to Skip It
- Whole-floor cleaning (too slow, too abrasive over time)
- Deeply stained or gray grout (won’t reach embedded dirt)
- Glossy or polished tile finishes (can dull the sheen)
Drill Brushes & Grout Cleaning Machines: Do They Belong in a No-Scrub Routine?
Search around “clean grout without scrubbing” long enough and you’ll run into drill-mounted brush attachments, cordless spin scrubbers, and dedicated grout cleaning machines. It’s a fair question whether these belong on a no-scrub list at all, since they’re technically still brushes. The honest distinction is effort, not mechanism: a drill brush or powered spin scrubber does the physical agitation for you at thousands of rotations per minute, so your knees, wrists, and knuckles are doing essentially nothing even though a brush is technically making contact with the grout.
If your main complaint about scrubbing is the physical toll — sore hands, aching knees, a bad back — rather than a philosophical objection to brushes existing at all, a power tool is often the most realistic long-term fix. A basic drill attachment brush costs very little, works with a cordless drill you likely already own, and can knock out an entire bathroom floor in a few minutes instead of an hour of hand scrubbing. Dedicated cordless grout cleaning machines go a step further, running at a fixed oscillation speed specifically calibrated for grout lines, which reduces the risk of gouging softer grout the way an overly aggressive drill attachment can.
The best results usually come from combining a powered brush with one of the chemical soak methods above rather than using either alone. Apply the oxygen bleach paste, let it dwell the full 15–20 minutes so the chemistry has already done most of the lifting, and then follow with a light, fast pass of a spin brush or drill attachment purely to finish clearing embedded residue out of the grout’s texture. Because the dirt has already been loosened chemically, the powered pass takes seconds per line instead of minutes, and there’s minimal risk of grout wear since you’re not grinding against set-in stains.
| Tool | Effort Level | Best Paired With | Watch Out For |
|---|---|---|---|
| Drill brush attachment | Very low (hand just guides it) | Oxygen bleach soak | Can be too aggressive on soft/old grout |
| Cordless spin scrubber | Very low | Peroxide or commercial spray | Battery life on large floors |
| Dedicated grout cleaning machine | Very low | Any soak method | Higher upfront cost |
| Manual grout brush | High (true scrubbing) | N/A — this is the method being avoided | Knee and hand strain |
How to Whiten Grout That’s Turned Yellow or Dingy
White grout has a specific failure mode that’s slightly different from ordinary dirt buildup: it doesn’t just get gray, it can shift toward a yellowish or beige cast, especially in kitchens near cooking grease or in bathrooms with hard water. That yellowing is usually a combination of mineral deposits from hard water, UV exposure fading the grout’s original color additive, and years of oils working into the porous surface.
Oxygen bleach is still the strongest option here because it’s specifically effective on organic staining rather than mineral buildup, so it’s worth doing the full 15–20 minute soak from Method 1 first. If yellowing persists after that soak and rinse, the more likely culprit is hard-water mineral scale rather than embedded dirt, and that calls for a mildly acidic approach instead — a short-contact vinegar or lemon juice application, limited to a few minutes and immediately rinsed, can dissolve the calcium and lime deposits that oxygen bleach doesn’t touch.
For grout that’s yellowed evenly across an entire floor or shower rather than in isolated dirty patches, the underlying grout color itself may simply be aging rather than dirty, in which case cleaning will only get you back to the grout’s current baseline color, not its original bright white. In that scenario, a grout colorant or grout paint — a specialized epoxy-based product designed to sit on top of existing grout and restore a uniform white or off-white finish — is the more realistic fix, and it’s worth researching separately since it’s a different process from cleaning entirely.
Cleaning Black or Dark-Colored Grout Without Making It Patchy
Dark and black grout is popular specifically because it hides staining better than white grout does, which creates an unexpected problem: when it does need cleaning, an uneven clean is far more visible as blotchy or patchy discoloration than it would be on a light grout line, since any spot that gets cleaned more thoroughly than its neighbors will stand out as a lighter patch.
The fix is consistency rather than a different chemical approach. Whichever no-scrub method you choose, apply it to entire grout lines from wall to wall or edge to edge in one pass, rather than treating a few visibly dirty spots and leaving the rest untouched — spot-treating is the single most common cause of the blotchy look people report with dark grout. It’s also worth testing dwell time on a small, inconspicuous section first, since dark grout dyes can occasionally lighten slightly with strong oxidizers like oxygen bleach if left far longer than the recommended 15–20 minutes.
Steam cleaning tends to be the safest option for dark and black grout specifically, since it relies on heat rather than any oxidizing or dye-affecting chemistry, which removes the risk of uneven lightening entirely. If you do use oxygen bleach on black grout, stick strictly to the recommended dwell time, work section by section so the entire floor gets even treatment, and rinse promptly rather than letting it sit longer “just to be safe.”
Grout Cleaning by Surface: Floors, Shower Walls, and Countertops
The methods above work everywhere, but the practical logistics of applying them shift depending on whether you’re working on a horizontal floor, a vertical shower wall, or a countertop backsplash — and matching the method to the surface makes the whole process faster.
Floors
Floors are the easiest surface for any soak method, since gravity keeps the paste or liquid sitting in the grout line instead of dripping away. Oxygen bleach paste and baking soda both perform well here because there’s no fight against gravity, and a floor squeegee makes the final rinse fast even across a large room.
Shower Walls
Vertical surfaces are trickier because liquid cleaners want to run downward off the grout line before they’ve had time to work. A thicker paste — oxygen bleach mixed slightly stiffer than usual, or a baking soda paste rather than loose powder — clings to vertical grout much better than a thin spray. For hydrogen peroxide specifically, spraying in short, repeated bursts every few minutes during the dwell period helps compensate for gravity pulling the liquid down before it’s had time to work.
Countertops & Backsplashes
Kitchen counters and backsplashes deal with grease rather than soap scum, which oxygen bleach and peroxide both handle well, but the smaller grout lines typical of countertop tile mean pastes are harder to apply precisely. A cotton swab or small applicator brush — used only to place the paste, not to scrub — helps keep the paste contained to narrow lines without wasting it on the tile face. Because countertops are food-adjacent surfaces, always finish with a thorough water rinse and dry, and avoid letting any cleaner sit near food-prep zones during the dwell period.
Sealed vs. Unsealed Grout: Why It Changes Your Cleaning Approach
Whether your grout is currently sealed makes a real difference in how these methods perform, because a sealer’s entire job is to block the porous surface that all of these no-scrub methods rely on penetrating.
On sealed grout, cleaning is generally faster and dwell times can often run toward the shorter end of the ranges given above, since the sealer has been preventing dirt from soaking as deeply into the grout in the first place — most of what you’re removing is sitting closer to the surface. Unsealed or poorly sealed grout, by contrast, tends to need the longer end of every dwell-time range, and staining tends to return faster afterward simply because there’s nothing stopping the next round of soap scum or grease from seeping right back in.
A simple way to check whether your grout is currently sealed: drip a small amount of plain water directly onto a clean, dry section of grout. If the water beads up on the surface for a minute or more before slowly absorbing, the sealer is still doing its job. If the water darkens the grout and soaks in within a few seconds, the seal has worn away and it’s a good candidate for resealing right after your next deep clean — see the sealing section above for how to apply a penetrating sealer once the grout is clean and fully dry.
Removing Grout Haze From New Tile Installation
New tile installations frequently come with a hazy, chalky film across the tile surface a day or two after grouting — this is grout haze, and it’s a different problem entirely from the dirt-and-grime staining the rest of this guide focuses on. Haze is a thin layer of cement residue left behind from the grouting process itself, not embedded organic grime, which is why the oxygen bleach, peroxide, and vinegar methods above generally won’t remove it effectively.
Grout haze typically needs a dedicated acidic haze remover formulated for the specific tile type involved, since natural stone, porcelain, and ceramic each react differently to acid-based haze removers. Because this is a chemically distinct problem from routine grout maintenance, and because using the wrong haze remover on natural stone can cause permanent etching, it’s worth treating haze removal as a separate research topic from ongoing no-scrub grout cleaning rather than assuming this guide’s methods will fix it.
One overlap worth knowing: once haze has been properly removed with an appropriate haze remover and the installation has fully cured (typically several weeks), the routine maintenance methods in this guide — a weekly no-scrub spray or an occasional oxygen bleach soak — are exactly what keeps freshly installed grout from developing the deeper staining this guide is designed to fix.
Outdoor Patio & Pool Deck Grout Without Scrubbing
Outdoor tile grout deals with a different combination of grime than indoor grout: dirt tracked in from bare feet, algae and moss in shaded or consistently damp areas, mineral deposits from sprinklers or pool splash-out, and UV fading that indoor grout never experiences. That combination generally means outdoor grout needs a slightly more aggressive version of the same no-scrub principles used indoors.
Oxygen bleach remains effective outdoors and is actually a reasonable choice for algae and moss specifically, since the same oxidizing action that lifts organic stains indoors also kills and lifts algae growth outdoors. For heavily shaded, consistently damp outdoor grout — the kind that develops a greenish cast — extend the dwell time toward 30 minutes rather than the 15–20 minutes used indoors, since outdoor staining tends to be more deeply set from constant weather exposure.
A garden hose on a strong jet setting is usually all that’s needed for the rinse step outdoors, and it does a more thorough job than a mop or towel would across a large patio or pool deck area. For pool deck grout specifically, be mindful that chlorine from pool splash-out is already a bleaching agent the grout is regularly exposed to, so oxygen bleach treatments can typically be spaced further apart — every few months rather than monthly — without staining building back up as quickly as it would on, say, a shaded north-facing patio.
Professional Grout Cleaning Cost vs. DIY
For anyone weighing whether to hire this out instead of doing it themselves, professional grout cleaning services typically charge either a flat per-room or per-square-foot rate, and pricing varies significantly by region and by whether the service includes sealing afterward. As a general reference point, professional cleaning tends to run noticeably more than a DIY oxygen bleach soak, which usually costs only the price of the powder — often just a few dollars’ worth per cleaning session once you own the container.
Where professional service earns its cost is in equipment and experience: professional-grade steam units and rotary extraction machines generate higher heat and pressure than consumer steam cleaners, which can pull out staining that’s resisted every DIY method. Professionals are also better equipped to judge whether staining is actually mold growing beneath the grout surface — a situation covered in the “When to Call a Professional” section above — versus staining that will respond to a deeper DIY treatment.
A reasonable rule of thumb: if grout in a single room or shower is stained but structurally sound, a DIY oxygen bleach soak followed by sealing is almost always worth trying first, since it costs very little and often gets excellent results. Professional service becomes the more sensible choice for whole-house grout that’s been neglected for years, for grout showing signs of mold or crumbling, or simply for anyone who values the time savings more than the cost difference.
Grout Cleaning Myths, Debunked
A handful of grout cleaning “hacks” circulate widely online, and it’s worth addressing them directly since a few are actively counterproductive.
Myth: Hairspray removes grout stains
This one circulates because old hairspray formulas contained alcohol that could cut through certain residues, but modern hairspray formulations vary widely, some contain oils and resins that can actually add to buildup rather than remove it, and none of them address the deeper embedded staining this guide focuses on. It’s not a reliable method.
Myth: A bleach pen is the same as an oxygen bleach soak
Bleach pens use chlorine bleach in gel form, which behaves differently from the oxygen bleach powder used throughout this guide. Chlorine bleach pens can work for very localized touch-up spots, but because they use chlorine rather than oxygen-based bleaching, they carry more risk of discoloring colored grout and tend to degrade grout sealant faster with repeated use.
Myth: More vinegar means faster results
Vinegar’s cleaning action comes from a fairly mild acid concentration, and using it more concentrated or leaving it on longer than recommended doesn’t meaningfully speed up results — it mostly just increases the risk of the acid affecting grout color or etching any nearby natural stone.
Myth: Scrubbing harder always gets better results
This is really the myth this entire guide is built around debunking: because most grout discoloration is embedded rather than sitting purely on the surface, physical friction alone often just polishes the top layer while leaving the deeper staining untouched — which is exactly why dwell-time-based chemical methods consistently outperform scrubbing on genuinely stained grout.
Grout Care in Humid Climates & Hard Water Areas
Where you live changes how often grout needs attention and which staining pattern you’re most likely to be fighting. In consistently humid climates, mildew and mold are the dominant threat, since grout in a bathroom that never fully dries out between uses provides exactly the damp, dark conditions mildew needs to establish itself. In those climates, running a bathroom fan or dehumidifier consistently matters as much as any cleaning method, and it’s worth leaning toward the more frequent end of the cleaning schedule mentioned in the prevention section above.
Hard water areas face a different pattern: mineral deposits from calcium and magnesium in the water supply build up as a chalky white or grayish film, particularly around faucets, shower heads, and any grout that regularly sits under dripping or splashing water. Because mineral buildup isn’t organic staining, oxygen bleach and peroxide are less effective against it than they are against soap scum or mildew — a mild acid rinse, like the short-contact vinegar approach described in the natural cleaning section above, is generally more effective specifically for mineral deposits. Installing a water softener, where practical, reduces how often this type of buildup recurs in the first place.
If you’re not sure which situation applies, a quick visual check helps: mildew staining tends to show up as dark gray, black, or greenish spots concentrated in low-airflow corners, while hard water buildup tends to appear as a more uniform white or gray haze concentrated wherever water regularly drips or pools.
A Long-Term Grout Maintenance Schedule
Pulling everything in this guide together into an actual schedule makes the no-scrub approach sustainable rather than something you only think about once grout has already gone gray. A reasonable cadence for most households looks roughly like this:
| Frequency | Task |
|---|---|
| After every shower | Quick squeegee pass on walls and floor |
| Weekly | No-scrub commercial spray or peroxide spray on shower grout |
| Monthly | Baking soda + vinegar pass on kitchen and high-traffic floor grout |
| Every 1–3 months | Full oxygen bleach soak on shower grout |
| Every 2–4 months | Full oxygen bleach soak on floor grout |
| Every 6–12 months | Reseal grout after a deep clean, once fully dry |
Households in humid climates or hard water areas should lean toward the more frequent end of each range, while households with sealed grout, good bathroom ventilation, and lower water hardness can often stretch toward the longer end without staining creeping back.
More Frequently Asked Questions
Technically the bristles do make contact with the grout, but because the drill does all the physical work, most people find it doesn’t carry the knee and hand strain that manual scrubbing does — it’s a reasonable option if effort, not brush contact itself, is the concern.
Not for genuinely stained or gray grout — castile soap is better suited to light, regular maintenance cleaning rather than lifting embedded staining.
This usually means that spot was treated more thoroughly or for longer than the surrounding grout. Working section by section with even dwell times, as described in the dark grout section above, helps avoid this.
Light and white grout tolerate oxygen bleach and peroxide well; darker and black grout is generally safest with steam or carefully time-limited oxygen bleach to avoid uneven lightening.
Drip water on a clean, dry section — if it beads up for a minute or more, it’s still sealed; if it darkens and absorbs within seconds, it’s time to reseal.
For a single room with grout that isn’t structurally damaged, a DIY oxygen bleach soak followed by sealing is usually worth trying first before paying for a professional visit.
Frequently Asked Questions
No — oxygen bleach is generally safe on colored grout since it lifts dirt rather than stripping dye, but it’s still smart to test an inconspicuous spot first.
You can, but chlorine bleach is harsher, can discolor colored grout, and produces stronger fumes. Oxygen bleach gives similar lifting power with far less risk.
Every 1–3 months for showers, and roughly every 2–4 months for floors, depending on foot traffic and humidity levels.
It’s safe for sealed, sound grout, but avoid it on grout that’s already cracked or crumbling, since the pressure and heat can worsen existing damage.
Usually it means the grout isn’t sealed, or that trapped moisture is feeding mildew growth beneath the surface — pairing a clean with a sealer step usually solves this.
Don’t combine vinegar and hydrogen peroxide at the same time — the reaction can form peracetic acid, which is irritating. Use one method per session.
Yes, though outdoor grout often needs a slightly longer dwell time due to heavier dirt and UV exposure, and a hose rinse works well as the final step.
Check the label, but most foaming no-scrub sprays are designed to be wiped or rinsed after their dwell time to avoid leaving residue.
Grout haze is different from dirt buildup and usually needs a dedicated haze remover rather than these cleaning methods, since haze is a cement film rather than embedded grime.
Be cautious — vinegar and other acidic cleaners can etch natural stone like marble or travertine. Stick to oxygen bleach or steam on stone, and avoid vinegar-based methods entirely.
Conclusion
Cleaning grout without scrubbing comes down to picking the right lifting method — oxygen bleach for deep stains, steam for a chemical-free routine, or a quick peroxide spray for regular upkeep — and giving it enough time to actually work before you rinse. Do that consistently, seal the grout once it’s clean, and you’ll spend a lot less time on your knees going forward.

Check Price on Amazon