The Ultimate Guide: Crafting Your Own Luxury Bath Salts
Everything you need to know to formulate, mix, and store therapeutic soaks.
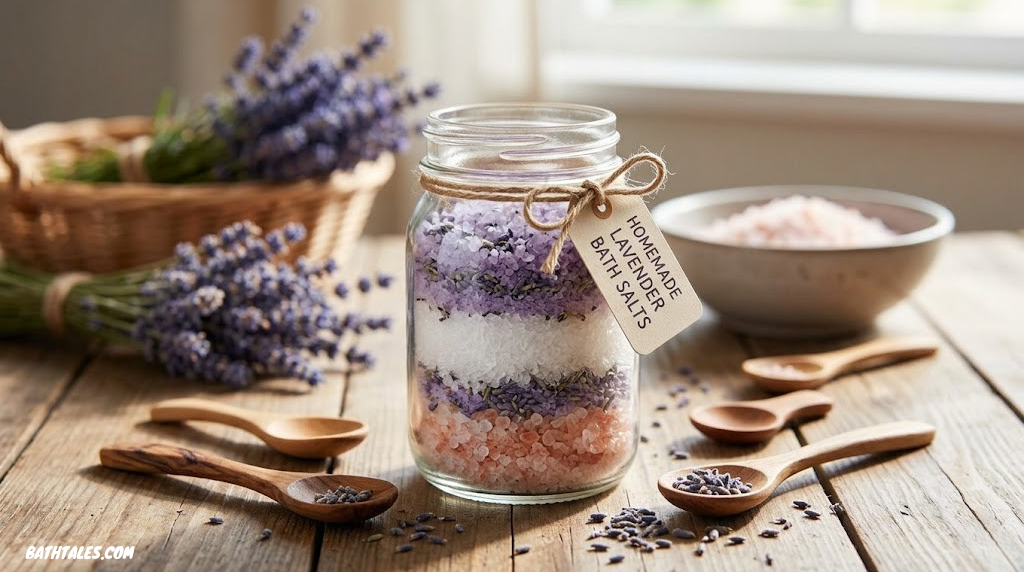
Creating your own bath blends is more than just a creative hobby; it is a therapeutic ritual that allows you to control exactly what touches your skin. Commercial bath products often contain synthetic fragrances, artificial dyes, and anti-caking agents that can irritate sensitive skin. Learning how to make bath salts at home empowers you to formulate deeply restorative, 100% natural soaking blends tailored to your exact physical and mental needs.
Whether you are seeking relief from sore muscles, trying to clear nasal congestion, or simply looking to unwind after a high-stress day, the power lies in your ingredients. In this comprehensive guide, we will break down the science of different minerals, explore the therapeutic benefits of various essential oils, and provide you with foolproof, step-by-step methods to craft artisanal-quality bath salts right in your own kitchen.
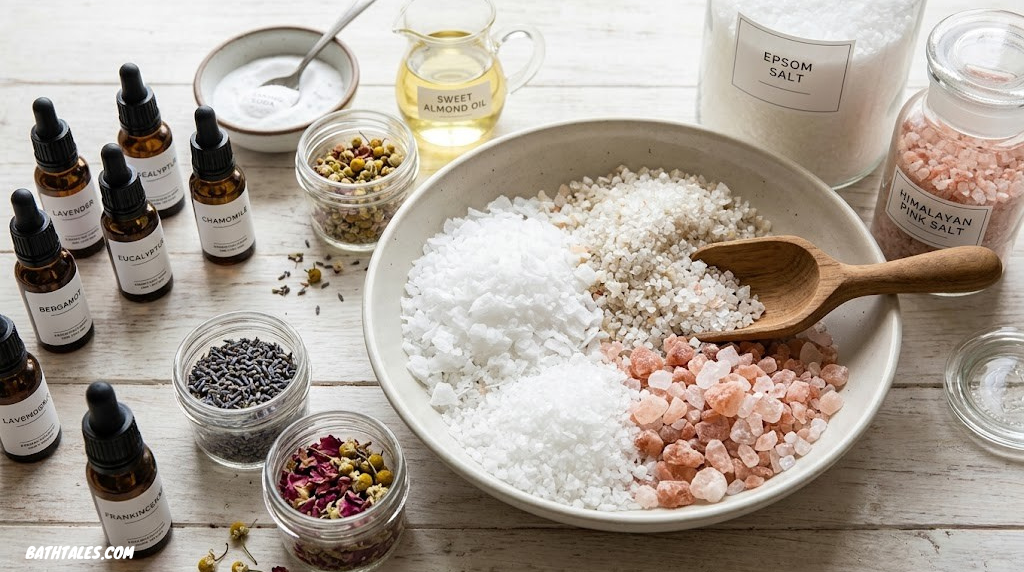
2. Understanding Bath Salts: More Than Just Minerals
Before diving into the mixing process, it is vital to understand what bath salts actually are. At their core, bath salts are pulverized minerals that are water-soluble. When dissolved in warm water, these minerals—primarily magnesium, sulfate, calcium, and potassium—can be absorbed topically through the skin in a process known as transdermal absorption. This is why knowing which salts to use for every type of soak is crucial to your formulation’s success.
Different salts serve entirely different purposes. Some are purely for physical recovery, pulling toxins from the body and reducing inflammation, while others are geared toward skin hydration and soothing dermatological conditions. Building a recipe blindly will still result in a nice bath, but formulating with intention allows you to create spa-level treatments.

Organize Your DIY Ingredients
Store your homemade creations safely and elegantly. These airtight glass jars preserve the potency of essential oils and keep moisture out.
Check Price on Amazon3. Choosing Your Core Ingredients (The Base Salts)
The foundation of any good bath formulation is the mineral base. You don’t have to stick to just one; blending them often yields the most dynamic results. Here are the titans of the bath salt world:
Epsom Salt (Magnesium Sulfate)
Technically not a salt but a naturally occurring pure mineral compound of magnesium and sulfate, Epsom salt is the gold standard for muscle recovery. It flushes toxins, forms proteins in brain tissue, and helps soothe muscle pain. For those looking for relief post-workout, formulating the best bath salts for muscle soreness almost always begins with a heavy Epsom base.
Dead Sea Salt
Harvested directly from the Dead Sea, this salt boasts a unique mineral profile containing 21 different minerals, including magnesium, calcium, sulfur, bromide, iodine, sodium, zinc, and potassium. It is intensely hydrating and purifying. If you’re curious about the specific chemical differences, you can dive deeper into the debate of Dead Sea salt vs Epsom salt. Dead Sea salt is particularly incredible for treating psoriasis and eczema.
Himalayan Pink Salt
Mined from ancient sea beds in the Himalayan mountains, this beautiful pink salt is rich in 84 trace minerals. Beyond its aesthetic appeal, it is highly detoxifying. Formulating the best Himalayan pink bath salt blend can help balance your body’s pH levels and improve sleep quality.
Magnesium Flakes (Magnesium Chloride)
While similar to Epsom salt in its goal (delivering magnesium), magnesium flakes are a different compound. Magnesium chloride is generally absorbed more efficiently by the body than magnesium sulfate. For serious mineral deficiencies, understanding the nuances of magnesium flakes vs Epsom salt will elevate your formulations.
| Base Material | Primary Composition | Best For… | Solubility |
|---|---|---|---|
| Epsom Salt | Magnesium Sulfate | Muscle aches, mild detoxification, general relaxation | Very High |
| Dead Sea Salt | Magnesium, Calcium, Potassium, Bromides | Skin conditions (eczema, psoriasis), deep hydration | High |
| Himalayan Salt | Sodium Chloride + 84 Trace Minerals | Detoxification, pH balance, aesthetic appeal | Medium (depends on grain size) |
| Magnesium Flakes | Magnesium Chloride | Severe muscle tension, rapid transdermal absorption | Very High |

Pure Epsoak Epsom Salt (19 lbs)
The perfect, unscented canvas for all your DIY bath salt recipes. 100% pure magnesium sulfate that dissolves instantly.
Check Price on Amazon4. Essential Oils & Aromatherapy Integration
Aromatherapy turns a simple hot bath into a transformative experience. However, oil and water do not mix. If you drop raw essential oils directly into bathwater, they will pool on the surface and can cause severe skin burns. The salt acts as a carrier, absorbing the oil and helping it disperse safely into the water.
When selecting the best essential oils for bath salts, consider your end goal:
- For Relaxation & Sleep: Lavender, Chamomile, Ylang Ylang, Bergamot. (Perfect for formulating the best bath salts for relaxation and sleep).
- For Respiratory Relief: Eucalyptus, Peppermint, Tea Tree, Rosemary. (Ideal when creating the best bath salts for cold and flu).
- For Grounding/Anxiety: Frankincense, Sandalwood, Patchouli, Vetiver.
- For Energy/Uplifting: Sweet Orange, Grapefruit, Lemon, Lemongrass.
Pros of Essential Oils
- 100% natural fragrance profiles.
- Actual therapeutic properties (e.g., antibacterial, calming).
- Highly concentrated, so a little goes a long way.
Cons & Precautions
- Can cause skin sensitization if improperly diluted.
- Some oils (citrus) can cause photosensitivity.
- Must be stored in dark glass to prevent degradation.
5. Elevating the Blend: Botanicals, Clays, and Carrier Oils
To take your formulation from “homemade” to “luxury boutique,” you need modifiers. These additions change the texture, visual appeal, and skin-conditioning properties of your salts.
Carrier Oils
If you are making the best bath salts for dry skin, adding a moisturizing carrier oil is essential. Jojoba oil, sweet almond oil, fractionated coconut oil, or even olive oil can be blended into the salts before packaging. The salts will absorb the oil, delivering intense hydration when dissolved in the tub.
Botanicals
Dried flowers make bath salts visually stunning. Rose petals, lavender buds, calendula petals, and chamomile flowers are popular choices. Tip: If you don’t want to clean flower petals out of your tub drain, package your finished bath salts in small muslin tea bags before dropping them in the water.
Clays and Powders
Bentonite clay, French green clay, or Kaolin clay can be added for extra purification, making them an excellent component for the best detox bath salts. Milk powders (like goat’s milk or coconut milk powder) can be added for lactic acid exfoliation and intense skin softening.

Organic Dried Botanical Kit
Elevate your visual presentation with these culinary-grade dried rose petals, lavender, and calendula. Perfect for bath soaks.
Check Price on Amazon6. Equipment You’ll Need
You don’t need a professional laboratory to craft excellent bath products, but having dedicated tools ensures your products remain sanitary and pure.
- Large Glass or Stainless Steel Mixing Bowls: Avoid plastic, as essential oils can degrade certain plastics and leach chemicals.
- Metal Whisks or Wooden Spoons: For thorough, even distribution of wet ingredients.
- Measuring Cups and Spoons: Accuracy is key, especially with essential oils.
- A Baking Sheet: Crucial for the drying process (detailed in the steps below).
- Airtight Storage Containers: Mason jars or glass apothecary jars with rubber seals are best.
7. Step-by-Step Instructions: The Master Method
This master method applies to almost any recipe you choose to formulate. Follow these precise steps to ensure proper essential oil dilution, prevent clumping, and maximize shelf life.
Step 1: Measure and Combine the Base Salts
In your large glass or stainless steel bowl, measure out your base salts. A standard ratio is 2 parts Epsom salt to 1 part Dead Sea or Himalayan salt. For example, 2 cups of Epsom and 1 cup of pink salt. Add in any baking soda if you are using it (baking soda helps soften the water and fizz slightly).
Step 2: Premix the Oils
Never drop essential oils directly onto dry salt. Instead, in a small, separate dish, mix your chosen essential oils with your carrier oil (like jojoba or sweet almond). This ensures the highly concentrated essential oils are properly diluted and will coat the salt grains evenly. For every 3 cups of salt, use 1-2 tablespoons of carrier oil and about 15-20 drops of essential oil.
Step 3: Combine and Whisk Vigorously
Slowly drizzle your oil blend over the dry salt mixture. Immediately take a metal whisk or strong wooden spoon and mix vigorously. You want to ensure every single grain of salt is lightly coated with the oil mixture. Break apart any clumps that form. The mixture should look slightly damp but not saturated.
Step 4: Fold in Dry Botanicals and Colors
If you are adding mica powder for natural coloring, clays, or dried botanicals, this is the time to fold them in. Do not use the whisk for this step if you are adding delicate flowers, as it will crush them. Use a spoon to gently fold the ingredients together until evenly distributed.
Step 5: Spread and Air Dry
This is the secret step that many amateurs skip. Because you have introduced liquids (carrier oils and essential oils) to dry salt, the mixture will sweat and potentially clump together into a solid brick inside your storage jar if sealed immediately. Spread the damp salt mixture evenly across a large baking sheet lined with parchment paper. Let it sit in a cool, dry room for 12 to 24 hours to cure and dry out.
Step 6: Packaging and Storage
Once the mixture is completely dry to the touch and no longer clumps when squeezed in your hand, transfer it to your glass jars. Secure with a tight-fitting lid. If you live in a humid climate, consider placing a small silica gel packet inside the jar lid to absorb excess ambient moisture.

Food-Safe Silica Gel Packets
Prevent your beautiful bath salts from turning into a solid block! Tape one of these under the lid of your jars to keep moisture out.
Check Price on Amazon8. Targeted Formulations (Printable Recipes)
Now that you have mastered the fundamental mixing technique, it is time to experiment with targeted formulations. Below are three expertly crafted recipes designed for specific needs.
The Muscle Recovery Soak
Ideal for post-gym soreness or physical labor. If you want to know more about recovery, read our guide on best bath salts for athletes.
- 2 Cups pure Epsom Salt
- 1 Cup Magnesium Flakes
- 2 Tbsp Sweet Almond Oil (Carrier)
- 10 drops Eucalyptus Essential Oil
- 10 drops Peppermint Essential Oil
- 5 drops Rosemary Essential Oil
The Deep Sleep & Relaxation Blend
Formulated to down-regulate the nervous system before bed.
- 2 Cups Epsom Salt
- 1 Cup Pink Himalayan Salt (Fine grain)
- 2 Tbsp Jojoba Oil (Carrier)
- 15 drops Lavender Essential Oil
- 5 drops Roman Chamomile Essential Oil
- 1/4 Cup Dried Lavender Buds
The Eczema & Dry Skin Soother
A deeply hydrating and skin-repairing blend. For severe flare-ups, consult our deep dive on the best bath salts for eczema.
- 1.5 Cups Dead Sea Salt
- 1.5 Cups Epsom Salt
- 1/2 Cup Colloidal Oatmeal
- 3 Tbsp Fractionated Coconut Oil
- 10 drops Frankincense Essential Oil
- 5 drops Helichrysum Essential Oil
9. Proper Usage: How to Get the Most Out of Your Soak
Making the product is only half the battle; using it correctly dictates its efficacy.
Water Temperature
Your bathwater should be warm, not scalding hot. Water that is too hot will cause your body to sweat rapidly, making it difficult for your skin to absorb the transdermal minerals. A temperature between 98°F and 102°F (36°C – 39°C) is ideal.
Dosage
A common mistake is using too little salt. For a standard size bathtub, you should use at least 1 to 2 full cups of your homemade bath salt blend. For oversized soaking tubs, double the amount. Read our full guide on how much bath salt to use for exact volumetric measurements based on tub size.
Duration
To fully benefit from the magnesium absorption and muscle relaxation, you need to soak for a minimum of 20 minutes. The first 10 minutes allow your pores to open and toxins to be drawn out; the second 10 minutes allow your body to absorb the minerals. Check out our detailed article on how long to soak in bath salts for more timing protocols.
10. Storage & Shelf Life
A frequently asked question is, “Do bath salts expire?” The salts themselves (Epsom, Dead Sea, Himalayan) are minerals and technically do not expire. However, the organic ingredients you add—like carrier oils, essential oils, and botanicals—do have a shelf life.
Generally, homemade bath salts stored in an airtight glass container in a cool, dark place will retain their potency for 6 to 12 months. If you notice the carrier oil smelling rancid or the essential oil scent completely fading, it is time to make a fresh batch.
11. Safety & Precautions
While bath salts are wonderfully therapeutic, they are not suitable for every single scenario.
- Pregnancy: Not all essential oils are safe during pregnancy, and extremely hot baths should be avoided. Stick to pure Epsom salt and consult a doctor, or read about the best bath salts for pregnancy for safe formulation ideas.
- Sensitive Skin: If you are prone to dermatitis, perform a patch test with your essential oil blend before submerging your whole body. For gentle options, explore the best bath salts for sensitive skin.
- Open Wounds: Do not soak in salt baths if you have large open wounds, fresh tattoos, or severe burns, as the salt will cause intense stinging.
For those prioritizing completely non-toxic lifestyles, ensuring your ingredients are certified organic is vital. Learn more about sourcing the best organic bath salts.
12. Conclusion
Learning how to make bath salts at home is an incredibly rewarding process. By controlling the ingredients, you eliminate harmful synthetic chemicals and create targeted, therapeutic blends that rival high-end spa treatments. Whether you are mixing a batch for personal recovery, looking for the perfect DIY holiday gift, or exploring the differences between magnesium compounds, the perfect soak is literally in your hands.
Start with our Master Method, experiment with the core recipes provided, and soon you’ll be formulating signature blends that perfectly suit your body’s needs. Ready to upgrade your self-care routine? Grab your mixing bowls, select your essential oils, and start crafting!
13. Frequently Asked Questions
Below are some of the most common questions regarding DIY bath salt formulations.
Do I have to use a carrier oil when adding essential oils to bath salts?
Yes. Essential oils are not water-soluble. Without a carrier oil to properly dilute them and help them disperse, pure essential oil drops can float on top of the bathwater and cause chemical burns or severe skin irritation.
Why are my homemade bath salts clumping into a hard block?
This happens when moisture is trapped in the jar. It could be from failing to air-dry the salts on a baking sheet (Step 5) after adding liquid oils, or from storing the jar in a highly humid bathroom without an airtight seal.
Can I use regular table salt instead of Epsom salt?
No. Table salt is heavily processed, stripped of trace minerals, and often contains anti-caking agents. It does not provide the transdermal magnesium benefits of Epsom or Dead Sea salt and will dry out your skin.
How much of my homemade blend should I use per bath?
For a standard-sized bathtub, you should use 1 to 2 cups of your homemade bath salts. If you have a larger garden or soaking tub, you may need 3 to 4 cups to reach the proper therapeutic concentration.
Are homemade bath salts safe for kids?
Plain Epsom salt is generally safe for kids, but you must be extremely cautious with essential oils. Many essential oils are not safe for children under a certain age. Always consult a pediatrician and use highly diluted, kid-safe oils like gentle lavender if approved.
How long should I soak in the bath?
To fully reap the benefits of the magnesium and allow your muscles to relax, it is recommended to soak for at least 20 to 30 minutes. Ensure the water is warm, not scalding hot, to prevent dehydration.
Can I add food coloring to make my bath salts pretty?
While you can use liquid food coloring, it adds excess moisture (causing clumping) and can sometimes stain the tub or skin. A better alternative is using natural colorants like cosmetic-grade mica powder or finely ground clays.
Can I use fresh flower petals in my mixture?
It is highly recommended to use ONLY completely dried flowers and botanicals. Fresh petals contain water, which will introduce mold and bacteria into your bath salt mixture, ruining the entire batch in a matter of days.