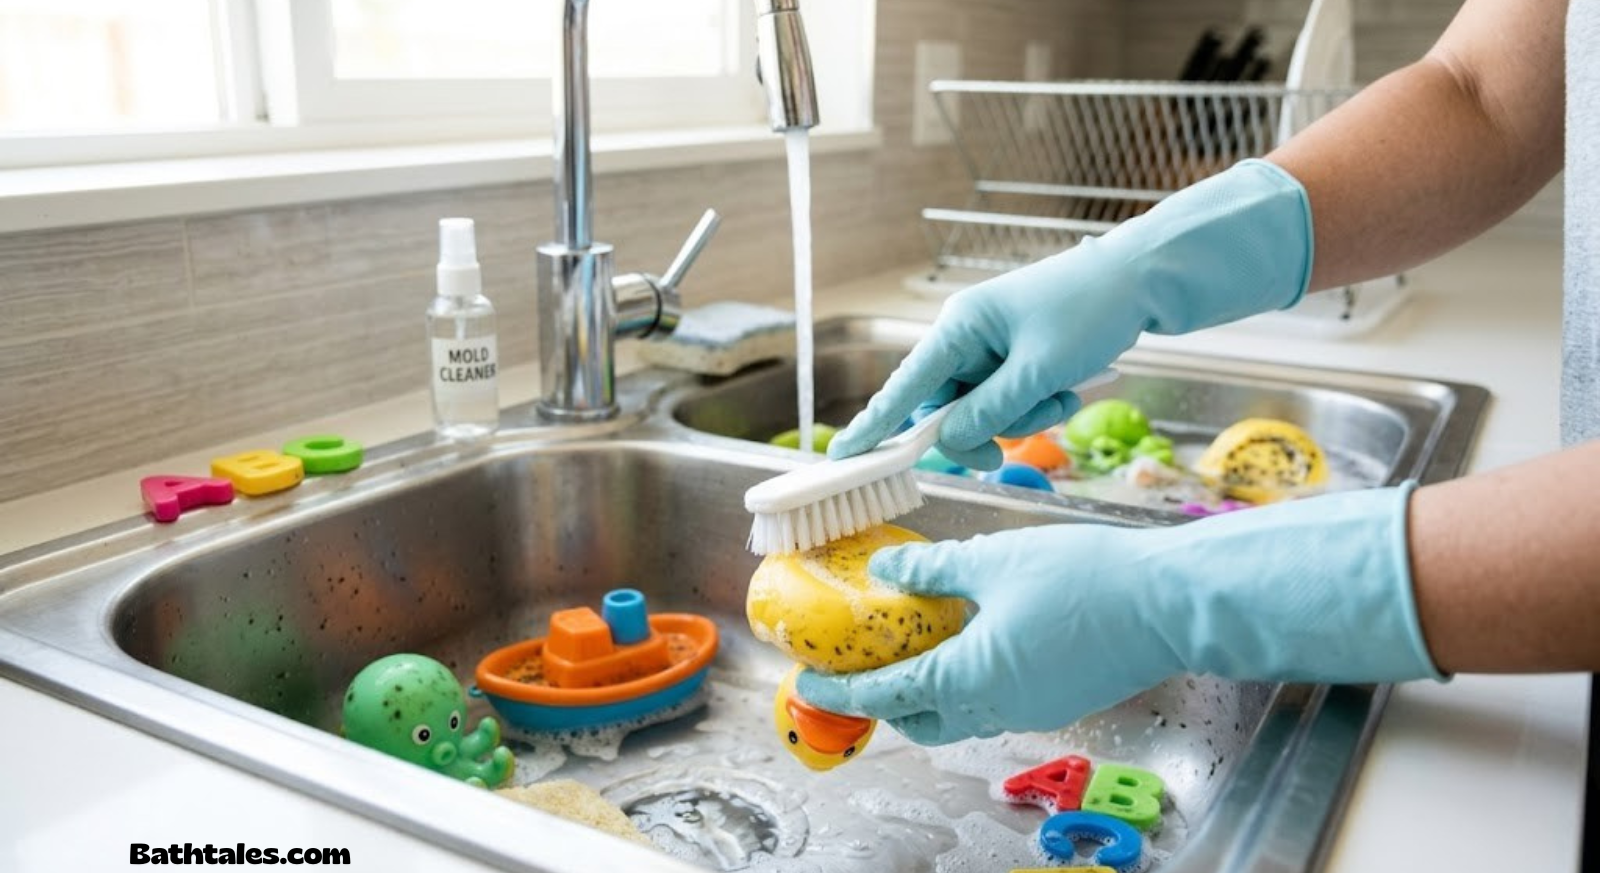
How to Clean Mold From Bath Toys: The Complete Step-by-Step Guide
That black gunk hiding inside your child’s rubber duck isn’t just gross — it’s mold. Here’s exactly how to get rid of it, keep it from coming back, and know when it’s finally time to toss the toy for good.
If you’ve ever squeezed your toddler’s favorite rubber duck at bath time and watched a thread of black or greenish water dribble out, you already know the horror. Bath toys — especially the hollow, squeezable kind — are basically tiny mold incubators. They sit in warm, wet environments for years, get squished full of soapy bathwater, and rarely dry out completely between uses. It’s the perfect recipe for mold and mildew to move in and set up permanent residence inside a toy your child puts directly in their mouth.
The good news is that cleaning mold out of bath toys isn’t complicated, and in most cases you don’t need anything you don’t already have in your kitchen cabinet. This guide walks through exactly why mold grows in bath toys in the first place, how to tell if your toys are affected, and three different cleaning methods — from the gentlest to the most aggressive — so you can pick the one that matches how bad the buildup is. We’ll also cover the trickiest toys of all (the ones with tiny squeak holes), how to stop mold from coming back, and when it’s simply time to let a toy go.
This is a problem practically every parent runs into eventually, and it usually catches people off guard the same way: the toy looks perfectly fine from the outside, kids are happily playing with it every night, and then one day someone gives it a firm squeeze over the sink and out comes a trickle of dark, foul-smelling water. It’s an unsettling moment, but it’s also incredibly common — bath toys are, by design, some of the hardest household items to keep truly clean, precisely because their whole appeal (squirting water, floating, squeaking) depends on features that also trap moisture.
What makes this guide different from a quick “just use vinegar” tip is that it walks through the full picture: the actual biology of why this happens, how to accurately assess how bad a particular toy’s mold problem is, three distinct cleaning approaches matched to different severity levels, specific techniques for the notoriously difficult squeeze toys, and — just as importantly — the storage and drying habits that determine whether your hard work actually sticks or whether you’ll be back here again in two weeks. By the end, you’ll have a complete, repeatable system rather than a one-time fix.
Feel free to jump straight to whichever section is most useful right now using the menu on this page — if you already know you’re dealing with heavy mold, skip ahead to the bleach method; if you’re just trying to build a better long-term habit, the prevention and storage sections toward the end will be the most relevant.
Why Bath Toys Grow Mold So Easily
Mold is a fungus, and like every living organism, it needs three basic things to survive: moisture, warmth, and a food source. A bathtub toy checks every single box. Bath water is warm. Bathrooms are humid. And the soap scum, skin cells, and standing water trapped inside a toy’s cavity provide plenty of organic material for mold spores to feed on.
The real culprit, though, is the design of most bath toys. Squeeze toys — rubber ducks, squirting animals, foam boats — almost always have at least one small hole so they can take in water and squirt it back out. That hole is fantastic for bath-time fun and absolutely terrible for hygiene. Every time your child squeezes the toy underwater, bathwater (along with soap, body oils, and whatever else is floating around) gets sucked into the hollow interior. When the toy dries on the outside, the inside often stays damp for days, sometimes never fully drying at all.
That trapped moisture, combined with the dark, enclosed environment inside the toy, is essentially a greenhouse for mold spores that are already floating around in every bathroom. Within a week or two of regular use, a toy that looked spotless on the outside can be growing a thriving colony of mold on the inside walls of its cavity.
Toy material matters too. Solid, non-porous plastic toys (like stacking cups or hard plastic boats) resist mold fairly well because there’s nowhere for water to get trapped. Soft rubber and vinyl squeeze toys, silicone toys with seams, and foam toys are the biggest offenders because they either trap water internally or absorb it into a porous surface.
The Role of Bathroom Humidity
It’s not just the toy itself — the room it lives in matters enormously. Bathrooms are, by a wide margin, the most humid rooms in most homes, especially if they don’t have a working exhaust fan or a window that gets opened regularly. Every hot bath or shower pumps a huge amount of water vapor into the air, and that moisture settles onto every surface in the room, including toy bins, shower caddies, and any toy sitting out to “dry.” If the ambient humidity in the bathroom stays elevated for hours after bath time, toys simply don’t get the chance to dry out fully before the next use, and the cycle of dampness never really breaks.
Why Soap Residue Makes Things Worse
Soap, shampoo, and bubble bath aren’t just rinsed away completely — a thin film of residue clings to surfaces, including the inside of a squeeze toy’s cavity. That residue is organic material, and organic material is food for mold. This is part of why toys that are used with bubble baths or heavily scented products often develop mold faster than toys used in plain water: there’s simply more for the mold to feed on.
How Fast Can a Colony Actually Establish Itself?
Mold spores are opportunistic. Under warm, damp, low-light conditions — exactly what’s inside a closed toy cavity — a visible colony can begin forming within as little as three to five days, and become a noticeable, smelly problem within two weeks. This is faster than most parents expect, which is exactly why a toy that seemed fine at the start of the month can be genuinely gross by the end of it if it hasn’t been dried and stored properly in between.

Tired of fighting mold? Consider switching to open, hole-free bath toys designed specifically to resist mold buildup.
Shop Mold-Resistant Bath Toys →Signs Your Bath Toys Have Mold
Mold doesn’t always announce itself clearly, especially when it’s growing inside a toy’s cavity where you can’t see it. Here are the most common signs that it’s time for a deep clean:
- Black or dark specks near the squirt hole. This is the most obvious giveaway. If you look closely at the opening of a squeeze toy and see dark flecks or a ring of discoloration, mold has almost certainly taken hold inside.
- Discolored water when squeezed. Squeeze the toy gently over a white sink or cloth. If the water that comes out looks murky, gray, black, or has a greenish tint, that’s mold and mildew being flushed out.
- A musty or sour smell. Even before you see anything, a damp, musty odor coming from the toy bin is a strong indicator that mold or mildew is present somewhere in your toy collection.
- Slimy texture on the surface. A slippery, slimy film on the outside of a toy — particularly foam toys — is usually mildew rather than mold, but it signals the same underlying moisture problem.
- Visible fuzzy or spotted growth. On foam bath toys, mold can actually grow on the surface, not just inside, appearing as fuzzy black, green, or pink patches.
If your child has bath toys they’ve had for more than a few months, it’s worth doing this quick “squeeze test” on a regular basis, even if nothing looks obviously wrong on the outside.
Where Mold Likes to Hide
Mold doesn’t distribute itself evenly through a toy — it tends to concentrate in specific spots, and knowing where to look speeds up your inspection considerably.
- The squirt hole itself. Because water enters and exits here repeatedly, the rim and just inside the opening is almost always the first place visible growth appears.
- Seams and joins. Many toys are made from two molded halves glued or welded together; the seam line is a common spot for water to seep in and get trapped, especially as the toy ages and the seal weakens.
- The bottom of the interior cavity. Gravity pulls trapped water to the lowest point inside a hollow toy, and that’s usually where the heaviest buildup forms, even if the opening itself still looks fairly clean.
- Underneath textured surfaces. Toys with molded texture, fur-like detailing, or fabric elements provide extra surface area and tiny crevices for mold to establish itself, and these spots are easy to overlook during a quick visual check.
The Five-Second Sniff Test
Smell is often a more reliable early indicator than sight, since mold can be growing inside a cavity for a week or more before it becomes visible at the opening. Bring a toy close and take a quick sniff directly at the hole. A clean toy should smell like, well, nothing much — maybe faintly of rubber or plastic. Any sour, musty, “wet basement” smell is a clear signal that mold or mildew is already present, even if you can’t see it yet.
Is Mold in Bath Toys Actually Dangerous?
For most healthy children, brief exposure to the common molds found in bath toys is not usually a medical emergency, but that doesn’t mean it should be ignored. Regular exposure to mold and the bacteria that often grows alongside it has been associated with skin irritation, minor rashes, and, in children who are prone to allergies or asthma, respiratory symptoms like coughing or wheezing.
There’s also the less obvious risk: bath toys with squirt holes don’t just harbor mold, they harbor bacteria too, including strains that can cause stomach upset if swallowed. Since babies and toddlers routinely put bath toys directly into their mouths, a moldy, bacteria-laden toy is a real hygiene concern, not just a cosmetic one.
The bottom line: it’s not usually cause for panic, but it is a good reason to build mold prevention and regular cleaning into your bath-time routine, the same way you’d wash a sippy cup or pacifier.
What the Research Generally Says
Public health guidance on household mold consistently points to the same conclusion: the risk from mold exposure depends heavily on the amount, the duration, and the individual’s sensitivity. A single bath with a slightly moldy toy is very different from months of repeated exposure to a heavily contaminated toy that’s never properly cleaned. Pediatric and allergy organizations generally recommend treating visible mold on children’s items as something to clean up promptly rather than something to worry about retroactively — the goal is prevention and routine maintenance, not alarm.
Bacteria Is Often the Bigger Concern
It’s worth separating two related but distinct issues: mold, and the bacteria that frequently grows alongside it in the same damp environment. Independent testing of used bath toys by consumer and health researchers has repeatedly found a wide range of bacteria living inside squeeze-toy cavities, some of which can cause mild gastrointestinal upset if ingested in enough quantity. This is one more reason the cleaning methods in this guide — particularly the bleach method — matter: they’re addressing both mold and the broader microbial load building up inside these toys, not mold alone.
Special Considerations for Younger Babies
Infants and very young toddlers are more likely to mouth toys directly and for longer periods, and their immune systems are still developing. If your household includes a baby under one, it’s worth being proactive rather than reactive: clean squeeze toys weekly as a default, and lean toward hole-free toy designs for this age group specifically. Our guide to bath toys for 1-year-olds highlights several options built with this exact concern in mind.
What You’ll Need Before You Start Cleaning
One of the best things about cleaning mold from bath toys is that you probably already have everything you need. Here’s a simple supply list covering all three methods in this guide:
- White distilled vinegar
- Baking soda
- Household bleach (optional, for the stronger method)
- A large bowl, basin, or bucket
- A clean turkey baster, ear syringe, or large plastic syringe (essential for toys with small holes)
- A soft-bristled toothbrush or bottle brush
- Dish soap
- Rubber gloves
- A clean, dry towel
- Painter’s tape or a hot glue gun (for permanently sealing squirt holes afterward, if you choose)
Before choosing a method, take a quick inventory of your toy collection. Hard plastic toys with no holes can usually be handled with any of the three methods below without much thought. Toys with squirt holes need extra attention getting solution inside the cavity, which we’ll cover in detail in its own section.
Setting Up Your Cleaning Station
You don’t need anything elaborate — a kitchen sink, a bathroom sink, or even a large basin set up on a bath mat works fine. What matters more is giving yourself enough space to lay everything out: your solution basin, a drying towel, your syringe or baster, and a small brush all within easy reach. If you’re cleaning a large batch of toys at once (which is the most time-efficient approach), a big plastic tub or even a clean bathtub itself gives you room to submerge everything simultaneously rather than working through toys one at a time.
A Note on Water Temperature
Warm water isn’t strictly required for any of these methods to work, but it does help both vinegar and diluted bleach solutions penetrate residue slightly faster than cold water would. Avoid very hot or boiling water with soft rubber or vinyl toys, though — sustained high heat can degrade some materials over repeated cleanings, making them more brittle over time. Warm tap water, similar to a comfortable bath temperature, is the sweet spot.
Method 1: The Vinegar Soak (Gentlest, Best for Light Mold)
White vinegar is a mild, non-toxic acid that’s effective against light to moderate mold and mildew, and it’s the safest starting point for toys your baby puts in their mouth daily. It won’t necessarily kill every mold spore on contact the way bleach will, but for regular maintenance cleaning, it does a great job and leaves no harsh residue behind.
Step 1: Mix Your Vinegar Solution
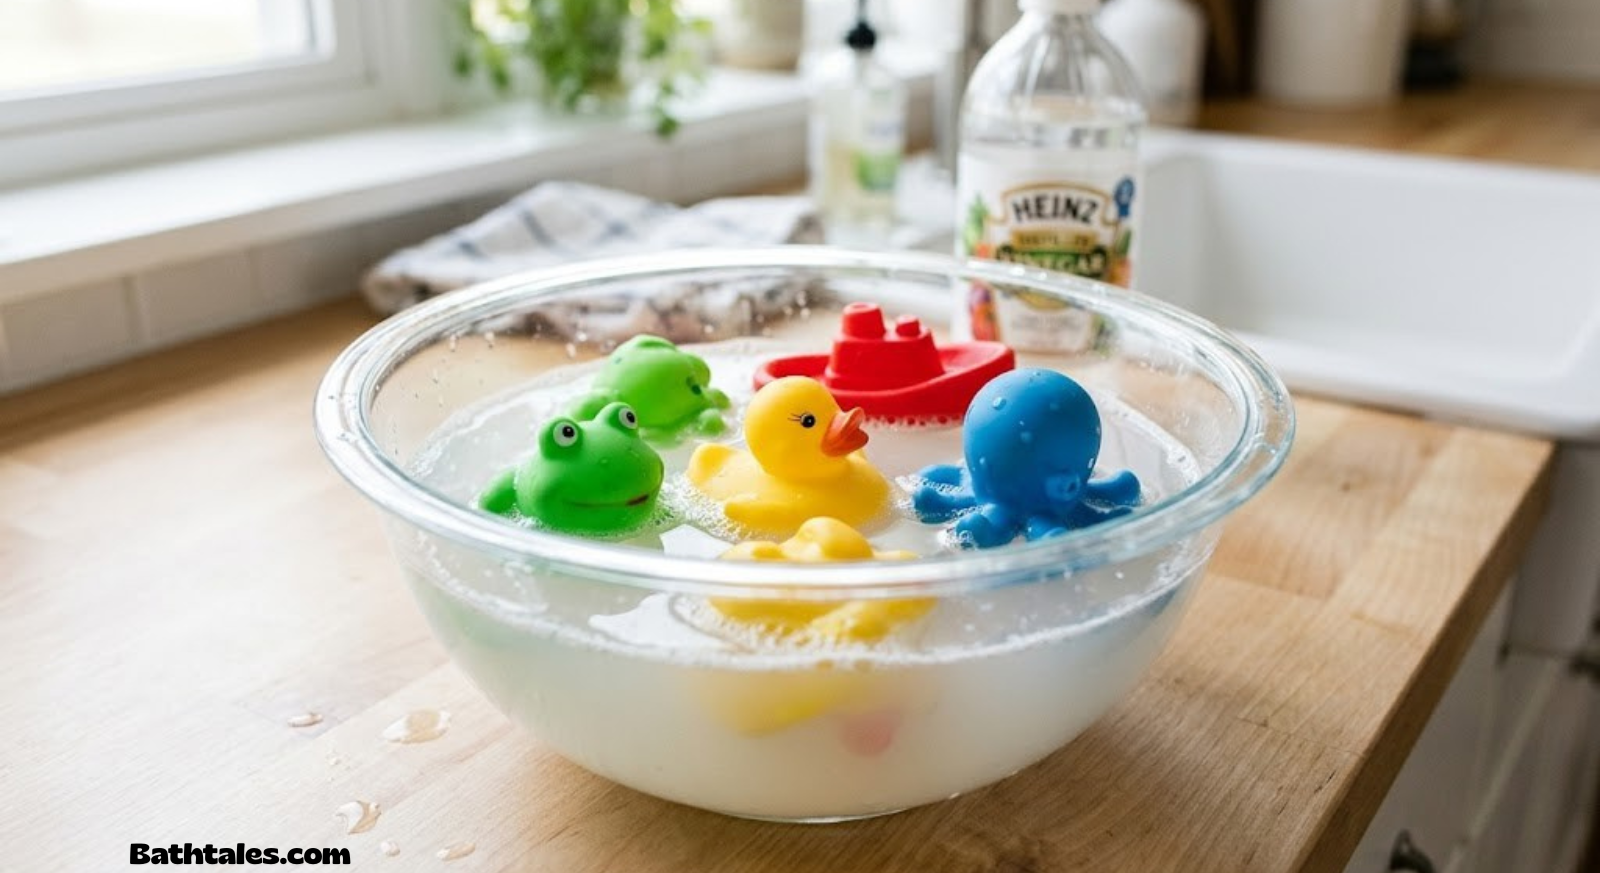
Fill a bowl or basin with a mixture of equal parts white vinegar and warm water. For a standard bathroom sink-sized basin, that’s roughly 2 cups of vinegar to 2 cups of water. Stir briefly to combine.
Step 2: Submerge and Soak the Toys
Fully submerge the bath toys in the solution, making sure hollow toys fill completely with liquid (squeeze them a few times underwater to force air out and solution in). Let everything soak for at least one hour; for toys with visible mold, extend the soak to a full 2–3 hours.
Step 3: Scrub, Rinse, and Air-Dry
After soaking, use a soft-bristled toothbrush to scrub any visible residue from the surface and around the squirt hole. Rinse thoroughly under running water, squeezing the toy repeatedly to flush the interior. Finish by placing toys on a towel in a well-ventilated spot, squirt hole facing down, so any remaining liquid can drain out completely.
The vinegar method is ideal for weekly or biweekly maintenance cleaning, and it’s gentle enough to use on almost any bath toy material without worrying about damage or harsh chemical residue near your child’s mouth.
One additional advantage worth mentioning: because vinegar is something most households already keep on hand for cooking or general cleaning, this method has essentially zero added cost and no special shopping trip required. It also doesn’t produce any strong fumes, which makes it a comfortable option to do in a smaller bathroom without needing to prop open a door or run a fan the way you might for a bleach clean. For most families, the vinegar soak ends up being the default go-to method simply because it fits so easily into a normal weekly routine without any friction.

A narrow bottle brush makes reaching inside squirt holes and tight seams dramatically easier during the scrubbing step.
Shop Cleaning Brushes →Method 2: The Bleach Solution (Strongest, Best for Heavy Mold)
When mold has really set in — dark staining, a strong musty smell, or mold that keeps reappearing within days of a vinegar clean — a diluted bleach solution is the most reliable way to kill it completely. Bleach is a stronger disinfectant than vinegar and is effective against a much broader range of mold and bacteria, but it needs to be used carefully and rinsed thoroughly given that these are children’s toys.
Step 1: Prepare a Diluted Bleach Solution
Mix 1 tablespoon of household bleach per gallon of water — this diluted ratio is strong enough to kill mold but mild enough to rinse away safely from toys. Mix it directly in a bucket or basin large enough to fully submerge your toys.
Step 2: Soak Toys for 5–10 Minutes Only
Submerge the toys completely, squeezing hollow ones to draw solution into the cavity. Unlike the vinegar method, keep this soak short — 5 to 10 minutes is enough for bleach to do its job. Leaving toys in bleach solution too long can degrade rubber and plastic over time.
Step 3: Rinse Extremely Thoroughly
This is the most important step of the bleach method. Rinse each toy under running water for at least 60 seconds, repeatedly squeezing hollow toys to flush bleach solution completely out of the interior cavity. Follow with a second rinse to be safe, then air-dry hole-side down as described earlier.
Reserve the bleach method for stubborn cases or a deep clean every month or two, rather than daily or weekly use. It’s more effective, but the vinegar method is gentler for regular maintenance.
A good way to think about the two methods together is as a tiered system rather than an either-or choice: use the vinegar soak as your regular weekly maintenance, and reach for the bleach solution specifically when a toy has clearly gotten past what a light clean can handle — visible dark residue, a strong odor, or mold that returned quickly after a recent vinegar clean. Treating bleach as the occasional “reset” rather than the everyday habit keeps toys hygienic without unnecessary wear from frequent strong-chemical exposure.
| Feature | Vinegar Method | Bleach Method |
|---|---|---|
| Strength against heavy mold | Moderate | High |
| Safe for daily/weekly use | Yes | No — occasional use only |
| Residue risk | Very low | Low if rinsed properly |
| Best for | Routine maintenance | Stubborn or recurring mold |
Method 3: Baking Soda + Vinegar Fizz (Best for Odor and Light Buildup)
If your main concern is that musty smell rather than heavy visible mold, the baking soda and vinegar combination is a great middle-ground option. The fizzing reaction helps physically dislodge grime from the interior walls of a toy, while baking soda neutralizes odors that plain vinegar sometimes leaves behind.
Step 1: Coat and Fill With Baking Soda
Sprinkle baking soda generously over the toy’s surface, and if it has an opening, use a small funnel or spoon to get a spoonful directly inside the cavity.
Step 2: Add Vinegar and Let It Fizz
Slowly pour or squirt white vinegar over the baking soda. It will foam up immediately — let the fizzing reaction sit and work for about 10 minutes, which helps loosen grime clinging to interior surfaces.
Step 3: Scrub and Rinse Clean
Once the fizzing has died down, scrub gently with a soft brush, then rinse thoroughly under warm running water until no residue remains. Air-dry the same way as the previous two methods.
This method is a favorite for parents who want something between the mild vinegar soak and the stronger bleach clean — powerful enough to break up light mold and grime, gentle enough for weekly rotation.
It’s also a particularly good choice if odor, rather than visible mold, is your main complaint. Baking soda is a natural odor absorber, so even after the fizzing reaction subsides and you’ve rinsed the toy clean, a faint dusting of baking soda left to sit dry inside a toy’s cavity between cleanings can help keep musty smells at bay in between deeper cleans.
Cleaning Squeeze Toys With Tiny Holes (The Hardest Ones)
Classic rubber ducks and squirting bath animals are, without question, the worst offenders when it comes to trapped mold, and they need a slightly different approach than solid toys because getting cleaning solution deep into the cavity is the whole challenge.
Use a Syringe for Direct Injection
A clean turkey baster, ear-cleaning syringe, or large plastic syringe (the kind used for children’s liquid medicine) is the single most effective tool for these toys. Fill it with your vinegar or diluted bleach solution, insert the tip directly into the squirt hole, and inject the solution straight into the toy’s cavity. Squeeze the toy a few times to circulate the solution around the interior before letting it sit for the recommended soak time.
Consider a Permanent Seal
Once a squeeze toy has been thoroughly cleaned and completely dried, many parents choose to permanently seal the hole with a small dot of hot glue or waterproof tape. This stops the toy from ever taking on water again — it simply becomes a squishy toy rather than a squirting one, but it also means mold has nowhere left to hide.
Pros of Sealing the Hole
- Permanently stops future mold growth
- No more ongoing deep-cleaning needed
- Extends the usable life of the toy
Cons of Sealing the Hole
- Toy loses its squirting function
- Not reversible once sealed
- Some kids specifically love the squirting feature
If squirting is a beloved feature in your house, that’s completely fair — just commit to a more frequent cleaning schedule (weekly rather than monthly) for those particular toys.
Why Squeeze Toys Are Disproportionately Bad for Mold
It’s worth understanding exactly why these toys cause so much more trouble than the rest of the toy bin. The hole that lets a duck take in water to squirt is almost always smaller in diameter than the hollow chamber inside the toy, which means water goes in easily but drains out slowly, especially once the toy is set down right-side up on a shelf or in a bin. Combine that with the fact that the interior surface is completely shielded from light and airflow, and you have close to ideal mold-growing conditions sitting inside what looks like an innocent rubber duck.
A Simple Test to Check If a Squeeze Toy Is Actually Drying
After your normal drying routine, pick up a toy that’s been sitting out for at least eight hours and squeeze it gently. If any moisture at all comes out, the interior still hasn’t fully dried, which means mold-friendly conditions are persisting even though the toy looks dry on the outside. This is a useful spot-check to run periodically, especially if you’ve recently changed where or how you’re storing toys, to confirm the new setup is actually solving the underlying drying problem rather than just moving it somewhere less visible.
Alternative: Trim or Enlarge the Hole Instead of Sealing It
If you’d rather keep the squirting function but reduce how much water gets trapped, some parents use a small pair of scissors or a hobby knife to carefully enlarge the existing hole slightly. A larger opening drains more completely on its own and is also easier to reach with a bottle brush or syringe during future cleanings, striking a middle ground between full functionality and the low-maintenance appeal of a sealed toy.

A dedicated cleaning syringe makes it far easier to flush solution directly into squirt-hole toys without the mess of a baster from your kitchen.
Shop Cleaning Syringes →What Kind of Mold Is Actually Growing on Bath Toys?
Not all the dark buildup you find in a bath toy is technically the same thing, and understanding the difference can help you gauge how seriously to treat it.
Black Mold-Like Growth
The dark specks and streaks most commonly found around squirt holes are usually a mix of common environmental mold species that thrive in damp indoor spaces, along with mildew, a closely related but generally less aggressive fungus. True toxic black mold (the kind associated with serious building-related health concerns) needs a much more specific, sustained wet environment than a bath toy typically provides, so while the term gets thrown around casually, most bath-toy mold is a milder, common variety rather than anything exotic.
Pink or Orange Slime
That pinkish-orange film that sometimes appears in shower corners and occasionally on bath toys usually isn’t mold at all — it’s a fast-growing bacteria that thrives on soap residue in damp environments. It looks alarming but is generally treated the same way: clean it promptly with vinegar or a diluted bleach solution, and address the underlying moisture issue.
Green or Fuzzy Patches (Foam Toys)
On foam bath toys specifically, you may see green or gray fuzzy patches rather than the black specks typical of hard plastic squeeze toys. This is a strong sign that mold has moved beyond the surface and into the porous foam material itself, which is much harder — often impossible — to fully clean out, a point we’ll come back to in the replacement section later in this guide.
None of this is meant to require a diagnosis before you clean — in practice, the same three methods in this guide handle the overwhelming majority of what you’ll actually encounter, regardless of the exact species involved. The distinction matters mainly for deciding how aggressively to clean and, in the case of porous foam, whether cleaning is even the right call versus simply replacing the toy.
Common Myths About Bath Toy Mold
Myth: “If It Looks Clean on the Outside, It’s Fine”
This is probably the single most common misconception, and it’s exactly why so many parents are caught off guard. Because most mold growth happens inside the hollow cavity of a squeeze toy, a toy can look spotless from the outside while harboring a significant colony internally. The only reliable check is the squeeze test described earlier, not a visual scan of the exterior.
Myth: “Boiling Toys Kills Everything, So It’s the Best Method”
Boiling can kill mold and bacteria on contact, but it isn’t practical or safe for most bath toys. Sustained high heat can warp, melt, or degrade rubber and plastic, and boiling doesn’t actually solve the underlying moisture-and-drying problem that let mold grow in the first place — a boiled toy that goes right back into a sealed, damp bin will simply grow mold again.
Myth: “Once You Clean It, Mold Won’t Come Back”
Cleaning removes the mold that’s currently present, but it does nothing to change the conditions that allowed it to grow. Without addressing drying and storage habits (covered later in this guide), mold typically returns within one to two weeks of a single cleaning, which is why prevention matters just as much as the clean itself.
Myth: “Natural Cleaners Are Always Safer Than Bleach”
Vinegar and baking soda are gentler and lower-risk in terms of residue, but “safer” isn’t the same as “more effective.” For heavy, established mold, diluted bleach used correctly and rinsed thoroughly is both effective and, when properly diluted, safe for children’s toys. The right choice depends on the severity of the problem, not a blanket rule about natural versus chemical.
The most useful mindset here is matching the tool to the job rather than picking a side and sticking with it out of habit. A lightly used toy with a faint smell doesn’t need bleach, and a heavily contaminated toy that’s been neglected for months isn’t going to be fully resolved by a quick vinegar rinse. Assess before you clean, and choose accordingly.
Comparing All Three Cleaning Methods at a Glance
With three different approaches covered, here’s a side-by-side breakdown to help you decide which one fits your situation right now.
| Method | Best For | Soak Time | Kills Mold Fully? | Kid-Safe Residue |
|---|---|---|---|---|
| Vinegar Soak | Light mold, routine cleaning | 1–3 hours | Mostly, with regular use | Excellent |
| Bleach Solution | Heavy, recurring mold | 5–10 minutes | Yes | Good, if rinsed well |
| Baking Soda + Vinegar | Odor and light buildup | 10–15 minutes | Partially | Excellent |
A simple rule of thumb many parents use: vinegar or baking soda for weekly maintenance, and bleach reserved as the occasional deep-clean when things have gotten out of hand.
If you’re still unsure which to start with, default to the vinegar soak. It’s the lowest-risk option, requires the least monitoring during the soak itself, and handles the vast majority of routine bath-toy mold without any downside. You can always step up to the bleach method afterward if the toy doesn’t come out looking and smelling the way you’d expect.
How to Prevent Mold From Coming Back
Cleaning mold out of bath toys is only half the battle — if the underlying moisture problem isn’t addressed, mold will simply grow right back within a week or two. Here’s how to break the cycle for good.
Dry Toys Completely After Every Bath
Get in the habit of giving each toy a firm squeeze over the drain after bath time to push out as much trapped water as possible, then store them somewhere they can air-dry fully rather than piling them wet into a closed bin.
Rotate a Smaller Toy Collection
A giant pile of bath toys sounds fun, but it means more items sitting damp for longer between uses. Keeping a smaller, curated rotation — appropriate for your child’s age, like the picks in our guides for bath toys for 1-year-olds or bath toys for 2-year-olds — makes it far easier to keep every toy properly dried and maintained.
Choose Mold-Resistant Designs
When shopping for new toys, look for options without water-trapping squirt holes. Solid silicone toys, stacking cups, and open-mesh designs are much easier to keep mold-free long term. Our roundups of bath toys for 3-year-olds and bath toys for 4-year-olds highlight several mold-resistant options worth considering.
Weekly Preventive Rinse
Even without visible mold, a quick weekly rinse with the vinegar method described earlier goes a long way toward stopping mold before it ever becomes visible.
Improve Bathroom Ventilation
Since ambient bathroom humidity plays such a large role in how quickly toys dry, small changes to the room itself can meaningfully cut down on mold risk. Running an exhaust fan for 15–20 minutes after bath time, cracking a window if the weather allows, or leaving the bathroom door open so air can circulate all help the whole room — and everything drying in it — return to a normal humidity level faster.
Build It Into an Existing Routine
The habits most likely to stick are the ones attached to something you’re already doing. Since you’re already draining the tub and getting your child dried off and dressed after bath time, use those same few minutes to squeeze out each toy and set it in its drying spot. It adds well under a minute to a routine you’re doing every night anyway, and it’s the single highest-leverage habit in this entire guide.
Storage & Drying Best Practices
How and where you store bath toys between uses has just as much impact on mold growth as how you clean them. Sealed, airtight bins are actually one of the worst storage choices, since they trap residual moisture against the toys with no airflow.
- Use a mesh or hanging bag. Mesh bags allow water to drain out and air to circulate freely around every toy.
- Store outside the tub. Keeping toys in the bathtub itself, even in a caddy, means they’re sitting in a consistently humid environment.
- Give toys a “drying station.” A small drying rack or towel near (but not inside) the tub gives toys time to fully dry before being put away.
- Avoid stacking wet toys. Wet-on-wet contact traps moisture between toys even if the storage container itself is well-ventilated.
For a full breakdown of storage systems, drying racks, and organizational setups that actively reduce mold risk, see our dedicated guide on how to store bath toys. And if you want to build mold prevention into a regular routine rather than a one-off deep clean, our guide on how to sanitize bath toys walks through a repeatable weekly schedule.
DIY Drying Solutions That Cost Nothing
You don’t need to buy specialty storage to get most of the benefit here. A simple suction-cup hook and a mesh produce bag from your kitchen can be repurposed into a functional hanging drying station in a couple of minutes. Alternatively, a small dish rack placed on a bath mat next to the tub gives toys an elevated, airflow-friendly spot to dry that keeps them off the potentially damp tub floor without requiring any purchase at all.
What to Avoid in a Storage Container
Beyond airtight bins, a few other common storage choices unintentionally work against you. Toy nets that sit directly against a tiled wall with no gap behind them restrict airflow on one side. Plastic caddies with a solid (rather than perforated) bottom trap water pooling at the base. And baskets lined with fabric or a soft insert can themselves become a hidden source of mold if they stay damp, since fabric holds moisture longer than bare plastic or mesh.

A ventilated mesh storage bag with a suction hook keeps toys off the tub floor and lets them air-dry fully between baths.
Shop Mesh Storage Bags →When to Repair vs. When to Simply Replace
Not every moldy bath toy is worth saving. In some cases, the mold has spread so deeply into a porous material — especially foam toys — that no amount of cleaning will fully remove it. Here’s how to know when it’s time to let go.
Worth Cleaning & Keeping
- Hard plastic or solid silicone toys
- Mold limited to the surface or a squirt hole
- Mold that hasn’t returned within days of a bleach clean
- Toy still holds sentimental or developmental value
Time to Replace
- Foam toys with mold growing throughout the material
- Cracked or torn toys where mold has entered the interior padding
- Mold that keeps returning within a day or two, repeatedly
- A strong musty smell that persists even after deep cleaning
When it is time to replace a toy, treat it as an opportunity to upgrade to a more mold-resistant design. Our age-specific guides for 1-year-olds, 2-year-olds, 3-year-olds, and 4-year-olds are a good starting point for finding hole-free, easy-to-clean replacements.
How to Retire a Toy Without a Meltdown
If the toy in question happens to be a genuine favorite, replacing it can be more of an emotional negotiation than a practical one. A few things tend to help: involve your child in picking the replacement so it feels like an upgrade rather than a loss, retire the old toy gradually by simply not restocking it in the bath rather than a dramatic announcement, and if it’s truly beloved, consider keeping it as a dry, out-of-tub toy instead of throwing it away outright, which sidesteps the mold problem entirely while still letting your child keep it around.
Ultimately, the goal isn’t to eliminate every squeeze toy or chase a zero-mold bathroom — that’s neither realistic nor necessary. It’s to build a simple, repeatable rhythm of cleaning, drying, and smart storage so that mold stays a minor, occasional chore rather than a recurring source of stress every time bath time rolls around.

Solid silicone bath toy sets have no hollow cavities for water to hide in, making them dramatically easier to keep mold-free long term.
Shop Solid Silicone Bath Toys →Cleaning Tips by Toy Material
While the three core methods above work for the vast majority of bath toys, a few material types benefit from small adjustments worth knowing about.
Hard Plastic
The easiest material to work with. Hard plastic toys can generally handle any of the three methods, longer soak times, and even an occasional dishwasher cycle without concern, since there’s no porous surface for mold to embed into beyond the surface itself.
Soft Rubber and Vinyl
These are the classic squeeze-toy materials, and they’re where most of this guide’s squirt-hole advice applies most directly. Stick to shorter bleach soak times specifically with these materials, since prolonged exposure to strong solutions can make rubber more prone to cracking over time.
Silicone
Silicone is naturally more resistant to mold than rubber or vinyl because it’s less porous, but seams where two silicone pieces are joined can still trap moisture. Pay particular attention to scrubbing along any visible seam lines during cleaning.
Foam
The most difficult material by far. Foam is inherently porous, meaning mold can grow inside the material itself, not just on the surface. Light surface mold on foam toys can sometimes be addressed with a careful vinegar wipe-down (avoid fully submerging foam, since it will absorb and retain the solution), but foam toys with mold that has clearly spread through the material are usually better replaced than deep-cleaned.
Frequently Asked Questions
How often should I clean mold out of bath toys?
A light vinegar or baking soda clean once a week is a reasonable routine for most households, with a deeper bleach clean roughly once a month, or sooner if you notice discoloration or a musty smell. Households with a baby under one, a child with asthma or allergies, or toys that see daily use may want to shift to a weekly deep clean instead of monthly, since moisture and use both accelerate how quickly mold can re-establish itself. The honest answer is that cleaning frequency matters less than consistent drying and ventilated storage between cleans — a toy that’s properly dried after every bath needs far less aggressive cleaning overall than one that’s tossed wet into a sealed bin.
Can I put bath toys in the dishwasher?
Hard plastic, hole-free toys can often go on the top rack of a dishwasher for a quick clean, but toys with squirt holes or soft rubber/foam construction should be hand-cleaned using the methods above, since dishwasher heat and detergent won’t reliably reach trapped mold inside a cavity. If you do run hard plastic toys through the dishwasher, skip the heated dry cycle for anything with fine detailing or painted elements, as sustained heat can occasionally cause warping or fading over repeated washes.
Is it safe to use bleach on toys my baby puts in their mouth?
Yes, as long as you use a properly diluted solution (about 1 tablespoon of bleach per gallon of water), keep the soak short, and rinse the toy extremely thoroughly under running water afterward until no bleach smell remains. A helpful confirmation step is to do a final smell check right at the squirt hole before returning the toy to your child — if any chemical smell lingers at all, give it one more thorough rinse and squeeze cycle before considering it done.
Why does mold keep coming back even after I clean the toys?
This almost always means moisture is still getting trapped somewhere, either because the toy isn’t fully drying between uses or because it’s being stored in a sealed, non-ventilated container. Switching to open-air, mesh storage usually solves this. It can also help to double-check that you’re getting solution — and later, rinse water — all the way into the interior cavity during cleaning rather than just around the exterior, since any pocket of leftover mold left untouched inside the toy will simply regrow and spread once conditions are damp again.
What’s the black stuff that comes out when I squeeze a bath toy?
That’s typically a mix of mold, mildew, and bacteria that has built up inside the toy’s hollow cavity from trapped bathwater. It’s a clear sign the toy needs a thorough clean using the vinegar or bleach method described above. Seeing this for the first time can be alarming, but it’s an extremely common finding in households with young children, and it’s very manageable once you know the toy needs attention — it isn’t a sign that anything has gone wrong with how you’ve been caring for the toy up to that point.
Can I use hydrogen peroxide instead of bleach or vinegar?
Yes, diluted hydrogen peroxide (roughly a 1:1 mix with water) is another effective, milder alternative to bleach and works well against mold and mildew, with the same soak-scrub-rinse process described in this guide. Some parents prefer it specifically because it breaks down into water and oxygen rather than leaving any chemical residue behind, though it’s generally considered slightly less effective against very heavy, established mold than a properly diluted bleach solution.
Should I throw away all bath toys with squirt holes?
Not necessarily. Many parents keep squirt toys but commit to more frequent cleaning, or permanently seal the hole once the toy is fully clean and dry. If mold keeps returning quickly despite regular cleaning, replacing the toy is usually the simpler long-term solution. It really comes down to how much your child enjoys the squirting feature specifically — if it’s a beloved part of bath time, the extra maintenance is often worth it; if it’s just one toy among many, sealing the hole or swapping it for a hole-free alternative removes the ongoing hassle entirely.
How long does it take for mold to grow inside a bath toy?
Under the right warm, damp conditions, visible mold can begin developing inside a toy’s cavity in as little as one to two weeks of regular use without proper drying between baths. Toys used nightly, stored in sealed bins, or kept in a poorly ventilated bathroom tend to fall on the faster end of that range, while toys used only occasionally and dried thoroughly each time can go considerably longer before any buildup becomes noticeable.
Can moldy bath toys make my child sick?
For most healthy children, brief exposure isn’t typically serious, but regular contact with mold and the bacteria that often grows alongside it can contribute to skin irritation or, in sensitive children, respiratory symptoms — which is why regular cleaning matters. Children with asthma, eczema, or known allergies may be more sensitive to repeated exposure, so it’s reasonable to be more proactive about cleaning frequency in those households specifically, even if a single exposure isn’t likely to cause a dramatic reaction.
What household items should I avoid using to clean bath toys?
Avoid ammonia-based cleaners, strong scented detergents, and never mix bleach with vinegar or ammonia, as the combination can produce harmful fumes. Stick to plain vinegar, baking soda, diluted bleach, or diluted hydrogen peroxide used separately. It’s also worth avoiding heavily fragranced “all-purpose” cleaners in general for children’s toys, since many contain ingredients that aren’t intended for repeated contact with a child’s mouth, even in small amounts.
Is it better to buy bath toys without holes in the first place?
For minimizing mold risk long-term, yes. Solid silicone or hard plastic toys with no water-trapping cavities are significantly easier to keep clean, which is why many parents gradually shift their collection toward hole-free designs as toys wear out. This doesn’t mean squirting toys are off-limits entirely — it’s more that, given a choice between two otherwise similar toys, the hole-free option will almost always be the lower-maintenance one over months and years of regular use.
Can I prevent mold without cleaning toys every single week?
Yes — the biggest lever isn’t cleaning frequency, it’s drying and storage. Squeezing out excess water after every bath and storing toys in a ventilated mesh bag rather than a sealed bin dramatically slows mold growth even without a weekly deep clean. Think of cleaning as addressing mold that’s already present, and drying/storage as preventing it from establishing itself in the first place — the second one is actually the more powerful long-term lever of the two.
Do bath toy cleaning tablets or sprays actually work?
Commercial bath toy cleaning tablets and sprays, which are widely sold online, generally use similar active ingredients to the diluted bleach or vinegar approaches in this guide, just in a pre-measured, convenient format. They can be a reasonable option if you’d rather not measure out your own dilution, though they typically cost more over time than mixing your own solution from pantry staples, and they don’t offer any real advantage in effectiveness for most households.
Should daycare or shared bath toys be cleaned differently than toys at home?
Toys shared between multiple children — like those found in daycare settings, splash pads, or multi-family households — see more frequent use and a wider range of exposure, so it’s worth erring toward the more frequent end of the cleaning schedule and prioritizing hole-free designs where possible. The same core methods in this guide still apply; the main difference is how often they need to be repeated given heavier, shared use.
The Bottom Line
Mold in bath toys is one of those quietly gross parenting realities that almost nobody warns you about — but it’s also completely manageable once you know what to do. Whether you reach for a gentle vinegar soak, a stronger bleach solution, or the baking soda fizz method, the real key to staying mold-free long-term comes down to two habits: drying toys thoroughly after every bath, and storing them somewhere air can actually circulate. Build those two habits into your routine, and the deep cleans in this guide will become far less frequent.
It’s also worth remembering that this is a completely normal part of having young children in the house, not a reflection of anything being done wrong. Bath toys are engineered for fun first, and hygiene has always been the secondary consideration in how they’re designed — which is exactly why a little bit of routine maintenance on your end makes such a big difference. Pick the method that matches today’s mess, build the drying habit into your existing bath-time routine, and you’ll spend far less time thinking about mold and far more time just enjoying bath time with your kids.
Ready to make bath time easier from here on out? Explore mold-resistant toy options built to avoid this problem altogether.
Shop Mold-Resistant Bath Toys on Amazon →