How to Clean a Shower Drain: The Complete Step-by-Step Guide
A slow-draining shower is almost always a fixable problem. Here’s exactly how to clear hair, soap scum, and grime out of your drain using tools you probably already own.
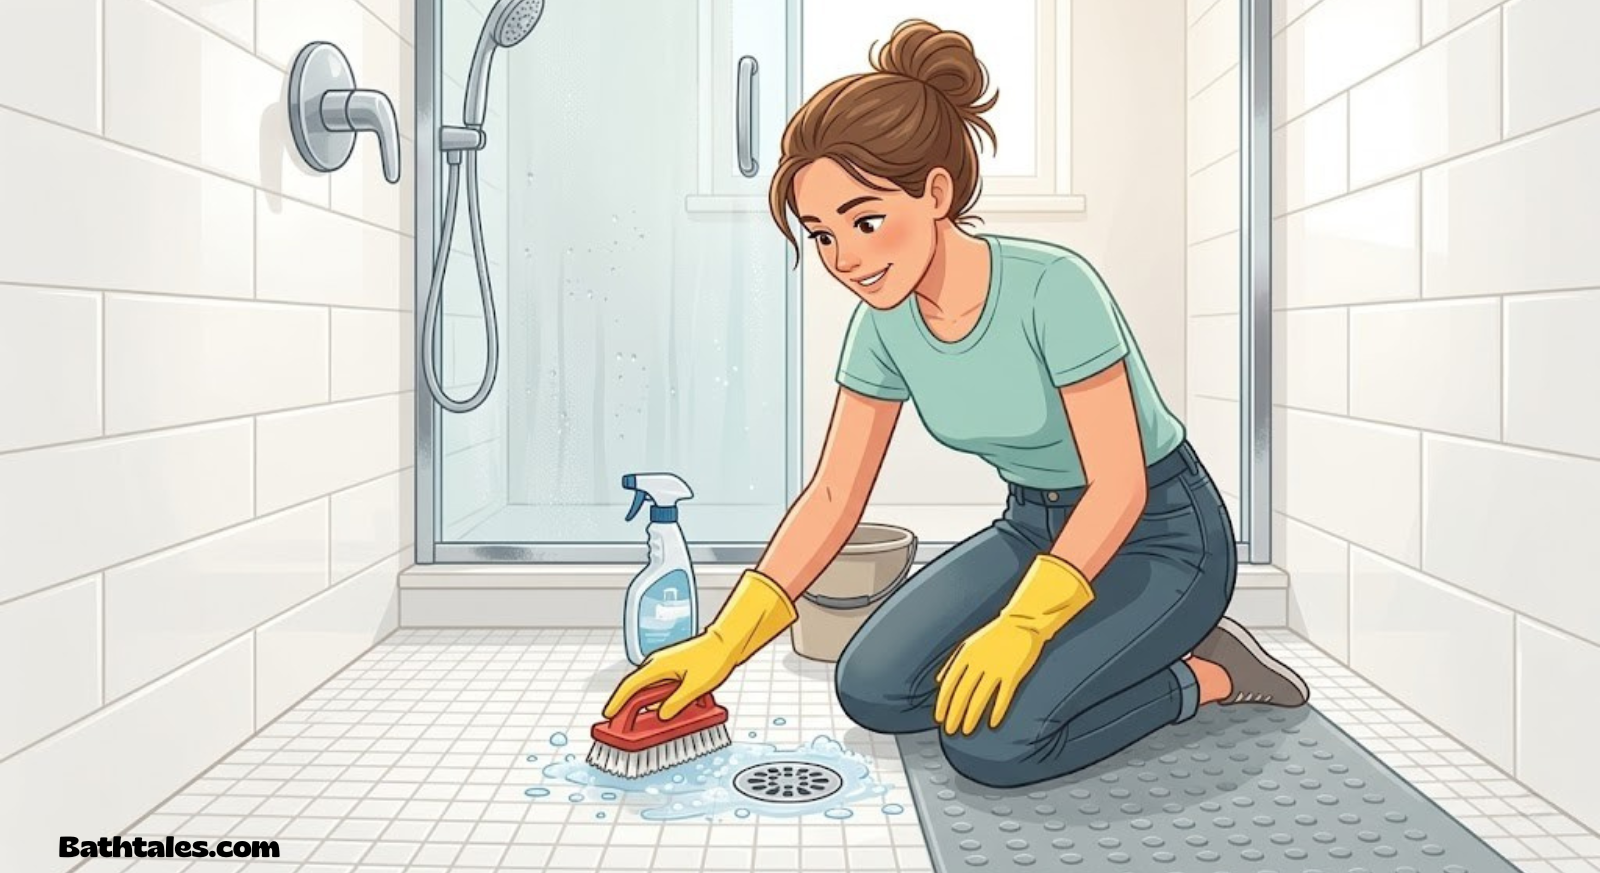
Why Shower Drains Clog in the First Place
Every shower drain eventually slows down, and it’s rarely a mystery. Hair is the number one culprit — it wraps around the crossbar of the drain cover and the inside of the pipe, catching soap residue, skin cells, and mineral deposits as water passes through. Over weeks, that tangle compacts into a dense mat that water can barely squeeze past.
Soap scum plays a supporting role. Traditional bar soaps contain fats that react with hard water minerals to form a waxy film. That film coats the pipe walls, narrowing the passage and giving hair something to stick to. If you’ve ever dealt with soap scum on your shower walls, the same buildup is happening inside the drain, just out of sight.
Hard water minerals, shaving stubble, and small debris like sand from outdoor showers add to the problem. In older homes, a corroded or partially collapsed pipe can also restrict flow, though that’s a plumbing issue rather than a cleaning one.
Signs Your Shower Drain Needs Cleaning
Most clogs build gradually, so it helps to know the early warning signs before you’re standing in ankle-deep water.
Watch for these signs
- Water pools around your feet during a shower
- A gurgling sound comes from the drain
- A musty or sulfur-like smell rises from the drain
- Water drains noticeably slower than it used to
- Visible hair or grime around the drain cover
Good habits that delay clogs
- Brushing hair before you shower
- Using a drain hair catcher
- Wiping the drain cover weekly
- Flushing with hot water after washing conditioner out
- Deep cleaning monthly, not just when it’s already slow
Understanding Your Shower Drain: Types and Anatomy
Before you dive into cleaning, it helps to know what kind of drain you’re working with. Not all shower drains are built the same, and each type has its own quirks when it comes to maintenance and clog removal. Understanding the anatomy of your particular drain will save you frustration and prevent accidental damage during the cleaning process.
Point Drains (Traditional Center Drains)
The most common type in residential bathrooms, a point drain sits in the center — or occasionally in one corner — of the shower floor. Water flows from all directions toward this single opening. Point drains typically use a circular or square grate cover that either lifts out, unscrews, or pops off with a flat tool. Beneath the grate, you’ll usually find a crossbar or strainer basket that catches hair and debris before it enters the pipe. This crossbar is where most clogs originate, which makes physical removal with a drain snake or tweezers particularly effective for this type.
Point drains connect to a standard 2-inch drain pipe through a short drain body, and the P-trap usually sits directly below. Because everything is relatively accessible from above, point drains are the easiest to maintain and clean yourself without professional help.
Linear Drains (Trench Drains)
Increasingly popular in modern and barrier-free bathroom designs, linear drains run along one wall of the shower in a long, narrow channel. Instead of water flowing to a center point, the entire shower floor slopes gently in one direction toward the linear channel. The drain cover is typically a long stainless-steel grate that lifts straight up once you release any securing clips.
Linear drains present a unique cleaning challenge. Their length means more surface area for hair and soap to accumulate, and the debris tends to collect unevenly — usually heavier near the center where water flow converges. You’ll need to remove the full-length grate and clean the entire channel, not just one spot. A handheld vacuum can be surprisingly useful for pulling dry debris out of a linear drain before you apply any wet cleaning method. The underlying pipe connection is still standard, so the baking soda and vinegar method and drain snake techniques work just as well once the grate is removed.
Trench Drains With Tile-In Grates
A subset of linear drains, tile-in models let you set your shower floor tile directly into the grate frame, making the drain nearly invisible. While aesthetically pleasing, these can be harder to remove for cleaning because the tile insert is heavier and may be sealed in place with silicone. If you have this type, check your manufacturer’s instructions before attempting removal — forcing a tile-in grate can crack the tile or damage the frame.
Pop-Up and Lift-and-Turn Drains
More common in bathtubs than showers, pop-up and lift-and-turn drain mechanisms use a mechanical stopper that you push down to seal or twist to open. These have more moving parts than a simple grate, which means more places for hair to wrap and soap to harden. Cleaning these drains usually involves unscrewing the stopper mechanism — typically a single screw visible from above — to expose the drain opening fully. Once the stopper is out, the same cleaning methods apply.
Flush-Mount and Infinity Drains
Found primarily in high-end curbless showers, flush-mount drains sit perfectly level with the shower floor, and infinity drains create a seamless edge where water appears to vanish into the floor. Both types require careful handling during cleaning because their precise alignment with the floor tile means any forceful prying can chip edges or break the waterproof seal. If you’re unsure about removing these, consulting your installer or the product documentation first is a smart move.
Key Parts of Every Shower Drain
Regardless of the drain type on the surface, the plumbing below shares common components:
- Drain grate or cover — the visible surface piece that catches large debris
- Drain body — the short housing that connects the grate to the pipe below
- Strainer or crossbar — a built-in screen inside the drain body that catches hair
- P-trap — the curved pipe section that holds a small amount of water to block sewer gas from rising into the bathroom
- Trap arm — the horizontal pipe connecting the P-trap to the main drain line
- Main drain line — the larger pipe that carries wastewater out of the house
Knowing these parts helps you diagnose where a clog is sitting. If water pools right at the grate, the blockage is in the strainer or the first few inches of pipe. If the drain seems clear at the top but water still backs up, the problem is deeper — likely in the P-trap or trap arm. That distinction tells you which cleaning method to reach for first.
Tools & Supplies You’ll Need
You don’t need anything specialized for most clogs. Here’s a simple checklist to gather before you start:
- Rubber gloves
- A flathead screwdriver (for screw-in drain covers)
- An old toothbrush or small scrub brush
- Baking soda and white vinegar
- A plastic drain snake or “zip-it” tool
- A bucket and adjustable wrench (only needed for P-trap access)
- A kettle or pot for boiling water

Don’t have a drain snake yet? A flexible plastic zip-it tool costs a few dollars and handles most hair clogs in under two minutes.
Check Price on AmazonCommon Mistakes That Make Drain Clogs Worse
Most shower drain clogs start small and manageable. What turns a minor slowdown into a full-blown blockage is usually a well-intentioned cleaning attempt gone wrong — or a daily habit that seems harmless but actually feeds the problem. Here are the mistakes plumbers see most often, and what to do instead.
Ignoring the Early Warning Signs
The single biggest mistake is waiting too long. When water first starts draining a bit slower than usual, the clog is still a thin film of hair and soap that a quick five-minute treatment could dissolve. Wait another month, and that film compresses into a solid plug that requires a drain snake and twenty minutes of work. Wait six months, and you may be looking at a P-trap removal. The earlier you act, the easier the fix.
Pouring Grease or Oil Down the Drain
While this is more commonly associated with kitchen sinks, it happens in showers too — particularly if you use oil-based body washes, coconut oil hair treatments, or bath oils. Any油脂 that goes down the drain in liquid form will cool and solidify inside the pipe, coating the walls and trapping hair against them. If you use oil-based products, wipe excess off your body with a towel before stepping into the shower, and follow every oil-heavy shower with a hot water flush.
Using Chemical Cleaners Too Frequently
Chemical drain cleaners dissolve organic matter quickly, but using them as a monthly maintenance tool — rather than a last resort — can corrode the inside of your pipes over time. This is especially true for older galvanized steel or cast iron pipes. Repeated chemical exposure eats away at the pipe walls, creating rough spots where debris catches more easily, ironically making future clogs more likely. Reserve chemical cleaners for genuine emergencies and use gentler methods for routine maintenance.
Mixing Cleaning Products
Combining different chemical cleaners — or mixing a chemical cleaner with bleach — can produce dangerous fumes or reactions. The most hazardous combination is an acid-based cleaner with a bleach-based one, which releases chlorine gas. Even mixing a chemical cleaner with a natural one like vinegar can create unexpected reactions. Always flush the drain thoroughly with water between any two products, and never use more than one chemical cleaner on the same clog.
Forcing a Drain Snake Too Deep
When a drain snake meets resistance, the instinct is to push harder. But if that resistance is a pipe joint or bend rather than a clog, forcing the tool can crack PVC fittings, damage the P-trap connection, or push the blockage further down the line where it’s harder to reach. The right approach is gentle pressure combined with a twisting motion — if the snake doesn’t advance after a few rotations, pull back slightly and try again at a different angle.
Not Removing the Drain Cover
Pouring baking soda and vinegar through a closed drain cover works for light maintenance, but if you’re dealing with an actual clog, leaving the cover on is like trying to clean a window through curtains. The worst buildup sits directly under the cover, around the crossbar and strainer — areas you can only reach with the cover removed. Always take the extra two minutes to remove it for any deeper cleaning attempt.
Flushing With Boiling Water on PVC Pipes
A full rolling boil reaches 100°C (212°F), which is hot enough to soften PVC pipe joints and weaken the solvent welds connecting them. While one accidental pour probably won’t cause immediate failure, repeated exposure to boiling water degrades the joints over months. Hot tap water or water from a kettle that’s been off the boil for a minute is plenty hot enough to dissolve soap scum without risking pipe damage.
Ignoring the Overflow Drain
Some showers — especially combined shower-tub units — have an overflow drain higher on the wall. This secondary drain connects to the same pipe system and can be a source of the same hair and soap buildup. If you’ve cleaned the main drain thoroughly but water still drains slowly, check whether the overflow is contributing to the problem. Removing the overflow plate and cleaning behind it with a small brush can reveal a hidden accumulation.
Step 1: Remove the Drain Cover
Before you can clean anything, you need access to the drain itself. Most shower drain covers either lift out by hand, unscrew with a flathead screwdriver, or twist counter-clockwise to release. Take a photo before removing it if you’re not sure how it goes back together.
Once the cover is off, set it aside and give it a quick scrub with dish soap to remove any buildup around the slots — this small step improves drainage even before you touch the pipe.
Step 2: The Baking Soda & Vinegar Method (Best First Try)
This is the go-to method for light-to-moderate buildup because it’s cheap, non-toxic, and gentle on both metal and PVC pipes. The chemical reaction between baking soda and vinegar creates a fizzing action that helps loosen grime clinging to the pipe walls.
2a. Pour in the baking soda
Pour roughly half a cup of baking soda directly into the open drain, tapping the sides so it settles down into the pipe rather than sitting in a clump at the opening.
2b. Add the vinegar and let it fizz
Slowly pour one cup of white vinegar over the baking soda. You’ll hear and see it foam almost immediately — that reaction is breaking down grease and soap film clinging to the pipe. Cover the drain loosely and let it sit for 15–20 minutes.

Stock up on a large box of pure baking soda so you always have enough on hand for a full drain treatment.
Check Price on AmazonStep 3: Physically Remove Hair With a Drain Snake
Baking soda and vinegar loosen buildup, but they rarely dislodge a thick hair mat on their own. For that, you need to physically pull the clog out. A plastic zip-it tool or a flexible metal drain snake does this job in minutes.
3a. Insert the snake into the drain
Feed the snake down through the drain opening, twisting gently as you go. You’ll feel resistance once it hits the clog — that’s your cue to start working it back and forth rather than forcing it deeper.
3b. Pull out the clog and dispose of it
Withdraw the snake slowly and steadily — pulling too fast can snap loose hair back into the pipe. Have a trash bag ready, since what comes out is genuinely unpleasant. Repeat two or three times until the tool comes back clean.
Dealing With Specific Clog Types
Not every clog is created equal. Hair, soap scum, mineral scale, and foreign objects each respond to different treatments, and using the wrong approach wastes time and effort. Here’s how to identify what’s actually blocking your drain and match the method to the problem.
Hair Clogs
Hair clogs are by far the most common type, accounting for roughly nine out of ten shower drain blockages. You can usually identify a hair clog by the early symptom: water drains fine most of the time but slows noticeably after someone with longer hair showers. Visually, you may see strands poking through the drain cover slots.
Hair doesn’t dissolve in water, and most household cleaners won’t break it down either — even enzyme-based cleaners work slowly on hair. The most effective approach is always physical removal. Start with tweezers or needle-nose pliers to pull visible strands from the crossbar. If that doesn’t restore flow, move to a plastic drain snake, which has small barbs designed to hook hair as you pull it back out. For deep hair clogs past the P-trap, a drum auger with a corkscrew head gives you more reach and grabbing power.
Prevention is straightforward: install a hair catcher over the drain and clean it after every shower. It takes ten seconds and eliminates the root cause entirely.
Soap Scum Buildup
Soap scum clogs develop more slowly than hair clogs and tend to affect the entire length of the pipe rather than forming a single plug. Symptoms include gradually worsening drainage over weeks or months, a slightly slimy feel if you run a finger inside the drain opening, and sometimes a whitish residue visible on the pipe walls.
Unlike hair, soap scum responds well to chemical and natural dissolving methods. The baking soda and vinegar treatment is particularly effective here because the acetic acid in vinegar reacts with the calcium stearate that makes up soap scum, breaking it into soluble components that flush away with water. For heavier buildup, a commercial descaler designed for bathroom use — or even a dishwasher tablet dissolved in hot water and poured down the drain — can dissolve the waxy film.
If soap scum is your primary problem, consider switching from bar soap to liquid body wash. Bar soaps contain the fatty acid salts that react with hard water to form soap scum; liquid body washes use synthetic surfactants that don’t produce the same residue.
Mineral Scale and Hard Water Deposits
In areas with hard water, calcium and magnesium deposits accumulate inside pipes over years, gradually narrowing the passage. This type of buildup is easy to distinguish from soap scum: mineral scale is hard and chalky rather than waxy, and white vinegar or a dedicated lime-scale remover will fizz visibly when applied to it.
For mineral deposits, pour two cups of white vinegar directly into the drain and let it sit for at least two hours — overnight is even better. The prolonged contact time gives the acid a chance to dissolve the calcium carbonate. Follow with very hot water to flush the loosened scale. Repeat this process weekly for a month if you suspect significant mineral accumulation, and then switch to a monthly maintenance schedule.
For severe mineral buildup that vinegar alone can’t resolve, a plumber’s descaling treatment may be necessary. Professional plumbers use specialized acid solutions and mechanical descaling tools that clean the pipe walls without damaging the pipe itself.
Shaving Stubble and Clumped Debris
If you shave in the shower, tiny hair clippings combine with soap and water to form a paste that hardens inside the drain. This type of clog tends to sit right at the drain opening or in the first few inches of pipe, making it relatively easy to address. A quick scrub with a bottle brush or old toothbrush around the inside of the drain body usually breaks it loose. Prevention is simple: let the water run for thirty seconds after you finish shaving to flush stubble through before it can settle and bind with soap.
Foreign Objects
Small items — shampoo bottle caps, razor blade covers, bobby pins, jewelry — fall into drains more often than you’d think. A foreign object typically causes a sudden blockage rather than a gradual one, and no amount of baking soda or vinegar will dissolve a plastic cap. For objects visible just inside the drain, needle-nose pliers or a bent wire hanger can fish them out. For objects deeper in the pipe, a drain snake with a retrieval head (a small hook or claw at the tip) is your best bet. If you can hear the object rattling but can’t grab it, a wet/dry vacuum set to its highest suction setting can sometimes pull it out.
Grease and Body Oil
Body oils, coconut oil hair treatments, and oil-based shower products can congeal inside pipes, especially in cooler weather or in pipes that run through unheated spaces. Grease clogs feel different from other types: the drain may work fine during a hot shower when the oil is liquid, then slow down dramatically afterward as the oil cools and solidifies. The best treatment is repeated hot water flushes — pour a full kettle of the hottest water your pipes can safely handle down the drain, wait ten minutes, then pour another. Adding a squirt of dish soap before the hot water helps emulsify the grease and carry it away.
Step 4: Flush With Hot (Not Boiling) Water
After removing the vinegar residue and hair, flush the drain with a kettle of hot water to carry away any remaining loosened debris. If your pipes are PVC, use hot tap water rather than a rolling boil, since genuinely boiling water can soften PVC joints over repeated use.
Step 5: Cleaning the P-Trap (For Stubborn Clogs)
If water is still backing up after the steps above, the clog may sit lower in the P-trap — the curved section of pipe beneath the shower base. This step involves a bit more work but resolves the vast majority of remaining clogs without calling a plumber.
5a. Access the trap and place a bucket underneath
Depending on your shower’s plumbing, the P-trap may be accessible through an access panel in an adjoining wall or closet. Place a bucket directly beneath the joint before loosening anything, since standing water will drain out immediately.
5b. Loosen the trap and clear debris
Using an adjustable wrench, loosen the slip nuts on either side of the trap. Once removed, you’ll usually find the exact hair and soap clump that was causing the slowdown. Clean the trap with a bottle brush, reattach it hand-tight plus a quarter turn, and run water to check for leaks.
Which Cleaning Method Should You Use?
Not every clog needs the full process. Use this quick comparison to match the method to your situation.
| Method | Best For | Time Needed | Tools Cost |
|---|---|---|---|
| Baking soda & vinegar | Light buildup, odor, maintenance | 20–30 min | Under $5 |
| Drain snake / zip-it | Hair clogs, slow drainage | 5–10 min | $5–$15 |
| Boiling/hot water flush | Soap scum, light grease | 2 min | Free |
| P-trap cleaning | Persistent clogs, standing water | 20–40 min | $10–$20 (wrench) |
| Chemical drain cleaner | Last resort, occasional use | 15–30 min | $8–$15 |
What About Chemical Drain Cleaners?
Commercial drain cleaners can dissolve hair and organic buildup quickly, but they come with real trade-offs worth understanding before you reach for a bottle.
Pros
- Fast-acting on organic clogs
- Requires no disassembly
- Widely available
Cons
- Can damage older or corroded pipes with repeated use
- Produces strong fumes — ventilation is essential
- Not safe to combine with other cleaning products
- Doesn’t remove hair mats stuck around the crossbar
If you do use one, choose an enzyme-based formula for routine maintenance and reserve stronger caustic cleaners for occasional, severe clogs only — never mix chemical cleaners with bleach or ammonia-based products.

Enzyme-based drain cleaners are a gentler option for monthly maintenance between deep cleans.
Check Price on AmazonEco-Friendly Drain Cleaning: A Greener Approach
If you’re trying to reduce the chemicals in your home — or simply prefer not to send harsh substances into the water system — there are several effective green alternatives for keeping your shower drain clear. Most of them use ingredients you already have in your kitchen.
Enzyme-Based Cleaners
Enzyme drain cleaners use bacterial cultures and enzymes that literally eat organic matter — hair, soap, skin cells, and grease — without producing heat, fumes, or caustic byproducts. They work more slowly than chemical cleaners (typically overnight rather than in fifteen minutes), but they’re safe for every pipe material, septic systems, and the environment. The trade-off is that enzyme cleaners work best as preventive maintenance rather than emergency unclogging. Pour a dose into the drain before bed once a month, let it work undisturbed overnight, and flush with warm water in the morning. Over time, the enzyme colonies establish themselves in the pipe and continuously break down small accumulations before they become clogs.
Salt and Hot Water
A surprisingly effective natural method for grease and soap-based buildup: dissolve half a cup of table salt in a pot of very hot (not boiling) water and pour it slowly down the drain. The salt acts as a mild abrasive that scours the pipe walls as the hot water carries it through, while the heat melts grease and softens soap residue. This method works best when combined with the baking soda and vinegar treatment — use the salt flush as the final hot water step.
Lemon Juice and Baking Soda
If you’re out of vinegar, lemon juice works as a substitute with a similar acidic reaction. Pour half a cup of baking soda into the drain, follow with half a cup of fresh lemon juice, and let the mixture fizz for thirty minutes before flushing with hot water. The added benefit of lemon is its natural deodorizing power — it leaves the drain smelling noticeably fresher than vinegar does.
Borax Treatment
Borax (sodium borate) is a naturally occurring mineral that acts as a cleaning booster, water softener, and mild disinfectant. Pour three tablespoons of borax down the drain, follow with a cup of white vinegar, then a pot of boiling or very hot water (use hot tap water for PVC pipes). Let it sit for fifteen minutes, then flush again with hot water. Borax is particularly good at breaking down the mineral component of clogs in hard water areas, and it inhibits mold and bacterial growth inside the pipe — an added hygiene benefit.
Preventive Habits That Replace Products
The greenest drain maintenance is the kind that doesn’t require any product at all. Running hot water for sixty seconds after every shower flushes soap and loose hair through before it can settle and bind. Wiping the drain cover with a cloth after your shower removes the thin film of soap that would otherwise migrate into the pipe. And brushing your hair before showering — rather than during — means fewer strands reach the drain in the first place. These zero-cost habits, practiced consistently, eliminate the need for most drain cleaning products entirely.
Preventing Future Clogs
Cleaning the drain once solves today’s problem; a few small habits keep it from coming back.
- Install a hair catcher. A simple mesh or silicone catcher stops the majority of hair before it ever reaches the pipe.
- Brush hair before showering. Loose strands that would otherwise wash down the drain end up in the brush instead.
- Run a monthly baking soda and vinegar treatment. Treat it as light maintenance rather than emergency repair.
- Rinse the drain cover weekly. Soap scum on the cover is an early sign of what’s building up below it.
- Keep up with general bathroom cleaning. A wider routine like a full bathroom deep clean also helps you catch mold and mildew before it spreads near the drain.
Building a Shower Drain Maintenance Calendar
The difference between a drain that never clogs and one that backs up every few months usually comes down to one thing: consistency. A drain that gets sporadic attention when problems surface will always be one bad month from a standing-water situation. A drain that follows a predictable maintenance rhythm stays clear with minimal effort. Here’s a practical calendar you can adapt to your household.
After Every Shower (30 Seconds)
Wipe the visible surface of the drain cover with your hand or a small cloth, removing any hair strands or soap residue clinging to it. If you have a hair catcher, lift it out, tap the collected hair into the trash, and replace it. This ten-second habit prevents ninety percent of hair from ever entering the pipe. Running the hot water for an extra fifteen to thirty seconds after you step out flushes residual soap and conditioner through the pipe before it can settle.
Weekly (5 Minutes)
Remove the drain cover and scrub it with an old toothbrush and dish soap. Pay attention to the slots or holes where water passes through — soap scum builds up here first. While the cover is off, look down into the drain opening and remove any visible hair or debris with tweezers or your fingers (gloves recommended). Replace the cover and run hot water for a minute to confirm good flow.
Monthly (20–30 Minutes)
Perform the full baking soda and vinegar treatment. Remove the drain cover, pour half a cup of baking soda into the pipe, add one cup of white vinegar, cover loosely, and let it sit for fifteen to twenty minutes. Follow with a hot water flush. This monthly treatment dissolves the thin layer of soap scum and grease that accumulates on pipe walls and prevents it from becoming a significant buildup.
Once a month is also a good time to inspect the drain cover itself for damage. Cracked or corroded covers can have sharp edges that snag hair more aggressively, and broken slots allow larger debris through to the pipe.
Quarterly (30–45 Minutes)
Every three months, go deeper. Remove the drain cover and run a plastic drain snake through the pipe, even if water seems to be draining fine. You’ll be surprised how much hair and gunk a snake pulls out of a drain that appeared to be working normally. This proactive snaking prevents the gradual accumulation that eventually causes a noticeable slowdown.
Quarterly is also the right frequency for a full P-trap inspection if your plumbing is accessible. Check the joints for any moisture that might indicate a slow leak, and tighten slip nuts if needed. If you use hard water, pour a cup of vinegar into the drain and let it sit overnight once per quarter to dissolve mineral scale.
Annually (1–2 Hours)
Once a year, schedule a more thorough assessment. Remove and deep-clean the drain cover with a vinegar soak (submerge it in a bowl of undiluted white vinegar for an hour, then scrub). Inspect the exposed pipe inside the drain body for corrosion, cracks, or significant mineral buildup. If you live in an older home with galvanized steel pipes, check for rust flakes or pinhole leaks. Consider having a plumber run a camera through your drain line every couple of years if your home is more than thirty years old — it’s a small investment that catches pipe deterioration before it becomes a costly emergency.
Adjusting for Household Size
A single person with short hair can probably stretch the monthly treatment to every six weeks without consequence. A family of four with multiple long-haired members may need to perform the baking soda treatment every two weeks and snake the drain monthly. The calendar above is a baseline — adjust the frequency based on how quickly you notice buildup accumulating on the drain cover. If the cover needs cleaning every few days rather than weekly, tighten your maintenance schedule proportionally.
The Best Drain Hair Catchers and Accessories
A hair catcher is the single most impactful investment you can make for shower drain maintenance. It costs a few dollars, takes seconds to use, and prevents the root cause of nearly every shower clog. But not all catchers are equal — here’s what to look for and how to choose the right one for your drain type.
Silicone Dome Catchers
These sit over the drain opening like a small dome or mushroom cap, with small holes around the edges that let water through while catching hair on top. They’re the most popular style because they fit almost any drain size, stay in place without adhesives, and are easy to clean — just lift, wipe off the hair, and replace. The main limitation is that they raise the drain profile by about half an inch, which can cause a small amount of water to pool around the base in very flat showers.
Flat Mesh Strainers
Thin stainless steel or silicone mesh screens that sit flush with the drain opening. These are the lowest-profile option and work well in showers with minimal floor slope or curbless designs where even a slight elevation matters. The finer mesh catches smaller debris — including pet hair and shaving stubble — that larger-hole catchers miss. The trade-off is that fine mesh clogs faster, so you need to clean it after every shower.
Drain Covers With Built-In Filters
Some newer drain covers incorporate a removable internal filter or basket that sits inside the drain body rather than on top of it. These are the most aesthetically discreet option since the visible cover looks like a standard drain grate. The internal basket catches hair before it enters the pipe and can be pulled out for cleaning without removing the entire cover. If you’re replacing a drain cover anyway, upgrading to one with an integrated filter is worth the few extra dollars.
Pop-Up Drain Stoppers With Hair Catching Screens
For bathtub-shower combinations that use a pop-up stopper, replacement stoppers with built-in hair screens serve double duty — they seal the drain for baths and catch hair during showers. These replace your existing stopper entirely and typically screw into the same drain fitting. Look for models with a stainless steel screen rather than plastic, since plastic screens warp over time from hot water exposure.
Keeping Your Catcher Effective
A hair catcher only works if you maintain it. A clogged catcher is no better than no catcher at all — in fact, it’s worse, because it creates an even more effective dam that holds water in the shower. Make it a reflex: when you turn off the shower, glance at the catcher. If hair is visible, remove it immediately. This single habit, combined with the maintenance calendar above, will keep your drain flowing freely for years with almost no effort.
Hard Water and Your Shower Drain: What You Need to Know
If you live in an area with hard water — and roughly 85% of the continental United States does — your shower drain faces an additional challenge beyond hair and soap. Dissolved calcium and magnesium minerals in hard water precipitate out as water cools or evaporates, leaving chalky white deposits on every surface they touch. Inside your drain pipes, this mineral scale accumulates year after year, gradually reducing the pipe’s internal diameter and making every other type of clog worse.
How to Tell If Hard Water Is a Problem
The most obvious sign is visible white, crusty buildup around the shower head, faucet, or drain cover. If you see it on the outside, there’s at least as much on the inside of your pipes. Other indicators include a persistent filmy residue on glass shower doors that reappears quickly after cleaning, stiff or faded laundry, and spots on dishes even after a dishwasher cycle. You can also request a free water hardness test kit from many municipal water departments, or purchase inexpensive test strips at a hardware store. Water above 7 grains per gallon (120 parts per million) is considered hard and will contribute to mineral accumulation in your plumbing.
How Mineral Scale Accelerates Clogs
Mineral deposits create a rough, uneven surface inside the pipe. In a smooth pipe, hair and soap slide through relatively easily. In a pipe coated with calcium scale, those same materials catch on the rough surface and start to build up. The result is a compounding problem: mineral scale narrows the pipe and gives debris something to cling to, which accelerates the formation of hair and soap clogs. A drain that might have lasted six months between cleanings in a soft-water area could need attention every two to three months in a hard-water zone.
Treatment Options for Mineral Buildup
White vinegar is the most accessible descaler for routine maintenance. Pour two cups of undiluted white vinegar into the drain once a month, let it sit for at least two hours (overnight is better), then flush with hot water. The acetic acid reacts with calcium carbonate to form soluble calcium acetate, which washes away with the water. For heavier buildup, commercial lime-scale removers based on citric acid or sulfamic acid work faster and are available at most hardware stores.
For long-term relief, consider a whole-house water softening system. Water softeners use ion exchange to replace calcium and magnesium ions with sodium ions, eliminating the mineral content that causes scale. While the upfront cost is significant — typically $1,500 to $3,000 installed — a water softener protects every pipe, appliance, and fixture in your home, and the drain maintenance benefits alone can justify the investment if hard water is significantly impacting your plumbing.
Prevention in Hard Water Areas
In addition to monthly vinegar treatments, make hot water flushes a regular habit. Minerals precipitate more readily in cool water, so keeping the pipe warm helps prevent deposits from forming. A thirty-second blast of the hottest water your tap produces after each shower keeps the pipe walls cleaner than cold water alone. If you’re considering a grout cleaning routine for your shower tile, addressing the drain at the same time makes sense — hard water affects grout, tile, and drain pipes simultaneously.
Shower Drain Cleaning by Pipe Material
The type of pipe beneath your shower determines which cleaning methods are safe to use aggressively and which ones you should approach with caution. Using the wrong technique on the wrong pipe material can cause damage that turns a simple clog into a costly repair.
PVC (Polyvinyl Chloride)
PVC is the most common pipe material in homes built after the 1970s. It’s lightweight, inexpensive, and resistant to corrosion and chemical damage from most household cleaners. You can safely use baking soda and vinegar, enzyme cleaners, and hot tap water on PVC without concern. The one caution: avoid boiling or near-boiling water. PVC begins to soften at around 140°F (60°C), and repeated exposure to temperatures above that can deform joints and weaken solvent welds. Hot tap water — typically 120°F (49°C) — is perfectly safe and plenty effective for dissolving soap scum.
PVC is also the most forgiving material for drain snakes. Plastic zip-it tools and soft-tipped metal snakes work well without risk of scratching. If you use a heavier drum auger, keep the rotation speed moderate and don’t force it through tight bends — PVC fittings can crack under excessive lateral pressure.
ABS (Acrylonitrile Butadiene Styrene)
ABS is a black plastic pipe similar to PVC in its cleaning tolerances. The same rules apply: hot (not boiling) water, gentle snake use, and no concerns with baking soda, vinegar, or enzyme-based cleaners. ABS is slightly more impact-resistant than PVC but equally susceptible to heat damage, so the same temperature precautions apply.
Cast Iron
Found in homes built before the 1970s, cast iron pipes are extremely durable but vulnerable to corrosion from the inside. Over decades, the interior surface rusts and becomes rough, creating the same kind of debris-catching surface that mineral scale does in hard water areas. Cast iron is generally safe with baking soda, vinegar, and hot water, but you should be more cautious with commercial chemical drain cleaners — repeated use of caustic (sodium hydroxide) cleaners can accelerate internal corrosion in older cast iron that’s already thinning.
Drain snakes require care with cast iron. The rough interior surface can catch and jam a snake, and aggressive forcing can chip corroded sections. Use a flexible plastic snake first; upgrade to a metal auger only if necessary, and work it gently. If your cast iron pipes are more than fifty years old, consider having a plumber inspect them with a camera before attempting aggressive cleaning — what looks like a simple clog may actually be a section of pipe that’s corroded nearly shut and needs replacement.
Galvanized Steel
Another legacy pipe material, galvanized steel is steel pipe coated with zinc to prevent rust. Like cast iron, it corrodes from the inside over time, and the zinc coating eventually wears away. Galvanized pipes in homes from the 1940s through 1960s are often at the end of their service life by now. Cleaning methods that are safe for newer pipes can sometimes dislodge chunks of corrosion in old galvanized pipe, potentially creating a clog further down the line. If you suspect your shower uses galvanized pipe (check visible pipe in the basement or crawlspace — galvanized is silver-gray and threaded at joints), proceed gently with all cleaning methods and consider a plumber’s assessment if clogs are recurring.
Copper
Occasionally used for drain lines in higher-end homes, copper pipe is the most chemically resistant common pipe material. You can use virtually any cleaning method safely on copper, including stronger commercial cleaners. Copper doesn’t corrode in the same way iron does, but it can develop a green patina (verdigris) on exterior surfaces, which is cosmetic rather than structural. The main concern with copper is the solder at joints — older solder formulations contained lead, so if you’re working with pre-1986 copper drain pipes, wear gloves and wash thoroughly after any contact with pipe internals.
How to Identify Your Pipe Material
If you’re unsure what your shower drain connects to, the easiest check is to look at any exposed pipe in the basement, crawlspace, or access panel directly below the shower. PVC and ABS are plastic (white/gray for PVC, black for ABS). Cast iron is heavy, dark gray or black, and has a bell-shaped hub at each joint. Galvanized steel is silver-gray with threaded fittings. Copper is distinctive reddish-brown. If no pipe is visible, the age of your home is a strong indicator: pre-1970 likely means cast iron or galvanized, 1970s and newer is almost always PVC or ABS.
Eliminating Shower Drain Odors for Good
A smelly shower drain is one of the most common bathroom complaints, and while it’s often mentioned alongside clogs, odor is actually a separate problem with its own causes and solutions. A drain can smell even when water flows freely, and a clogged drain doesn’t always produce odor. Understanding what’s causing the smell determines the right fix.
Bacterial Growth in the Drain
The warm, moist, nutrient-rich environment inside a shower drain is ideal for bacteria. As they feed on organic matter — soap residue, skin cells, hair — they produce volatile sulfur compounds that smell like rotten eggs or a musty basement. This is the most common cause of shower drain odor, and it responds well to treatments that kill bacteria or remove their food source.
Pour half a cup of baking soda into the drain, followed by one cup of white vinegar. Let it fizz for fifteen minutes, then flush with boiling or very hot water (hot tap water for PVC). The combination of the acid reaction and the hot water kills a significant portion of the bacterial colony and flushes away the organic matter they feed on. Repeat weekly until the smell disappears, then switch to monthly treatments for maintenance.
Dried-Out P-Trap
Every drain has a P-trap — a curved section of pipe that holds a small amount of standing water. That water acts as a physical barrier, blocking sewer gas from rising up through the drain and into your bathroom. If a shower goes unused for more than a week or two, the water in the P-trap can evaporate, removing the barrier and allowing a sewage-like odor to enter the room. The fix is straightforward: run the shower for two to three minutes to refill the trap. If the smell persists after refilling, the trap may have a leak that’s allowing it to drain — check for moisture around the trap joints and tighten or replace as needed.
Mold and Mildew Inside the Pipe
Mold thrives in dark, damp environments, and the inside of a rarely cleaned drain pipe is prime territory. Mold-related odors tend to smell musty or earthy rather than sulfurous, and they’re often strongest right after the shower has been used, when the water flow disturbs the mold colonies. To address mold inside the drain, pour one cup of hydrogen peroxide (3% concentration, the standard drugstore strength) into the drain and let it sit for an hour. Hydrogen peroxide kills mold on contact without producing toxic fumes. Flush with hot water afterward. Repeat every two weeks until the smell is gone.
Soap and Organic Residue Decomposition
Sometimes the odor source isn’t bacteria or mold but simply accumulated organic residue decomposing slowly in the pipe. This is common in showers that get heavy use — the constant supply of soap, skin cells, and hair means there’s always fresh organic matter being added faster than it can be flushed away. An enzyme-based drain maintenance product is particularly effective for this type of odor because the enzymes break down the organic residue at the molecular level, eliminating the odor source rather than just masking it.
Sewer Gas From a Plumbing Issue
If the smell is distinctly sewage-like and doesn’t respond to any of the cleaning methods above, the problem may be a plumbing issue rather than a hygiene one. A cracked P-trap, a disconnected vent pipe, or a failed wax seal at the shower drain connection can all allow sewer gas to bypass the water barrier. These situations require a plumber’s diagnosis — the smell is unpleasant but more importantly, sewer gas in enclosed spaces is a health concern that warrants prompt professional attention.
Quick Odor Elimination Methods
For an immediate but temporary fix while you work on the underlying cause: pour a few drops of essential oil (tea tree, eucalyptus, or lavender) into the drain after cleaning. The oil coats the pipe walls and produces a pleasant scent for several days. Boiling water with a splash of lemon juice poured slowly down the drain also provides a quick freshness boost. These are cosmetic fixes, not solutions — they buy you time while the real treatment (cleaning, enzyme application, or plumbing repair) takes effect.
Shower Drain Health: Bacteria, Germs, and Hygiene
Most people think of their shower as a place where you get clean — and it is. But the drain at the bottom of that shower is one of the most microbially active spots in your entire home. Understanding what’s living down there, why it matters, and how to manage it turns your shower drain from an afterthought into a genuine part of your household hygiene routine.
What Lives in Your Shower Drain
Research has identified shower drains as significant reservoirs of bacteria, including species of Mycobacterium, Pseudomonas, and various biofilm-forming organisms. Biofilms are thin, slimy layers of bacteria that adhere to the inside of pipes and are remarkably resistant to standard cleaning — they can survive chemical treatments that kill free-floating bacteria in seconds. While the vast majority of these organisms are harmless to healthy individuals, they can pose risks for people with compromised immune systems, open wounds, or chronic respiratory conditions.
Fungal organisms, particularly Aspergillus and various mold species, also thrive in the dark, damp interior of drain pipes. These produce the musty smell associated with poorly maintained drains and can release spores into the air during and after shower use.
Why Drains Become Bacterial Hotspots
Three factors converge to make shower drains ideal for microbial growth: warmth (shower water is typically 98–105°F), moisture (the drain never fully dries between uses), and nutrients (soap, skin cells, hair, and body oils provide a constant food supply). Unlike a countertop or floor, the inside of a drain pipe is virtually never exposed to air or sunlight — two natural disinfectants — so once a bacterial colony establishes itself, it faces very little environmental pressure to keep it in check.
Practical Steps for a Cleaner Drain
Complete sterilization of a drain pipe isn’t realistic or necessary, but you can significantly reduce the microbial load with a few targeted practices:
- Monthly hot water and vinegar treatment. The acidity of vinegar disrupts biofilm formation and kills many common bacteria. Following with hot water flushes away the loosened organisms.
- Quarterly hydrogen peroxide treatment. Pour one cup of 3% hydrogen peroxide down the drain and let it sit for an hour before flushing. Hydrogen peroxide is effective against both bacteria and mold without leaving toxic residues.
- Keep the drain cover clean. The visible drain cover collects the same organic residue as the pipe but is exposed to air, which allows some drying between uses. Wiping it daily removes the nutrient layer before it can migrate into the pipe.
- Ensure good ventilation. Running the bathroom exhaust fan during and for twenty minutes after every shower reduces humidity in the room, which helps the drain and surrounding surfaces dry faster. Less standing moisture means less opportunity for microbial growth.
- Replace old drain covers. Over years of use, drain covers develop micro-scratches and corrosion pits that harbor bacteria even after cleaning. A new stainless steel or silicone cover costs a few dollars and gives you a clean starting surface.
Special Considerations for Households With Vulnerable Individuals
If someone in your household is immunocompromised, undergoing chemotherapy, recovering from surgery, or has a chronic respiratory condition, maintaining a cleaner drain environment becomes more important. Consider increasing the hydrogen peroxide treatment to monthly, using an enzyme-based drain cleaner as a regular maintenance product (enzymes break down the organic matter that feeds bacteria without producing harsh fumes), and ensuring the bathroom is well-ventilated at all times. If foot infections like athlete’s foot are a recurring issue, cleaning the shower floor and drain area with a dilute bleach solution (one tablespoon of bleach per gallon of water) once a week can help reduce fungal load on surfaces where bare feet make contact.
When to Call a Plumber
Most shower drain clogs are a DIY job, but a few signs point to something beyond a cleaning fix:
- Multiple drains in the house are slow at the same time — this usually points to a main line issue, not a local clog.
- Water backs up into the shower from another fixture, like the toilet.
- You’ve cleared the P-trap and it’s still draining slowly.
- You notice a persistent sewage smell after cleaning.
- The pipes are old galvanized steel and prone to corrosion buildup rather than simple clogs.
These situations usually mean the blockage is further down the line, or that the pipe itself needs repair — both jobs where a professional plumber’s equipment and cameras genuinely earn their cost.
DIY vs. Professional Drain Cleaning: Costs Compared
One of the most common questions homeowners ask is whether to tackle a drain problem themselves or call in a professional. The answer depends on the severity of the clog, the age and material of your plumbing, and how much of your time you’re willing to invest. Here’s a realistic cost comparison to help you decide.
DIY Costs
For most routine and moderate clogs, the DIY approach costs almost nothing in materials. A box of baking soda runs $1–$3, a bottle of white vinegar is $2–$4, and a plastic drain snake or zip-it tool costs $5–$10. If you need an adjustable wrench for P-trap removal, that’s a $10–$20 one-time purchase that you’ll use for decades of home maintenance. Total investment for the full five-step process outlined in this guide: under $25, and most of those materials are reusable or useful for other household tasks.
The real cost of DIY is your time. A simple baking soda and vinegar treatment takes twenty minutes with most of that being wait time. A full drain snake and P-trap cleaning might take forty-five minutes to an hour for someone who hasn’t done it before. Once you’ve done it once, subsequent cleanings go much faster as you develop a feel for the process.
Professional Costs
A plumber’s visit for a straightforward shower drain cleaning typically costs between $100 and $250, depending on your area and the severity of the clog. This usually includes a basic snake treatment and a camera inspection if needed. More complex jobs — like removing a section of corroded pipe, clearing a main line blockage, or hydro-jetting — can run $300 to $600 or more.
The value a professional brings isn’t just the equipment (though commercial-grade drain machines and sewer cameras are significantly more powerful than consumer tools). It’s the diagnostic ability. A plumber can tell the difference between a simple hair clog and a collapsed pipe, between soap buildup and root intrusion in the main sewer line. That diagnosis can prevent you from spending hours trying to clear a clog that no amount of baking soda will fix.
When DIY Makes Sense
- Water is draining slowly but not completely stopped
- The shower is the only affected fixture in the house
- Your plumbing is PVC or ABS (forgiving of beginner mistakes)
- You haven’t tried any cleaning methods yet
- The drain has been cleaned successfully before using similar methods
When to Call a Professional
- You’ve completed the full DIY process and water still backs up
- Multiple drains are slow or backing up simultaneously
- There’s a sewage smell that doesn’t respond to cleaning
- Your home has old cast iron or galvanized pipes you’re not comfortable working with
- You suspect the clog is in the main sewer line
- Water appears in unexpected places — under the floor, in a ceiling below, or around the shower base
The Middle Ground: Renting Equipment
Some hardware stores and home improvement centers rent professional-grade drain cleaning machines, including motorized drain augers and small sewer cameras. A rental typically costs $40–$80 per day. This can be a worthwhile option if you’re comfortable with basic plumbing work and the DIY methods have failed but you’d like to avoid a full plumber’s visit. The caveat: motorized drain machines are powerful enough to damage pipes if used incorrectly, so familiarize yourself with the equipment before operating it.
Troubleshooting: When Your Cleaning Method Doesn’t Work
Even with the right method and careful execution, some drain problems don’t resolve on the first try. Here’s a troubleshooting guide for the most common scenarios where the standard cleaning process falls short, and what to try next before calling a plumber.
Water Still Drains Slowly After Baking Soda and Vinegar
This usually means the clog is too dense for the fizzing reaction to dissolve — most likely a compacted hair mat rather than a soap or grease film. The baking soda treatment addresses buildup on pipe walls but can’t physically remove a solid blockage. Move to the drain snake method and physically extract the obstruction. If the snake doesn’t find significant resistance, the clog may be past the P-trap — proceed to P-trap removal and cleaning.
The Drain Snake Doesn’t Catch Anything
If the snake goes in smoothly and comes back clean, but water is still slow, a few possibilities exist. First, the clog may be past the point where your snake can reach — a standard plastic zip-it tool extends about 18 inches, which may not get past the P-trap. Try a longer metal drain snake (typically 15–25 feet). Second, the issue may be a venting problem rather than a clog. Every drain needs air behind it to flow properly, and that air comes through a vent pipe that runs up through the roof. A blocked vent (from bird nests, leaves, or ice) creates a vacuum that slows drainage. If you hear gurgling sounds from other fixtures when the shower drains, a vent blockage is likely — that’s a professional job.
The Drain Smells Worse After Cleaning
Paradoxically, aggressive cleaning can temporarily make odors worse. When you disturb bacterial biofilms and organic deposits inside the pipe, you release concentrated odor compounds that were previously sealed under layers of buildup. This effect typically fades within a day or two as the disturbed material flushes away. If the smell persists beyond three days, or if it has a distinctly sewage character, the likely cause is a dried-out P-trap or a plumbing vent issue rather than residual cleaning disturbance.
A Clog Returns Within Days of Clearing
Rapid recurrence of a clog after thorough cleaning points to an underlying condition rather than a simple maintenance gap. Possibilities include a pipe belly — a section of pipe that sags due to ground settling, creating a low spot where water pools and debris accumulates — or a partial pipe collapse that catches materials as they pass through. Both require a plumber with a camera to diagnose. In the interim, you can manage symptoms with more frequent snaking and hot water flushes, but the root cause needs professional attention.
You Can’t Remove the Drain Cover
If a drain cover is corroded in place, stripped, or seized with mineral deposits, forcing it risks breaking the drain body — a much more expensive problem. Try spraying the screw or connection point with a penetrating oil (WD-40 or similar), letting it sit for fifteen minutes, then attempting removal again. For snap-in covers that won’t budge, a thin putty knife slid under the edge can break the seal. If the cover absolutely won’t come off, you can still perform a partial cleaning by pouring baking soda, vinegar, and hot water through the openings, and using a thin flexible tool like a zip-it snake through the slots. It’s less thorough than cleaning with the cover off, but it’s better than nothing while you plan a proper cover removal or replacement.
Water Backs Up Into Another Fixture
If running the shower causes water to appear in a nearby sink, bathtub, or — worse — a toilet, the blockage is almost certainly in the main drain line rather than the shower’s individual drain. This is beyond the scope of DIY drain cleaning. Stop using the affected fixtures and call a plumber. Main line blockages can cause sewage backup into the home, which is a health hazard and can cause significant water damage.
Frequently Asked Questions
How often should I clean my shower drain?
A light maintenance clean every 3–4 weeks and a deeper snake-and-flush treatment every three months keeps most drains running smoothly. Households with multiple long-haired family members may need to increase frequency.
Can I use bleach instead of vinegar?
It’s best avoided. Bleach doesn’t break down hair or grease the way vinegar’s acidic reaction does, and it can react dangerously if any ammonia-based cleaner is present in the pipe.
Why does my shower drain smell even after cleaning?
A lingering smell usually means the P-trap has dried out (letting sewer gas rise up) or there’s still organic buildup lower in the pipe. Running water for a minute or repeating the P-trap cleaning step usually resolves it.
Is it safe to use a drain snake on PVC pipes?
Yes, a plastic zip-it tool or a soft-tipped drain snake is safe for PVC. Avoid forcing a rigid metal auger too aggressively, since it can scratch or crack older plastic fittings.
What’s the difference between a shower drain clog and a slow leak?
A clog causes water to pool and drain slowly but eventually clears. A leak shows up as water appearing outside the pipe — under the floor, in a ceiling below, or around the drain base — and needs a plumber rather than a cleaning method.
Can baking soda and vinegar damage my pipes?
No, this combination is safe for PVC, metal, and most modern plumbing. It’s actually one of the gentlest methods available compared to caustic chemical cleaners.
How do I know if the clog is in the drain or further down the line?
If only the shower drains slowly while sinks and toilets work fine, the clog is local to that drain. If multiple fixtures are affected, the issue is likely in the main line.
Should I remove the drain cover every time I clean it?
For a quick maintenance treatment, no — pouring baking soda and vinegar through the cover works fine. For a deeper clean or snake treatment, removing the cover gives you much better access.
Can I use a wet/dry vacuum to unclog a shower drain?
Yes, a wet/dry vac set to liquid mode can create suction strong enough to pull out a stubborn clog, though it works best combined with, not instead of, physical removal with a snake.
Why does hair build up in the shower drain more than other drains?
Showers combine standing water, soap film, and constant hair shedding in one spot, which is a perfect environment for a mat to form quickly compared to a sink or tub used less frequently.
Do enzyme-based drain cleaners really work?
Yes, but patience is required. Enzyme cleaners work by digesting organic matter over several hours, not dissolving it instantly like caustic chemicals. They’re most effective as monthly preventive maintenance rather than emergency unclogging tools. Over time, the enzyme colonies become more established in the pipe and provide continuous cleaning between applications.
Can hard water cause my shower drain to clog faster?
Absolutely. Hard water minerals deposit on pipe walls, creating a rough surface that catches hair and soap more easily. In hard water areas, monthly vinegar treatments help dissolve mineral scale before it significantly narrows the pipe.
Is it worth replacing old galvanized or cast iron drain pipes?
If your home is more than fifty years old and has recurring drain problems despite regular cleaning, the pipes may be corroded enough that replacement is more cost-effective than repeated plumber visits. A plumber can run a camera through the line to assess pipe condition and give you a clear recommendation.
What’s the best type of hair catcher for a shower drain?
A silicone dome catcher is the most versatile option — it fits almost any drain, is easy to clean, and catches the vast majority of hair. For flat or curbless showers, a low-profile mesh screen may be a better fit. The most important factor isn’t the style but the consistency of cleaning it after every use.
Can a shower drain cause health problems?
While a slow or smelly drain is unlikely to make a healthy person sick, shower drains do harbor bacteria and mold that can be a concern for immunocompromised individuals. Regular cleaning, good ventilation, and occasional disinfection with hydrogen peroxide minimize any health risk.
How long does a shower drain last before it needs replacement?
The drain body and pipe connections typically last as long as the pipe material itself — 25–50 years for PVC, 50–75 years for cast iron. The drain cover or grate may need replacement every 10–15 years due to corrosion, wear, or aesthetic updating. If you’re renovating your shower, upgrading to a modern drain with an integrated hair filter is a worthwhile investment.
A Clear Drain Is a Simple Habit Away
Cleaning a shower drain isn’t glamorous, but it’s one of the most satisfying small wins in home maintenance — a five-minute job that saves you from a much bigger plumbing headache later. Start with baking soda and vinegar, follow up with a drain snake if hair is the real problem, and build a light monthly routine so you rarely need the deeper P-trap clean at all.
Shop Drain Cleaning Essentials