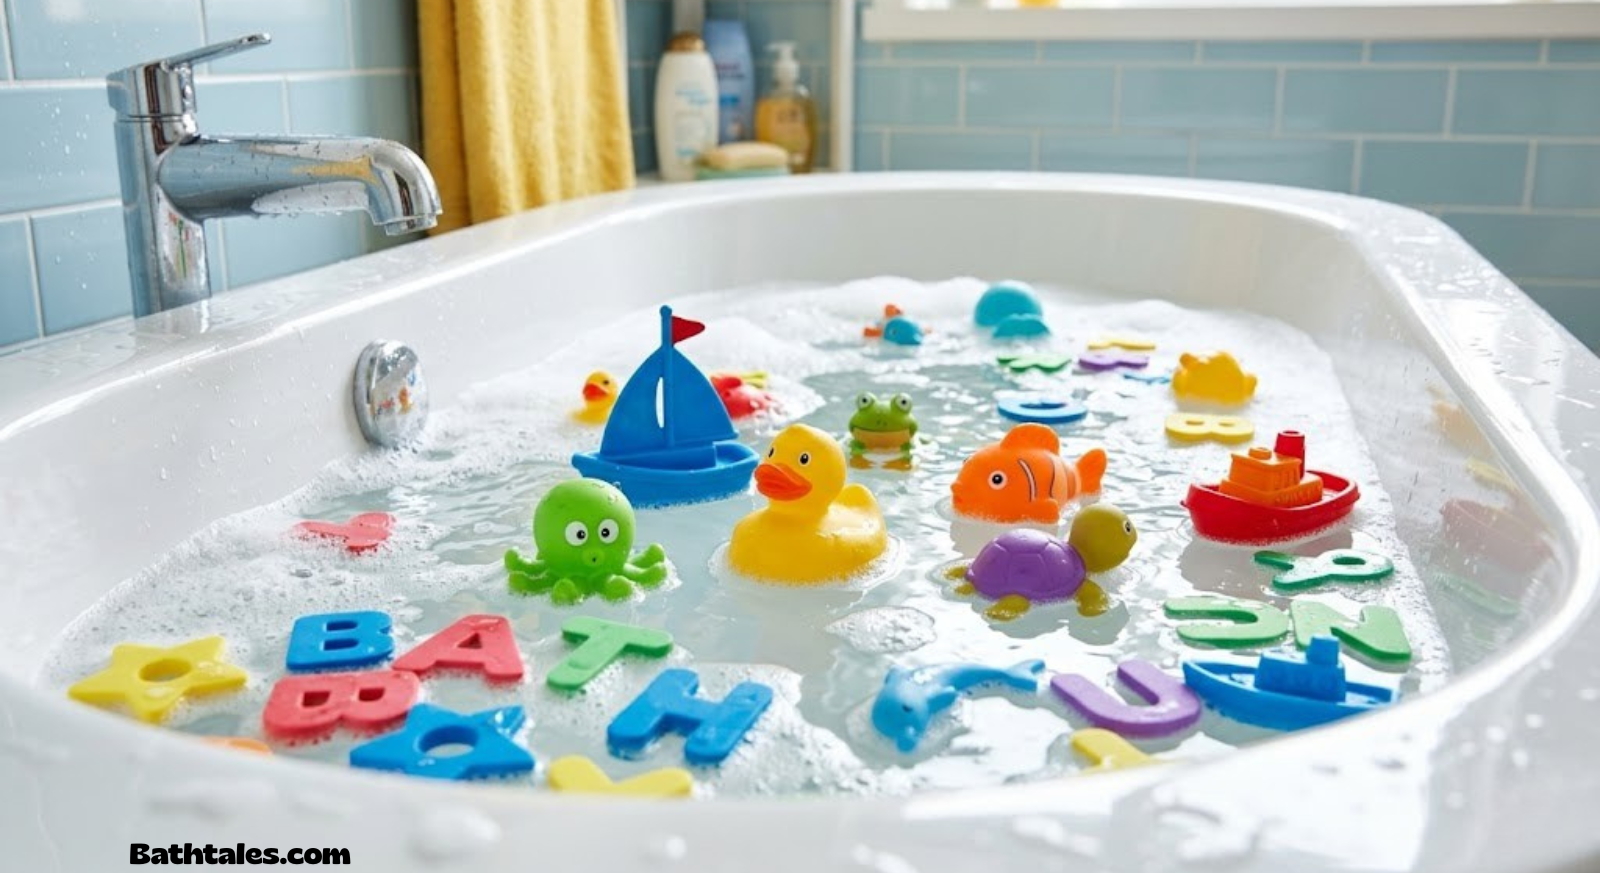
How to Sanitize Bath Toys: The Complete, Mold-Free Guide for Parents
Five proven, kid-safe methods to kill germs, banish black mold, and keep bath time squeaky clean.
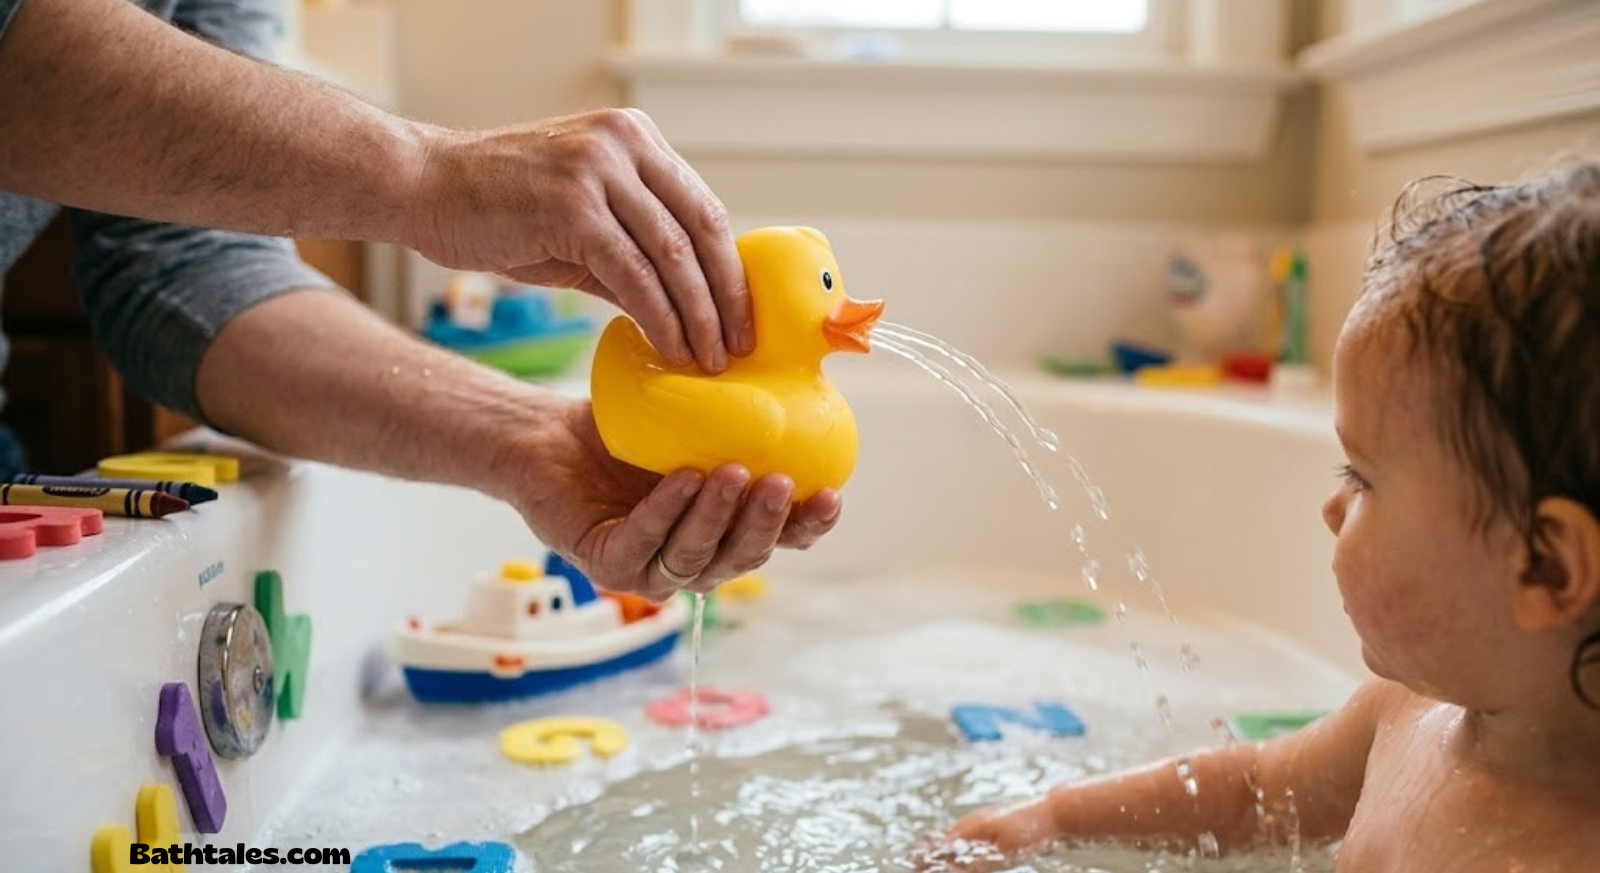
That familiar black gunk inside squirty toys isn’t just gross — it’s a mix of mold and bacteria. Here’s how to get rid of it for good.
If you’ve ever squeezed a rubber duck and watched a thread of black sludge ooze out into your toddler’s bathwater, you already know: bath toys are one of the germiest objects in the entire house. Warm water, trapped moisture, and soap residue create the perfect breeding ground for mold, mildew, and bacteria — and small children love putting these toys straight into their mouths. The good news is that sanitizing your child’s bath toys doesn’t require harsh chemicals or hours of scrubbing. With the right method, most toys can be fully cleaned in under thirty minutes, and a few small habit changes will keep them from getting grimy again.
This guide walks through five different sanitizing methods — from a gentle vinegar soak to a full bleach disinfection — along with step-by-step instructions, visual diagrams for every step, a full comparison chart, and answers to the questions parents ask most. Whether you’re dealing with a few plastic stacking cups or an entire mesh bag of squeeze toys with mold hiding inside, you’ll find a method here that fits your toys, your schedule, and your comfort level with cleaning products.
It’s also worth setting expectations up front: no single method is universally “best.” A parent with a newborn who’s more concerned about chemical exposure than a five-minute time savings will likely gravitate toward the vinegar soak, while a parent dealing with an already-moldy toy basket after months of neglect will get faster, more thorough results from the bleach method. Households with a dishwasher that already runs daily might find the dishwasher method the most sustainable long-term habit simply because it requires zero extra steps beyond loading a mesh bag. The right approach is less about finding one “correct” answer and more about matching the method to the toy, the mess, and the amount of time you realistically have on a given evening.
Why Bath Toys Get So Dirty So Fast
Bath toys look harmless, but they combine almost every condition mold and bacteria need to thrive: standing water, warmth, organic residue from soap and body oils, and — in the case of squirt toys — a sealed internal cavity that never fully dries out. Every time your child squeezes a rubber duck or a squirting fish, they pull in a mixture of bathwater, soap film, skin cells, and sometimes urine (yes, really) through the intake hole. That water sits inside the toy long after bath time is over, and within a few days a thin biofilm starts to form on the inner walls. Given a week or two, that biofilm becomes visible black or pink mold.
Solid toys aren’t immune either. Textured rubber ducks, foam letters, and bath books all have seams, crevices, and porous surfaces where soap scum and moisture collect. Add a humid bathroom with poor ventilation, and you have an environment that’s arguably more favorable to mold growth than a damp basement.
It also helps to understand why bath toys are structurally different from almost every other toy in the house. A stuffed animal that gets damp can be tossed in the dryer. A wooden block that gets wet can be wiped and set on a shelf to dry in open air within an hour. Bath toys, by contrast, are used specifically in an environment saturated with water and soap, then immediately placed into storage while still wet — often into a bag, bin, or net that traps humidity rather than releasing it. That combination of use-case and storage habit is what makes this particular toy category so uniquely prone to biological buildup compared to anything else your child owns.
There’s also a seasonal element worth mentioning. Bathrooms tend to run warmer and more humid in the colder months when windows stay closed and exhaust fans go unused, which is exactly the kind of environment mold thrives in. Parents often notice a spike in bath toy grime around winter, not because toys are being used any differently, but because the ambient humidity in the room has quietly climbed. Being aware of this seasonal pattern can help you decide when to bump up your cleaning frequency rather than being caught off guard by mold that seems to appear “out of nowhere.”
Signs Your Bath Toys Need Sanitizing Right Now
You don’t need to wait for a set schedule to know when it’s time to clean. Watch for these warning signs:
- Black or pink specks escaping from the hole when a toy is squeezed.
- A musty or sour smell coming from the toy box or mesh bag.
- A slimy film on the surface of hard plastic toys.
- Discoloration inside seams, textured grooves, or squeaker holes.
- Cloudy residue left behind in the bath after toys have soaked for a few minutes.
If you notice any of these, skip straight to the deep-clean methods below rather than a quick rinse — surface wiping won’t reach mold that has already colonized the inside of a toy.
It’s also worth doing a periodic “squeeze test” even when nothing looks obviously dirty. Pick up each squirt toy, gently squeeze it over a white paper towel or a light-colored sink basin, and watch what comes out. Clear water with no odor is a good sign. Cloudy water, a sour smell, or any colored flecks — even faint gray or tan rather than obvious black — means mold is already establishing itself, just not yet visible from the outside. Catching it at this early stage means a simple vinegar soak is often enough, rather than needing a full bleach disinfection later.
Texture changes are another subtle clue. Rubber that has started to feel slightly tacky, slippery, or unusually soft in one specific spot (rather than uniformly across the toy) often indicates that bacteria has begun breaking down the material itself. This is different from normal wear and is a sign that a toy may be nearing the end of its usable life regardless of how thoroughly it’s cleaned going forward.
Supplies You’ll Need
Most of these sanitizing methods use inexpensive household items you probably already have. Here’s the full supply list across all five methods, so you can pick and choose:
| Supply | Used For | Notes |
|---|---|---|
| White vinegar | Vinegar soak method | Plain distilled, no need for apple cider vinegar |
| Unscented liquid bleach | Bleach solution method | Regular strength, non-splash |
| Large basin or clean sink | Soaking toys | Big enough to fully submerge toys |
| Turkey baster or bulb syringe | Flushing squirt toys | Forces solution deep into cavities |
| Soft bristle brush or old toothbrush | Scrubbing seams and textured surfaces | Keep one dedicated brush for toys only |
| Microfiber cloth | Drying and wiping | Lint-free, gentle on plastic |
| Mesh laundry bag | Dishwasher method | Prevents small toys from falling through racks |
| UV sanitizing box (optional) | Chemical-free sanitizing | Good for daily quick sanitizing of hard toys |

Portable UV Sanitizer Box
A chemical-free way to sanitize pacifiers, small toys, and bath toy parts in minutes — handy for daily use between deep cleans.
Check Price on AmazonMethod 1: The Vinegar Soak (Gentle, Chemical-Free)
Best for: everyday maintenance cleaning, toys used by babies under one year, and parents who prefer to avoid bleach entirely.
White vinegar is mildly acidic, which makes it effective at breaking down soap scum and killing many common mold and bacteria strains without leaving behind harsh chemical residue. It won’t be quite as powerful as bleach against stubborn black mold, but for regular upkeep it’s the method most pediatric cleaning guides recommend first.
Fill your basin or sink with equal parts white vinegar and warm water — enough to fully submerge every toy. For a standard bathroom sink, that’s usually about 4 cups of each.
Push each toy under the surface and use a turkey baster or bulb syringe to draw solution in and out of the squirt hole several times. This forces the vinegar mixture into the internal cavity where mold actually lives, rather than just cleaning the outside.
Let everything sit fully submerged for 15 to 20 minutes. While toys soak, use a soft brush on any textured grooves, seams, or painted-on facial details where scum tends to hide.
Rinse thoroughly under running water, flushing squirt toys one more time with clean water to remove all vinegar residue. Stand toys upright, hole facing down, on a dish rack or towel so trapped water drains out completely.
Pros
- No harsh chemicals
- Safe for infant toys
- Cheap and always on hand
Cons
- Less effective on established black mold
- Vinegar smell can linger briefly
- Needs repeating more often
One reason the vinegar method remains the default recommendation from most pediatric and childcare sources is that it carries essentially zero risk of chemical irritation, even if a small amount of residual solution ends up in a child’s mouth during play the next day. This makes it the natural first choice for households with a new baby, for toys used during teething when everything ends up mouthed constantly, and for parents who simply want a clean-toy routine they can run without gloves, ventilation, or a second thought about rinsing thoroughness.
It’s also a method that scales well. A single basin can handle an entire toy basket at once, and because the ingredients are inexpensive, there’s no real cost barrier to running this soak more frequently than the other methods on this list — some families do a light vinegar flush every few days specifically because it’s cheap and gentle enough to not worry about overdoing it, reserving the stronger bleach method for a true monthly deep clean instead.
Method 2: Diluted Bleach Solution (Deep Disinfection)
Best for: toys with visible mold, toys that have been sitting unused for a while, or a thorough seasonal deep clean.
Bleach is the gold standard for actually killing mold spores rather than just loosening them, but it needs to be diluted correctly and rinsed thoroughly so no residue reaches your child’s mouth.
Combine 3/4 cup of regular unscented bleach with 1 gallon of water. This ratio is strong enough to kill mold and bacteria but dilute enough to rinse away safely. Never use bleach at full strength on toys.
Submerge toys fully and set a timer for 5 minutes. Bleach solution shouldn’t sit longer than necessary, especially on painted or colored plastics that can fade or degrade with prolonged exposure.
Rinse each toy under running water, then rinse a second time in a separate basin of fresh water. For squirt toys, flush the cavity with the baster at least four times to remove every trace of bleach.
Air dry fully, ideally outside the humid bathroom, before putting toys back into rotation. This prevents any residual moisture from restarting the mold cycle immediately.
Pros
- Kills mold spores, not just surface grime
- Fast — 5 minute contact time
- Best for visible black mold
Cons
- Requires careful rinsing
- Not ideal for very young infants’ toys
- Can fade colored plastics over time

Unscented Concentrated Bleach
A reliable, fragrance-free bleach for safely disinfecting baby and toddler items around the house.
Check Price on AmazonVentilation matters more than most parents expect when working with a bleach solution indoors. Even at a heavily diluted ratio, bleach fumes can build up in a small, poorly ventilated bathroom faster than in an open kitchen or laundry area. Cracking a window or running the exhaust fan for the duration of the soak isn’t just a nice-to-have — it noticeably reduces the sharp smell that otherwise lingers on hands and clothing long after the toys themselves have been rinsed clean.
Timing the bleach soak around nap time or a moment when young children aren’t in the immediate bathroom is also worth building into the routine, both to avoid curious hands reaching into the basin mid-soak and to give the solution the full uninterrupted five minutes it needs to actually disinfect rather than being pulled out early because a toddler wants their duck back.
Method 3: The Dishwasher Method (Hands-Off Convenience)
Best for: hard plastic toys without electronic parts, and parents who want a low-effort sanitizing option.
Solid hard plastic toys — stacking cups, boats, rings — are generally dishwasher safe. Skip anything with batteries, sound modules, or soft foam, since heat and water pressure can damage or warp them.
Place small toys inside a zippered mesh laundry bag so they don’t fall through the rack or bounce around near the heating element. Run a hot cycle without detergent, or with a small amount of dish soap.
Use the sanitize setting if your dishwasher has one — it holds water at a higher temperature specifically to kill bacteria. Skip the heated dry cycle to avoid warping plastic, and let toys air dry on a rack instead.
Pros
- Minimal hands-on effort
- High heat kills most bacteria effectively
- Good for a whole toy basket at once
Cons
- Not suitable for battery or foam toys
- Heat can warp thin plastic over time
- Doesn’t flush squirt toy cavities well
The dishwasher method tends to be the favorite among parents juggling more than one child, simply because it requires the least hands-on time of any option here. Loading a mesh bag of stacking cups and running it alongside the regular dinner dishes turns toy sanitizing into a task that happens automatically rather than one more thing added to an already full evening routine. The tradeoff is that it’s genuinely limited to solid, simple toys — anything with a battery compartment, speaker, or light-up element has no business going anywhere near a dishwasher cycle, and even sturdy-looking foam can absorb enough water during a wash cycle to take days to fully dry out afterward, which defeats the purpose of sanitizing in the first place.
Placement inside the machine also affects results more than people expect. Toys placed too close to the heating element at the bottom of some dishwasher models can develop soft spots or warping even if they’re technically labeled dishwasher-safe, so top-rack placement, away from direct heat exposure, is worth treating as a firm rule rather than a suggestion.
Method 4: Boiling Water Method (For Solid, Heat-Safe Toys)
Best for: solid rubber or silicone toys without electronics, teething toys, and pacifier-style bath items.
Check that the toy is labeled heat-safe silicone or solid rubber — never boil anything with a battery, glue seam, or painted-on plastic finish. Bring a pot of water to a rolling boil.
Using tongs, lower the toy into the boiling water and hold it fully submerged for 60 to 90 seconds — long enough to kill bacteria without warping the material.
Set the toy on a towel and let it cool fully to room temperature before your child touches it again — this can take several minutes for thicker silicone items.
Boiling is, in many ways, the most reliably thorough sanitizing method on this list, since sustained heat kills essentially everything without needing precise chemical ratios or a rinse step afterward. Its main limitation isn’t effectiveness but compatibility — most bath toy collections include a mix of materials, and only the simplest solid silicone or rubber pieces without glued seams, hollow cavities, or paint can safely handle full submersion in boiling water. Toys with any kind of internal air pocket can also expand rapidly when heated, occasionally causing seams to split, so a quick material check before boiling is worth the extra thirty seconds it takes.
For households with just one or two boil-safe items — a favorite silicone teether or a solid rubber ring — this method is often faster and more thorough than setting up an entire basin soak just for a couple of pieces, making it a convenient spot-treatment option to keep in rotation alongside a broader weekly method for the rest of the toy collection.
Method 5: UV Sanitizer Box (Fastest Chemical-Free Option)
Best for: quick daily touch-ups on hard toys, pacifiers, and teethers when you don’t have time for a full soak.
Place toys inside the UV box so that light can reach every surface — overlapping items create shadows that won’t be sanitized.
Close the lid and run the standard cycle, typically 3 to 10 minutes depending on the device. UV-C light disrupts bacterial and viral DNA without any liquid or residue.
Pros
- No chemicals, no water
- Fast — minutes, not a soak
- Great for daily touch-ups
Cons
- Upfront cost for the device
- Only sanitizes exposed surfaces, not deep inside squirt toys
- Box size limits how many toys fit at once
UV sanitizing boxes have become popular largely because they fit into the small pockets of time parents actually have available — a few minutes while a toddler is getting into pajamas, or overnight on a counter, rather than requiring a dedicated soak-and-scrub session. Because there’s no liquid involved at all, there’s also no rinse step and no drying time afterward, which makes this the fastest path from “used toy” to “ready for next bath” of any method covered here.
The tradeoff worth understanding clearly is that UV light only sanitizes what it can directly reach. It does nothing for the water trapped inside a squirt toy’s sealed cavity, and it can’t penetrate deep grooves or overlapping toys placed too close together inside the box. For that reason, most parents treat a UV box as a complement to — not a replacement for — one of the water-based methods above, using it for quick daily touch-ups on solid toys and pacifiers while still running a proper soak or flush on squirt toys weekly.
Fixing the Mold Inside Squirt Toys (The Real Problem)
Squirt toys deserve their own section because they’re the number one source of bath toy mold complaints. The squeeze hole that lets your child spray water everywhere is the exact same opening that lets soapy, dirty water in — and because there’s no drainage hole on the other end, that water often just sits there for days.
If a squirt toy already has visible mold inside, here’s the most effective approach: first flush it thoroughly with the diluted bleach solution from Method 2, working the baster in and out at least six to eight times. Then do a final flush with plain water, and instead of setting the toy down normally, store it hole-down over a small cup or hook so any remaining moisture continues draining for a full day. Some parents choose to permanently seal the hole with a small dab of waterproof glue once toys are fully dry and mold-free, effectively converting them into a solid toy that can’t refill with water again — though this does end the toy’s squirting function.
If mold keeps returning to the same toy no matter how often it’s cleaned, it may genuinely be time to retire it. Once mold has deeply penetrated porous rubber, some spores can survive even a bleach soak lodged in tiny cracks that are impossible to reach.
There’s a simple diagnostic many parents use before deciding whether to keep fighting for a toy or let it go: after a full bleach flush and complete drying, do a squeeze test again after one week of normal storage. If the water that comes out is clear, the toy has genuinely been sanitized and the mold cycle has been broken. If discoloration or odor returns within that first week even with good drying habits, the internal structure of the toy has likely been compromised beyond what cleaning alone can fix, and it’s reasonable to move it to the recycling bin rather than back into the bath basket.
For toys you’re trying to save, an extra trick some parents swear by is a baking soda paste flush. Mixing baking soda with a small amount of water into a thick paste, then working it into the cavity with the baster before the vinegar or bleach step, adds a mild abrasive action that helps dislodge biofilm clinging to the interior walls — something liquid alone sometimes struggles to fully remove from a toy that’s already had a mold problem once.
It’s also worth thinking about squirt toys on a spectrum rather than as simply “clean” or “moldy.” A toy that’s a few weeks old with light use and good drying habits behind it is a very different case from a toy that’s been in daily rotation for two years with inconsistent drying the whole time. The older, heavily used toy has had far more opportunity for biofilm to work its way into microscopic surface cracks that develop naturally in rubber and silicone over time from repeated flexing and squeezing. Recognizing that toy age and cumulative wear are real variables — not just how recently it was last cleaned — helps set realistic expectations about which toys are worth the extra effort of a baking soda flush and which are simply reaching the natural end of their usable life regardless of cleaning method.
Method Comparison Table
| Method | Best For | Effectiveness on Mold | Time Needed | Chemical-Free |
|---|---|---|---|---|
| Vinegar Soak | Everyday maintenance | Moderate | 20–30 min | Yes |
| Bleach Solution | Visible mold, deep clean | High | 15–20 min | No |
| Dishwasher | Hard plastic toys | Moderate–High | 1 cycle | Depends on detergent |
| Boiling Water | Solid silicone/rubber | High | 2–5 min | Yes |
| UV Sanitizer | Daily quick sanitizing | Moderate (surface only) | 3–10 min | Yes |
How Often to Sanitize Bath Toys
For most households, a light rinse and dry after every bath, combined with a full sanitizing session once a week, keeps mold from ever getting a foothold. Squirt toys benefit from a quick vinegar flush every few uses since they trap water the fastest. If your bathroom runs humid or toys sit in a mesh bag that never fully dries, weekly may need to become twice-weekly during warmer months.
| Toy Type | Recommended Frequency |
|---|---|
| Squirt/squeeze toys | Vinegar flush every 2–3 uses; full clean weekly |
| Solid rubber toys | Full clean weekly |
| Foam letters/numbers | Air dry after every use; clean every 1–2 weeks |
| Bath books | Wipe after use; deep clean every 2 weeks |
| Stacking cups | Dishwasher every 1–2 weeks |
These are starting points rather than fixed rules, and it’s worth adjusting based on what you actually observe in your own bathroom. A family in a dry climate with excellent bathroom ventilation may find their toys stay clean on a schedule looser than what’s listed above, while a family in a humid coastal region with a small, poorly ventilated bathroom may need to sanitize more often than these general guidelines suggest. The squeeze test described earlier is a more reliable indicator than any calendar-based schedule — if toys are coming back clear and odor-free at your current frequency, there’s no need to clean more often than that just because a guide says weekly.
It can also help to anchor sanitizing sessions to an existing routine rather than trying to remember a separate schedule entirely. Some parents run their weekly bath toy soak on the same day they change bathroom towels, or right before a weekend grocery trip so freshly cleaned toys are drying while the household is out of the house and the bathroom door can stay open for maximum airflow.
Preventing Mold Before It Starts
Sanitizing is only half the equation — the habits around bath time matter just as much. A few small changes dramatically cut down how often you’ll need a deep clean:
- Squeeze out water immediately after bath before setting squirt toys down, rather than letting them air dry with water still trapped inside.
- Never store wet toys in a sealed container — trapped humidity with no airflow is exactly what mold needs.
- Improve bathroom ventilation by running a fan or cracking a window after bath time so ambient humidity drops faster.
- Rotate toys so the same few items aren’t constantly wet; giving toys a full day to dry out between uses helps enormously.
- Rinse off soap residue from toys before putting them away — soap film is a food source for mold just as much as skin cells are.
Water chemistry plays a role too, even if it’s easy to overlook. Households on well water or with older plumbing sometimes have slightly higher mineral or organic content in their tap water, which can accelerate biofilm formation compared to municipal water with standard treatment. If you’ve noticed mold returning unusually fast despite following every drying and storage best practice, it may be worth using filtered water for the final rinse step during sanitizing, just to remove one more variable from the equation.
Bath time routine itself can also be adjusted slightly to reduce buildup. Adding bath toys at the very start of the bath, rather than the end, means they spend less total time steeping in water that’s gradually accumulating soap and body residue. It’s a small shift, but across dozens of baths a month, it measurably reduces how much organic material toys are exposed to before they’re removed and set aside to dry.
Finally, it’s worth periodically auditing the total size of the toy collection itself. A bath basket with twenty-five toys crammed together means less airflow around any individual item during drying, more toys competing for limited rack or hook space, and a higher overall cleaning burden each week. Trimming the rotation down to a smaller set of favorites — with the rest stored dry, away from the bathroom, and swapped in occasionally for variety — often does more to prevent mold buildup than any single cleaning technique, simply because fewer wet items packed into a small humid space is one of the most effective preventive changes a household can make.
Proper Bath Toy Storage After Sanitizing
The classic mesh bag suction-cupped to the tile is actually one of the worst storage choices, since it holds toys in a damp cluster with almost no airflow between them. A better setup is an open wire basket or a wall-mounted rack that lets water drip straight down the drain rather than pooling at the bottom of a bag. If you’re dealing with a recurring mold problem despite regular cleaning, the storage method is often the real culprit rather than the cleaning method itself. For a deeper breakdown of racks, baskets, and drying solutions that actually work, our dedicated guide on how to store bath toys covers several tested options side by side.
If mold has already become a recurring issue on toys you’re trying to save rather than replace, our companion article on how to clean mold from bath toys goes deeper into stubborn, already-established mold specifically, including which toys are worth salvaging and which are better retired.
The location you choose for a drying rack matters almost as much as the rack itself. A rack placed directly over the tub lets water drip straight down the drain, which is ideal, but it also means the rack itself sits in the same humid microclimate that caused the mold problem in the first place. Some parents find better results moving the rack to a spot just outside the shower area — on a nearby counter with a small towel underneath — where ambient humidity is naturally lower and airflow from the rest of the bathroom or hallway can reach the toys more easily. It’s a small adjustment, but for households in particularly humid climates, that difference in placement can be the deciding factor between toys that dry fully overnight and toys that stay faintly damp for days.
Labeling or color-coding storage by “clean and dry” versus “just used, still drying” is another simple system that prevents the common mistake of grabbing a toy mid-dry and tossing it back into the main bin before it’s actually ready. A second small basket dedicated purely to actively-drying toys, kept separate from the main storage container, makes this distinction visual and effortless rather than relying on memory during a busy bath-time routine.
Choosing Bath Toys That Are Easier to Keep Clean
If you’re building out a bath toy collection from scratch, or slowly replacing moldy toys as they’re retired, a little attention at the shopping stage can save a considerable amount of cleaning effort down the road. The single biggest factor is whether a toy has a sealed cavity at all — solid toys without any hole for water to enter are dramatically easier to keep mold-free than anything designed to squirt or float with air trapped inside. This one factor alone often explains more variation in how often a family finds themselves dealing with mold than any cleaning method they choose, since a collection built mostly around solid, hole-free toys can go far longer between deep cleans than one dominated by classic squirting rubber ducks and animals.
Beyond that, look for toys explicitly labeled as mold-resistant or designed with drainage in mind — some manufacturers now sell squirt toys with a secondary small drainage hole opposite the main opening specifically so water doesn’t pool inside between uses. Textureless or minimally textured surfaces are also easier to keep clean than toys with deep grooves, fur-like texture, or intricate molded details, since those crevices are exactly where soap scum and biofilm tend to accumulate fastest.
Material quality matters too. Higher-grade silicone and rubber tend to resist the kind of microscopic surface degradation that eventually makes a toy permanently porous, meaning a slightly more expensive, well-made toy often actually needs less frequent deep cleaning over its lifespan than a cheaper alternative that degrades faster under repeated water exposure. For parents specifically shopping with easy-clean features in mind, our age-based guides highlight which picks are solid, hole-free, or otherwise built with lower maintenance in mind: see the best bath toys for 1-year-olds and best bath toys for 4-year-olds guides for specific product recommendations by age and stage.
Sanitizing by Toy Material
Not every toy in the bath basket should be cleaned the same way. Material matters as much as the method:
| Material | Safe Methods | Avoid |
|---|---|---|
| Solid rubber | Vinegar, bleach, boiling | Prolonged full-strength bleach exposure |
| Silicone | Boiling, vinegar, dishwasher | None major — silicone is heat-tolerant |
| Hard plastic | Dishwasher, vinegar, bleach | Boiling (can warp thin plastic) |
| Foam | Vinegar wipe-down only | Full submersion, bleach, dishwasher |
| Bath books (vinyl) | Vinegar wipe, gentle bleach wipe | Boiling, full dishwasher cycle |
| Battery/electronic | Wipe with damp cloth only | Any submersion or dishwasher use |
If you’re shopping for new toys and want to sidestep some of these headaches entirely, look for solid silicone designs without squeeze holes — they’re dramatically easier to keep clean long-term. Our age-specific picks cover safe, easy-clean options for every stage: best bath toys for 1-year-olds, best bath toys for 2-year-olds, cool bath toys for 3-year-olds, and best bath toys for 4-year-olds.

Mold-Resistant Silicone Stacking Toys
No squeeze holes means no trapped water — a genuinely lower-maintenance choice for bath time.
Check Price on AmazonIt’s worth building a mental map of your child’s toy basket by material rather than treating every item identically, since a one-size-fits-all cleaning routine is often what leads to either under-cleaning the toys that need the most attention or over-cleaning delicate items in a way that shortens their lifespan. A quick sort — solid rubber and silicone in one group, hard plastic in another, foam and porous materials set aside for gentler treatment — takes only a minute or two but makes every subsequent cleaning session faster and more effective.
Painted or printed details deserve a specific note of caution across every material category. Even on toys that are otherwise dishwasher- or bleach-safe, repeated exposure to hot water or diluted bleach can gradually fade painted-on facial features or patterns faster than the base material itself degrades. This is purely cosmetic and doesn’t affect safety, but it’s useful to know in advance so a favorite duck’s slowly fading smile doesn’t come as a surprise after a few months of regular sanitizing.
Troubleshooting: When Cleaning Doesn’t Seem to Work
Occasionally a toy goes through a full sanitizing cycle and still smells musty or shows discoloration within days. A few common culprits explain most of these cases. First, incomplete drying is by far the most frequent cause — if a toy is returned to a damp mesh bag or sealed bin immediately after cleaning, any surviving spores have exactly the moist environment they need to regrow almost as fast as before the clean. Second, an insufficient flush on squirt toys — just one or two passes with the baster rather than the recommended six to eight — often leaves enough residual mold-contaminated water inside the cavity to reseed the whole toy within a week.
Water quality can occasionally play a role as well; toys cleaned with water that itself carries a higher mineral or organic load may re-develop a film faster than expected, which is why a final rinse with filtered or bottled water is sometimes recommended for toys that have proven especially stubborn. Finally, some toys — particularly older, heavily used rubber ducks with years of wear — may simply have degraded to the point where their internal material has become permanently porous enough to host mold no matter how thoroughly they’re cleaned. In these cases, no method on this list will produce a lasting fix, and replacement is genuinely the more practical option.
Before giving up on a toy entirely, it can help to isolate the variable that’s actually causing the repeat problem rather than assuming it’s the toy itself. Try storing that one specific toy separately from the rest of the collection, hole-down over a dedicated small cup, in the driest spot available in the bathroom, for one full cleaning cycle. If it stays clean under those close-to-ideal conditions but fails again once returned to normal shared storage, the issue may be more about the storage setup than the toy’s material — worth ruling out before writing off an otherwise-favorite item.
| Symptom After Cleaning | Likely Cause | Fix |
|---|---|---|
| Mold returns within days | Incomplete drying | Store hole-down, improve airflow, extend dry time |
| Smell persists after rinse | Insufficient flush cycles | Increase baster flushes to 6–8 passes |
| Discoloration reappears quickly | Degraded, porous material | Retire and replace the toy |
| Residue after bleach soak | Under-rinsing | Rinse twice, including a fresh basin rinse |
Sanitizing Bath Toys for Multiple Children or Daycare Settings
Households with more than one child, or in-home daycare setups where several kids share the same bath toys across a single day, face a different set of challenges than a single-family bathroom. When toys move between multiple children in quick succession, the standard weekly sanitizing schedule usually isn’t frequent enough, since each child introduces a fresh round of skin oils, saliva, and occasionally illness-causing organisms that can pass between kids far more easily through shared bath items than through toys used exclusively by siblings who already share close contact at home.
For shared or daycare use, it’s worth keeping two full sets of toys in rotation — one set actively in use and drying, and a second sanitized set ready to swap in. This lets you run a full bleach or dishwasher cycle without leaving bath time short on toys, and it naturally extends the drying window each set gets between uses, which is often the single biggest factor in preventing mold from taking hold in a high-traffic bathroom.
If a child in your care has recently been sick — particularly with a stomach bug or a contagious skin condition — it’s worth pulling that day’s toys for an immediate bleach sanitizing session rather than waiting for the regular weekly clean. Standard illnesses common in young children can survive on wet plastic and rubber surfaces for longer than most parents expect, so treating a known illness exposure as its own mini deep-clean event is a reasonable extra precaution.
Labeling toys by household or by child, where practical, is another habit worth adopting in shared-care settings. Even a simple system — a colored dot sticker on the bottom of each toy corresponding to a specific family or child — makes it far easier to trace which items need extra attention after a known illness, and helps avoid the awkward situation of an entire shared toy basket needing a full sanitizing pass when only one child’s items were actually the source of concern.
Sanitizing Bath Toys While Traveling
Hotel bathtubs, vacation rentals, and visits to grandparents’ houses all come with their own bath toy logistics. Toys that travel in a wet ziplock bag inside a suitcase are essentially guaranteed to develop mold within a day or two, since there’s zero airflow and often residual warmth from being packed against other items. If you’re bringing bath toys on a trip, pack only toys that have been fully dried for at least 24 hours beforehand, and bring a small mesh bag specifically so toys can hang and drip-dry in an unfamiliar bathroom rather than sitting in a wet pile on the tub ledge.
For longer trips, a travel-sized bottle of white vinegar takes up very little luggage space and lets you run a quick sanitizing soak in a hotel sink partway through the trip, which is often enough to prevent the kind of buildup that would otherwise require a full bleach treatment once you’re back home. Solid silicone toys without squeeze holes are, once again, the easiest option for travel specifically because there’s no cavity for water to hide in overnight.
A useful habit for frequent travelers is keeping a small, dedicated “travel only” set of two or three toys that never mix with the main at-home collection. Because these toys see less overall use between trips, they naturally have more time to fully dry and reset between each outing, and keeping them separate means you’re never scrambling to pull toys out of active daily rotation the night before a trip when they may not have had a full day to dry.
Natural and Alternative Sanitizing Options
Beyond vinegar, a few other pantry-friendly options come up often among parents who prefer to minimize synthetic cleaners around their children’s things. Hydrogen peroxide, used at a similar 1:1 dilution with water as the vinegar method, has mild antifungal properties and is sometimes preferred because it breaks down into water and oxygen rather than leaving any lingering smell. Lemon juice, while pleasant-smelling, is generally less effective than either vinegar or hydrogen peroxide against established mold and is better suited to freshening toys that are already clean rather than treating a genuine mold problem.
Baking soda, mentioned earlier as a scrubbing aid, can also be used as a milder standalone soak — one tablespoon per two cups of warm water — for toys used by very young infants where parents want to avoid vinegar’s acidity or any trace of bleach entirely. It won’t match bleach for killing an active mold colony, but as a gentle, food-safe option for otherwise-clean toys that just need a refresh, it’s a solid choice.
| Natural Option | Strength vs. Mold | Best Use Case |
|---|---|---|
| White vinegar | Moderate | Routine weekly cleaning |
| Hydrogen peroxide | Moderate–High | Odor-sensitive households |
| Baking soda soak | Mild | Newborn/very young infant toys |
| Lemon juice | Low | Freshening already-clean toys |
Essential oils are sometimes suggested as a natural addition to a vinegar soak, mainly for scent rather than any meaningful antimicrobial boost. While a few drops of tea tree oil do have some documented antifungal properties, the concentration typically used in a home soak is too diluted to meaningfully outperform vinegar alone, and undiluted essential oils can occasionally irritate a young child’s skin if residue isn’t rinsed thoroughly. If the goal is genuinely fighting mold rather than adding a pleasant scent, it’s reasonable to skip this addition and rely on the vinegar itself to do the work.
Common Mistakes to Avoid
- Only cleaning the outside. Wiping the surface of a squirt toy does nothing for the mold colony living inside the cavity.
- Mixing bleach and vinegar. This creates toxic fumes — always fully rinse and dry before switching cleaning agents.
- Storing toys wet. Even a perfectly sanitized toy will grow mold again within days if it’s put away damp.
- Skipping the rinse step. Bleach or vinegar residue left on a toy can irritate a child’s skin or mouth.
- Assuming “dishwasher safe” applies to everything. Battery-operated and foam toys should never go through a dishwasher cycle.
- Waiting for visible mold. By the time you can see black specks, a colony has usually been growing for over a week.
- Reusing the same cleaning brush for toys and other household surfaces, which can reintroduce contaminants you just spent time removing.
- Ignoring the toy box or bin itself. A clean toy placed into a moldy or grimy storage container gets recontaminated almost immediately — the container needs cleaning on the same schedule as the toys.
Most of these mistakes share a common thread: they undo the effort of an otherwise correct cleaning session at the very last step, usually around drying or storage rather than the actual sanitizing process. Getting the soak or wash right matters, but treating the after-care — rinsing, drying, and where the toy goes next — as equally important is really what determines whether a cleaning routine holds up over weeks and months rather than needing to be repeated from scratch every few days.
A useful way to think about it: sanitizing is a single event, but staying clean is a system. The soak or wash addresses whatever mold and bacteria already exist at that moment, but it does nothing to change the conditions that allowed them to grow in the first place. Pairing a genuinely effective cleaning method with better drying habits, smarter storage, and periodic honest evaluation of which toys are worth keeping is what actually breaks the cycle long-term, rather than any single product or technique working in isolation.
Frequently Asked Questions
How often should I sanitize bath toys?
A quick rinse and dry after every bath, plus a full sanitizing session once a week, is enough for most households. Squirt toys benefit from more frequent attention since they trap water the fastest, and homes with humid bathrooms or multiple children sharing toys may want to shorten that interval to twice a week during warmer, more humid months.
Is vinegar or bleach better for bath toy mold?
Vinegar is gentler and works well for routine maintenance, while diluted bleach is more effective against established black mold. Many parents alternate between the two depending on how dirty the toys are — using vinegar as the default weekly method and reserving bleach for toys that already show visible discoloration or a musty smell.
Can I put bath toys in the washing machine?
Hard plastic and rubber toys should not go in a washing machine — the drum and agitator aren’t designed for them. The dishwasher is a much better hands-off option for hard, solid toys.
What’s the black stuff inside squirt toys?
It’s typically a mix of mold and bacterial biofilm that develops when soapy water gets trapped inside the toy’s cavity and never fully dries out between uses.
Is it safe to seal the hole on a squirt toy?
Yes, once the toy is completely clean and dry, sealing the hole with waterproof glue prevents water from ever re-entering — though the toy will lose its squirting function.
Can moldy bath toys make my child sick?
Mold exposure can cause respiratory irritation, and ingesting mold or bacteria from a squeezed toy can occasionally lead to minor stomach upset, so regular sanitizing is worth the small time investment.
How do I clean bath toys without chemicals?
A white vinegar and warm water soak, or a boiling water dip for heat-safe solid toys, both sanitize effectively without any bleach or synthetic cleaners.
Should I throw away moldy bath toys?
If mold keeps returning after repeated cleanings, or if it has deeply discolored porous rubber, it’s usually best to retire the toy rather than keep fighting a losing battle with trapped spores.
Can I use a UV sanitizer for all bath toys?
UV sanitizer boxes work well for hard, exposed surfaces but can’t reach mold hiding deep inside a squirt toy’s cavity, so they’re best used alongside — not instead of — a soak or flush method.
What’s the fastest way to sanitize bath toys?
For solid, heat-safe toys, a 60 to 90 second boiling water dip is the quickest full sanitizing method, followed closely by a UV sanitizer box cycle of a few minutes.
How do I dry bath toys so mold doesn’t come back?
Stand toys upright with any holes facing down over a rack or towel, ideally outside the humid bathroom, and let them dry completely for at least a full day before storing.
Are foam bath toys safe to sanitize the same way?
Foam toys should be wiped down with a vinegar solution rather than fully submerged, since foam absorbs water and holds onto moisture far longer than solid rubber or silicone, and a fully soaked foam toy can take several days to dry out completely even in good conditions.
Can I use dish soap instead of vinegar or bleach?
Dish soap can loosen surface grime and is fine for a quick wipe-down, but it doesn’t reliably kill mold or bacteria the way vinegar, bleach, or boiling water do, so it shouldn’t be relied on as a stand-alone sanitizing method for toys that show any signs of mold.
Final Thoughts
Bath toys don’t have to be a constant source of mold and worry. With a regular rhythm — a quick rinse and dry after each bath, a proper deep clean weekly, and smarter storage that lets everything actually dry out — you can keep the entire toy basket genuinely clean without spending your evenings scrubbing rubber ducks. Pick whichever method above fits your toys and your schedule, and pair it with better drying habits, and mold simply won’t have the conditions it needs to come back.
Shop Bath Toy Cleaning Essentials