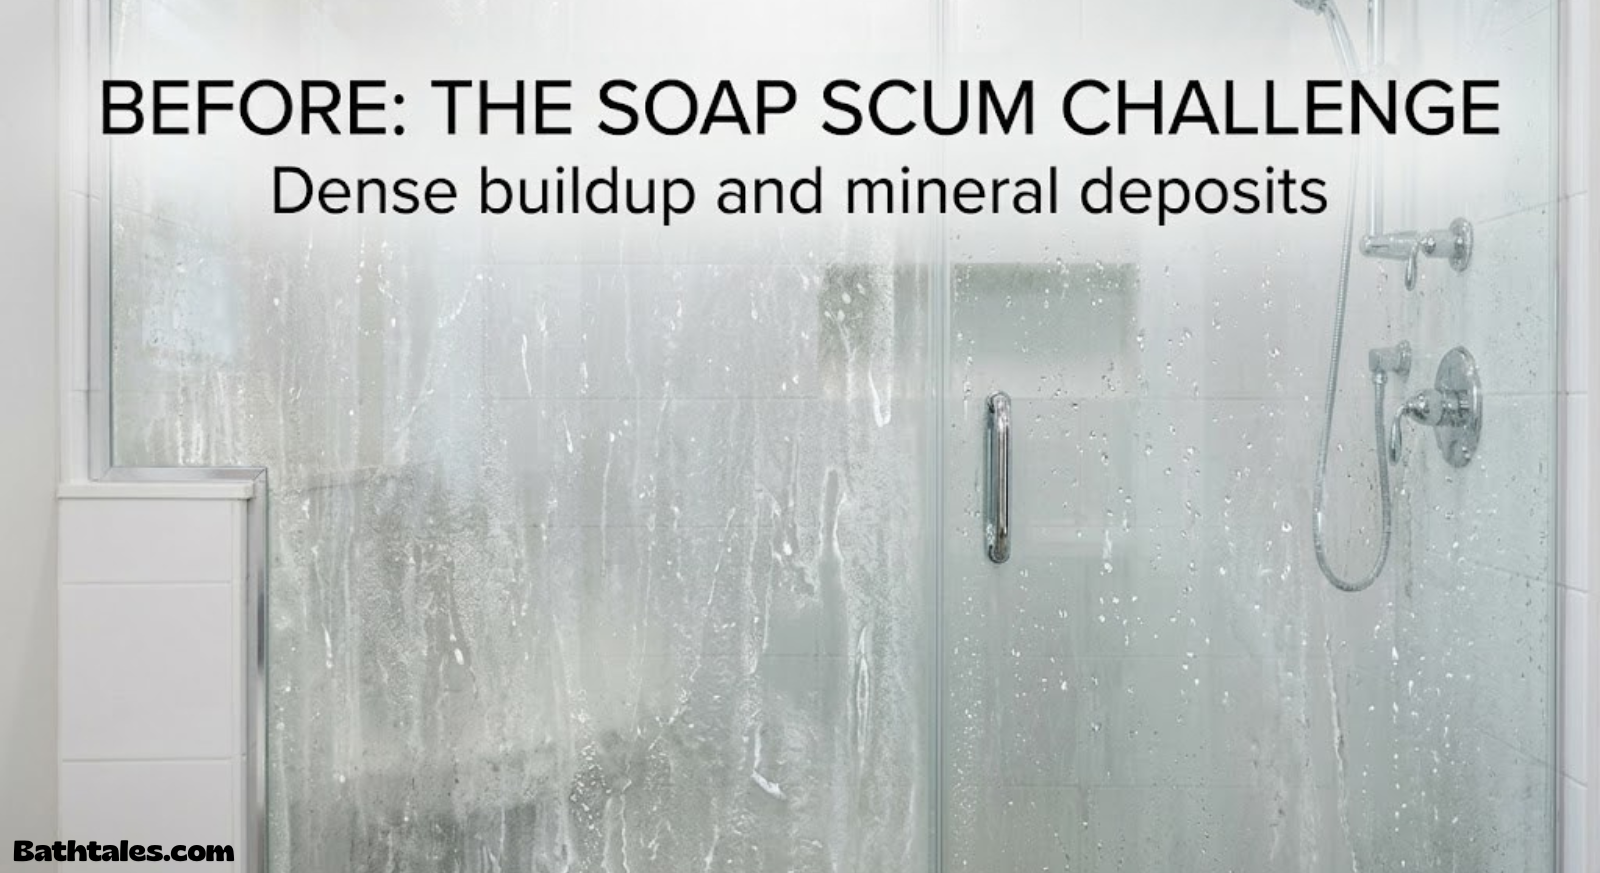
How to Remove Soap Scum: The Complete Step-by-Step Guide

A practical, no-nonsense method for stripping soap scum off glass, tile, tubs, and fixtures — without scratching a single surface.
What Soap Scum Actually Is
Soap scum is the chalky, filmy residue that forms when the fatty acids in bar soap or body wash react with minerals in your water — mainly calcium and magnesium. Instead of rinsing cleanly away, the soap binds to these minerals and creates a waxy compound that clings to glass, tile, and fixtures. That’s why it feels almost impossible to wipe off with just a wet cloth; the bond has already hardened into a mineral-soap solid by the time you notice it.
If you’ve ever wondered why your shower glass looks foggy even right after cleaning, this is usually the culprit. Unlike simple dirt, soap scum needs an acidic or surfactant-based approach to break the mineral bond before it will lift off.
This buildup is closely related to the same hard-water and mineral issues covered in our guide on how to get rid of bathroom mold, since both thrive in damp, mineral-rich environments.
Why It Builds Up So Fast in Bathrooms
Three conditions combine to accelerate soap scum: hard water, heat, and humidity. Hot showers dissolve more minerals into the air and onto surfaces, and the warm, moist environment never fully dries between uses — especially in households that shower daily. Add in bar soap (which produces more scum than gel-based washes) and you get a layer that thickens week after week if it isn’t managed.
Homes with harder water will notice scum forming noticeably faster than homes with softened water. If you’re also dealing with cloudy glass, chalky faucet heads, or a ring around the tub, hard water is very likely involved.
Supplies You’ll Need
| Supply | Purpose | Notes |
|---|---|---|
| White vinegar | Dissolves mineral bonds | Undiluted works best on heavy buildup |
| Baking soda | Mild abrasive paste | Safe on most surfaces |
| Dish soap | Cuts through oily residue | Pairs well with vinegar |
| Microfiber cloths | Streak-free wiping | Non-scratch |
| Non-abrasive scrub sponge | Agitation without scratching | Avoid steel wool on glass |
| Squeegee | Prevents future buildup | Use after every shower |
| Rubber gloves | Skin protection | Especially with commercial cleaners |
| Spray bottle | Even application | Reusable for DIY solutions |

Recommended: Streak-Free Microfiber Cloth Set
A dedicated set of microfiber cloths makes soap scum removal faster and leaves zero lint behind on glass.
Check Price on AmazonStep 1: Clear the Area and Pre-Rinse
Remove shampoo bottles, loofahs, and razors from the shower before you start. Then run hot water over the affected surfaces for 30–60 seconds. This softens the outer layer of scum and makes your cleaning solution far more effective, since it won’t have to fight through a dry, hardened crust first.
Step 2: Apply Your Cleaning Solution
Spray your chosen solution — vinegar-based, dish-soap-based, or a commercial soap scum remover — generously over the entire surface. Don’t just spot-treat visible spots; the mineral film often extends further than what’s visibly cloudy.
Step 3: Let the Solution Dwell
This is the step most people skip — and it’s the one that matters most. Give the solution 5–10 minutes of dwell time on light buildup, or up to 20 minutes on heavy, months-old scum. The acid in vinegar or the surfactants in dish soap need time to actually break down the mineral bonds; scrubbing too early just smears the film around.
Step 4: Agitate With the Right Tool
After the dwell time, scrub in small circular motions using a non-abrasive sponge or soft-bristle brush. For grout lines, switch to an old toothbrush or a dedicated grout brush to get into the recessed grooves without damaging the glass or tile glaze around them.
Step 5: Rinse Thoroughly
Rinse with warm water, working from top to bottom so loosened residue flows down and off the surface rather than resettling. Check for any remaining hazy patches — those usually indicate a spot that didn’t get enough dwell time or agitation, and can be treated with a quick second pass.
Step 6: Dry and Squeegee
Finish with a squeegee on glass and a dry microfiber cloth on tile and fixtures. Drying the surface completely prevents new mineral deposits from forming as water evaporates, which is the single biggest reason soap scum returns so quickly after cleaning.

Recommended: Stainless Steel Shower Squeegee
A dedicated squeegee used after every shower is the single most effective habit for preventing soap scum from returning.
Check Price on AmazonRemoving Soap Scum From Glass Shower Doors
Glass shows soap scum more obviously than any other surface because there’s no texture to hide the haze. Vinegar-soaked paper towels pressed directly onto the glass for 15 minutes work exceptionally well on frameless glass doors, since the acid stays in contact with the film the entire time instead of dripping away.
For hinges and frame edges, dip a cotton swab in vinegar to reach the tight corners a sponge can’t access. Once clean, a rain-repellent glass coating or a simple daily squeegee habit will keep the surface clear for weeks.
Removing Soap Scum From Tile and Grout
Tile and grout trap soap scum in their texture, so a baking soda paste (three parts baking soda to one part water) generally outperforms a spray-on liquid here — the paste clings to vertical surfaces and grout lines long enough to work. Apply the paste, let it sit for 10 minutes, then scrub with a grout brush.
If your grout looks discolored rather than just filmy, that may point to mold rather than scum; our guide on how to clean grout without scrubbing covers a gentler oxygen-based approach for stained grout lines.
| Surface | Best Method | Dwell Time |
|---|---|---|
| Glass doors | Vinegar-soaked paper towel | 15 min |
| Ceramic tile | Baking soda paste | 10 min |
| Grout lines | Baking soda paste + brush | 10–15 min |
| Acrylic tub | Diluted vinegar spray | 5–10 min |
| Chrome fixtures | Vinegar spray, soft cloth | 5 min |
Removing Soap Scum From Tubs and Fixtures
Bathtub rings usually respond well to a diluted vinegar spray followed by a light scrub with a non-abrasive sponge. Be careful with acrylic or fiberglass tubs — undiluted vinegar left too long can dull the finish, so a 1:1 water dilution is safer for daily-use tubs.
Chrome and stainless fixtures clean up quickly with the same vinegar approach, but always dry them immediately afterward, since standing moisture on metal invites new spotting almost instantly. If you soak in bath salts regularly, residue from those can also contribute to ring buildup — see our comparison of Dead Sea salt vs. Epsom salt for how mineral content varies by product.

Recommended: Daily Soap Scum Remover Spray
A no-scrub daily spray keeps tubs and glass from building up soap scum between deep cleans.
Check Price on AmazonNatural vs. Chemical Cleaners: Which Should You Use?
Natural (Vinegar / Baking Soda)
- Inexpensive and always on hand
- No harsh fumes
- Safe for most sealed surfaces
- Good for light-to-moderate buildup
Commercial Cleaners
- Faster on heavy, old buildup
- Often require ventilation
- Can be harsher on natural stone
- Higher ongoing cost
For most households, a natural vinegar-based routine handles regular maintenance just fine, while a commercial soap scum remover is worth reaching for when buildup has been neglected for months or when dealing with natural stone that needs a pH-balanced formula.
Best Product Types Compared
| Product Type | Best For | Effort Level |
|---|---|---|
| Vinegar spray | Weekly maintenance | Low |
| Baking soda paste | Grout and textured tile | Medium |
| Commercial scum remover | Heavy buildup | Low–Medium |
| Magic eraser-style pad | Stubborn spots | Medium |
| Squeegee (prevention) | Daily upkeep | Very Low |
How to Prevent Soap Scum From Coming Back
- Squeegee glass and tile after every shower — this alone cuts buildup dramatically
- Switch from bar soap to a gel or liquid body wash, which leaves far less residue
- Run a bathroom exhaust fan for 20–30 minutes after showering to reduce lingering moisture
- Consider a water softener if you’re in a hard-water area and dealing with frequent buildup
- Wipe down fixtures with a dry cloth once a day in high-use bathrooms
Pairing a clean shower routine with a relaxing soak routine can make bathroom maintenance feel less like a chore — see our guide on how to make a bath comfortable for ideas on turning cleanup into a more enjoyable ritual.
Common Mistakes to Avoid
- Skipping dwell time — scrubbing too soon just smears the film instead of lifting it
- Using steel wool on glass — this causes permanent micro-scratches that trap more scum
- Mixing vinegar with bleach — this combination releases harmful fumes and should never be done
- Leaving surfaces wet — drying is what actually prevents the next layer from forming
- Ignoring grout lines — scum trapped in grout keeps re-spreading onto clean tile
Building a Simple Weekly Routine
| Frequency | Task |
|---|---|
| Daily | Squeegee glass, wipe fixtures dry |
| Weekly | Vinegar spray on glass and tub |
| Bi-weekly | Baking soda paste on grout lines |
| Monthly | Deep clean with commercial remover if needed |
A consistent light routine takes far less total effort than periodic deep scrubbing sessions, and it keeps your bathroom looking clean between visits from guests. If you’re also maintaining other bathroom surfaces, our guide on how to deep clean a bathroom pairs well with this routine, and how to clean a shower drain covers the one spot most people forget.
Soap Scum vs. Hard Water Stains: What’s the Difference?
People use “soap scum” and “hard water stains” almost interchangeably, but they’re not quite the same problem, and knowing which one you’re actually looking at changes how you should clean it. Soap scum is the combination of soap residue and minerals — it needs a soap source to form, which is why it concentrates in showers and tubs and almost never appears on surfaces that only see plain water, like a kitchen faucet spout that’s never touched by body wash. Hard water stains, on the other hand, are pure mineral deposits left behind when water evaporates. They show up anywhere water sits and dries: around drains, on showerheads, on glass that gets splashed but not soaped, and inside kettles and coffee makers.
Visually, soap scum tends to look like a hazy, slightly greasy film that feels waxy or slippery when you run a finger across it. Hard water stains look more like chalky white spots or rings, and they feel gritty or crusty rather than slick. If you scrub a spot and it feels slippery before it lifts, you’re dealing with scum; if it feels like sandpaper, you’re dealing with mineral scale.
The cleaning approach overlaps heavily since both respond to acid, but the ratios differ slightly. Soap scum usually lifts faster with a bit of dish soap mixed into the vinegar, because the surfactant helps break the fatty-acid bonds, while pure hard water scale often responds best to straight vinegar or a dedicated descaling product with no soap added at all. If your bathroom has both problems layered on top of each other — which is extremely common — clean in two passes: a vinegar-and-dish-soap pass first to strip the soap-based film, followed by a plain vinegar soak on any remaining chalky spots to finish off the mineral scale underneath.
| Trait | Soap Scum | Hard Water Stains |
|---|---|---|
| Texture | Waxy, slippery film | Chalky, gritty deposit |
| Where it forms | Anywhere soap contacts water | Anywhere water evaporates |
| Color | Grayish-white haze | Bright white spots or rings |
| Best solvent | Vinegar + dish soap | Plain vinegar or descaler |
Soap Scum on Shower Curtains and Liners
Fabric and vinyl shower curtains collect soap scum along the bottom third, where splashback hits most directly, and the porous surface of a fabric liner makes this especially stubborn since the residue works its way into the weave rather than sitting on top of it. For vinyl or plastic liners, the washing machine is actually the easiest fix: toss the liner in on a gentle warm cycle with a cup of white vinegar added to the detergent, and add two bath towels to the load so the agitation scrubs the plastic without letting it fold on itself and crease.
Fabric curtains that are machine-washable can follow the same routine, but check the care tag first, since some blends shrink or lose their water-repellent coating in hot water. For curtains that aren’t machine-safe, or for spot treatment between washes, mix a solution of one part vinegar to one part warm water in a spray bottle, saturate the scummy area, let it sit for 10 minutes, and scrub gently with a soft brush before rinsing in the shower.
Line-drying rather than machine-drying is worth the extra step, since heat can set any remaining residue and make the next round of buildup adhere even more stubbornly. If a liner is more than a year or two old and the scum has visibly yellowed the plastic despite washing, replacement is usually more practical than continued deep cleaning — at that point the plastic itself has started to degrade and absorb residue at a level a wash cycle won’t reverse.
Soap Scum on Plastic and Fiberglass Shower Surrounds
One-piece plastic and fiberglass shower surrounds are common in rentals and older homes, and they need a gentler touch than glass or tile because the gel-coat finish scratches more easily and, once scratched, actually collects soap scum faster in the resulting micro-grooves. Skip anything abrasive — no steel wool, no scouring powders with grit, and no melamine erasers used aggressively — and stick with a soft microfiber cloth or a non-scratch nylon scrub pad.
A baking soda paste is usually the safest heavy-duty option for fiberglass, since it’s abrasive enough to lift buildup but soft enough not to dull the gel coat the way a harsher powder cleanser would. Apply it with light pressure, let it sit for 10 minutes, then wipe rather than scrub hard. For daily maintenance, a diluted dish soap solution wiped on with a soft cloth and rinsed immediately keeps buildup from ever reaching the point where aggressive scrubbing becomes necessary.
If a fiberglass surround has gone chalky or dull despite regular cleaning, that’s often the gel coat oxidizing rather than scum sitting on top — a fiberglass-safe polish or gel-coat restorer (the same category used on boats) can restore shine in cases where cleaning alone no longer helps.
Soap Scum on Natural Stone Showers (Marble, Travertine, Granite)
Natural stone showers are the one surface in this guide where the standard vinegar approach actively works against you. Marble, travertine, limestone, and even some granites contain calcium carbonate that reacts with acid, so vinegar, lemon juice, and most citrus-based cleaners will etch the surface — leaving dull, permanently rough patches that no amount of polishing fully reverses. This makes stone showers uniquely prone to a frustrating cycle: soap scum builds up, someone reaches for vinegar out of habit, and the fix ends up damaging the stone in the process.
Instead, use a cleaner specifically labeled “stone-safe” or “pH-neutral,” which relies on surfactants rather than acid to lift soap residue. A soft microfiber cloth or a stone-safe non-scratch pad should be the only agitation tool; grout brushes with stiff bristles can wear down honed or polished finishes over repeated use. Sealed stone holds up noticeably better against staining and scum absorption than unsealed stone, so if buildup has been a recurring problem, check when the stone was last sealed — most sealers need reapplication every 12 to 24 months depending on shower use, and resealing often reduces future scum buildup more than any cleaning product will.
For daily upkeep, a squeegee is even more valuable on stone than on glass, since it prevents both soap scum and the mineral spotting that shows up more visibly on stone’s matte or honed surfaces than it does on smooth glass.
Soap Scum on Colored or Stained Grout
Colored grout — the darker charcoals, grays, and earth tones popular in newer tile installs — hides soap scum less obviously than white grout at first glance, but it comes with its own complication: many of the abrasive pastes and bleach-based grout cleaners that work fine on white grout can lighten or blotch colored grout unevenly, leaving a patchy look that’s more noticeable than the scum was.
Test any new cleaner on a small, inconspicuous section first — inside a corner or behind a shampoo shelf — and let it sit for the full recommended dwell time before judging the result. For routine cleaning, a soft-bristle brush with a mild dish soap solution is safe on virtually all grout colors and handles everyday soap scum without risking discoloration. Reserve baking soda paste or oxygen-based cleaners for deeper buildup, and skip chlorine bleach entirely on colored grout, since it’s the most common cause of blotchy fading.
Epoxy grout, increasingly common in new installs, is far more resistant to soap scum absorption than traditional cement grout because it’s non-porous, so if you’re planning a remodel and soap scum has been a recurring headache, epoxy grout is worth asking your installer about specifically.
Soap Scum in the Bathroom Sink and Around Faucets
Sinks accumulate a different flavor of soap scum than showers — usually from hand soap and toothpaste rather than body wash — and it tends to concentrate right around the drain, the faucet base, and the underside of the soap dispenser where residue drips and sits without ever getting rinsed off during normal handwashing. Because bathroom sinks are cleaned more frequently than showers on average, the buildup is often thinner but more persistent, since the same few square inches are being coated day after day.
A quick daily wipe with a damp cloth around the faucet base prevents most of this buildup before it starts. For a deeper clean, spray the basin and faucet with an all-purpose vinegar solution, focus extra attention on the faucet’s base and any decorative grooves where residue collects, and use an old toothbrush to get into tight spots around the drain stopper hinge. Porcelain and enamel sinks tolerate vinegar well; if your sink is a natural stone vessel sink, follow the same stone-safe approach described above rather than reaching for vinegar.
Faucet finishes matter too — matte black and brushed gold finishes show water spots and soap residue more visibly than chrome, and some matte finishes can be damaged by abrasive scrubbing, so a soft cloth and a finish-safe cleaner (check the faucet manufacturer’s care instructions) is the safer default on higher-end fixtures.
Soap Scum on Silicone Caulk and Seals
Caulk lines around tubs, sinks, and shower pans are where soap scum and mildew most often team up, since the slightly textured surface of silicone traps residue and the joint itself stays damp longer than the surrounding tile or glass. A gray or yellowed tinge along a caulk line is frequently a combination of soap film and early mildew staining rather than either one alone, which is why cleaning caulk sometimes takes more effort than the smooth surfaces around it.
Start with a vinegar spray and a soft toothbrush worked gently along the caulk line — pressing too hard can pull silicone away from the substrate over time, so use light pressure and let the dwell time do the work rather than scrubbing aggressively. For caulk that’s staining rather than just filming over, a diluted oxygen bleach solution left to sit for 10–15 minutes typically lifts the discoloration without the fume concerns of chlorine bleach, and it’s safer for repeated use on silicone than harsher chemical options.
If caulk has gone from merely discolored to visibly cracked, peeling, or pulling away from the wall, cleaning won’t fix the underlying seal — at that point it needs to be stripped and re-caulked, since a compromised seal lets water behind the tile and invites much bigger problems than surface soap scum.
DIY Essential Oil Soap Scum Spray Recipes
A basic vinegar spray works well on its own, but adding a few drops of essential oil solves two small annoyances at once: it masks the sharp vinegar smell while it works, and several common oils — particularly tea tree and eucalyptus — have mild antimicrobial properties that help with the lingering mildew smell that often accompanies soap scum in a humid shower.
A simple starting recipe is 1 cup white vinegar, 1 cup warm water, 1 tablespoon dish soap, and 10–15 drops of tea tree, eucalyptus, or lemon essential oil, combined in a spray bottle and shaken before each use since the oil will naturally separate from the water-based solution over time. Lemon essential oil adds a bright scent and a touch of extra grease-cutting power, though it doesn’t add meaningful acidity beyond what the vinegar already provides, so it’s a scent choice more than a performance upgrade.
For a paste version suited to grout and textured tile, mix baking soda with just enough water to form a spreadable consistency, then stir in 5–8 drops of essential oil per half cup of baking soda. Keep any DIY solution in a labeled spray bottle, since unlabeled cleaning mixtures are a common source of household mix-ups, and avoid using citrus oils on natural stone for the same acid-etching reasons that rule out plain lemon juice or vinegar.
Tools That Make Soap Scum Removal Easier
Beyond a basic sponge and spray bottle, a few tools consistently cut cleaning time for people dealing with frequent or heavy buildup. Electric spin scrubbers — cordless handheld tools with a rotating brush head — take most of the physical effort out of scrubbing grout lines and textured tile, and they’re especially useful for anyone who finds sustained hand-scrubbing hard on the wrists or shoulders. Match the brush head to the surface: a soft head for glass and fiberglass, a stiffer nylon head for grout, and always start on the lowest speed setting on an unfamiliar surface to make sure it doesn’t leave swirl marks.
Steam cleaners are another category worth considering for households that deep-clean infrequently, since high-temperature steam loosens soap scum and mineral deposits without needing much chemical assistance at all, which is particularly useful on natural stone where acidic cleaners are off-limits. The tradeoff is time — steam cleaning takes longer per surface than a vinegar spray-and-scrub — so it tends to suit monthly deep cleans better than weekly maintenance.
For grout specifically, a cordless drill fitted with a nylon grout-brush attachment can turn a tedious hand-scrubbing job into a five-minute task, though the same caution about pressure applies — let the brush’s rotation do the work rather than pressing hard, since aggressive pressure can wear grooves into softer grout over repeated use.
Should You Hire a Professional Cleaner? Cost and When It’s Worth It
Most soap scum, even heavy buildup, is manageable with the DIY methods in this guide and doesn’t require professional help. Professional bathroom deep cleaning becomes worth considering in a few specific situations: when buildup has been neglected for a year or more and has hardened into a layer that resists repeated home attempts, when a natural stone shower needs both cleaning and resealing in the same visit, or when someone simply doesn’t have the time or physical ability to do the scrubbing themselves.
Pricing for a standalone deep bathroom clean varies by region and scope, but it’s typically billed either as an add-on to a standard house cleaning or as a flat per-bathroom deep-clean fee that’s noticeably higher than a routine cleaning visit, since scum and scale removal takes considerably longer than general tidying. Getting a couple of quotes and asking specifically whether soap scum and hard water buildup are included — rather than just surface wiping — avoids paying for a “deep clean” that skips the actual scrubbing.
If cost is the deciding factor, a middle-ground option is a one-time professional visit to strip years of accumulated buildup back to a clean baseline, followed by a DIY weekly routine to keep it from ever reaching that point again — this tends to be far cheaper over time than either recurring professional visits or repeated failed DIY attempts on heavily neglected surfaces.
Soap Scum in RVs, Campers, and Vacation Rentals
RV and camper showers present a unique challenge: the fiberglass or plastic surrounds are typically thinner and more scratch-prone than residential fixtures, water systems often run harder or more mineral-heavy depending on the campground source, and the compact space makes ventilation and drying much harder than in a full-size bathroom. The same gentle, non-abrasive approach used for plastic and fiberglass surrounds applies here, with extra emphasis on drying — running a small fan or cracking a roof vent after every shower matters even more in an RV, where humidity has nowhere to go.
For vacation rental hosts, soap scum is one of the most common sources of negative cleanliness reviews, precisely because it’s the kind of buildup that guests notice immediately but hosts stop seeing after living with it for months. A standing rule of squeegeeing glass and wiping the tub after every guest turnover, combined with a vinegar deep-clean on a fixed schedule (weekly for high-turnover properties), keeps the bathroom photograph-ready without requiring a full professional clean between every stay.
Travel-sized versions of the same supplies used at home — a small squeegee, a travel spray bottle pre-mixed with a vinegar solution, and a couple of microfiber cloths — make it realistic to maintain the same routine on the road that you’d use in a home bathroom.
Eco-Friendly and Pet-Safe Soap Scum Removal
Households with pets, small children, or anyone sensitive to fumes often want a soap scum routine that skips harsh commercial chemicals entirely, and the good news is that vinegar, baking soda, and dish soap — the core supplies in this guide — are already about as gentle and eco-friendly as effective cleaning gets. Diluted vinegar breaks down into water and biodegradable byproducts, and baking soda poses minimal risk if a curious pet licks a residual trace off a rinsed surface.
The bigger risk in most bathrooms isn’t the natural cleaners themselves but combining them carelessly with something else already under the sink — mixing vinegar with any bleach-based product releases chlorine gas regardless of how “natural” the vinegar side of the mix is, so store-and-label discipline matters as much as ingredient choice. Rinse surfaces thoroughly after any cleaning session in homes with pets, since animals sometimes lick shower walls or tub edges out of curiosity, and thorough rinsing removes the vast majority of residue even from otherwise low-toxicity cleaners.
For an extra eco-conscious step, reusable microfiber cloths and a refillable glass or aluminum spray bottle cut down on the paper towel and single-use plastic waste that a soap-scum routine can otherwise generate over a year of regular cleaning.
Frequently Asked Questions
What removes soap scum the fastest?
Undiluted white vinegar with a full dwell time of 15–20 minutes is typically the fastest DIY method for cutting through moderate-to-heavy buildup without scratching surfaces.
Is soap scum harmful to breathe or touch?
Soap scum itself isn’t toxic, but it can trap moisture that encourages mold growth over time, which is more of a concern than the scum itself.
Does WD-40 remove soap scum?
WD-40 can work on chrome fixtures in a pinch, but it’s not recommended for glass or tile since it can leave an oily film that’s tricky to fully rinse away.
Can I use vinegar on natural stone tile?
No — vinegar is acidic and can etch marble, travertine, and other natural stone. Use a pH-neutral stone-safe cleaner instead.
How often should I clean soap scum?
A quick squeegee after every shower plus a full vinegar wipe-down weekly is enough to prevent buildup from becoming a deep-clean project.
Why does soap scum come back so quickly after cleaning?
It usually returns fast when surfaces aren’t fully dried after showers, since evaporating water leaves fresh mineral deposits behind almost immediately.
Does hard water make soap scum worse?
Yes — the more calcium and magnesium in your water, the faster and thicker soap scum will build up on every bathroom surface.
Can I mix baking soda and vinegar together?
You can, but they neutralize each other quickly and fizz out, so it’s usually more effective to apply baking soda paste first, then follow with a vinegar rinse rather than mixing them in advance.
Will a magic eraser scratch glass?
Melamine sponges are mildly abrasive and can dull glass over repeated use, so it’s best to reserve them for stubborn spots rather than full-surface cleaning.
Does switching to liquid soap really reduce scum?
Yes — bar soap contains more fatty acids and binders that react with minerals, so liquid or gel body wash typically leaves noticeably less residue over time.
Final Thoughts
Soap scum isn’t complicated to remove once you understand what it actually is — a mineral-soap bond that needs time and the right acid or surfactant to break down. A consistent light routine, built around a quick daily squeegee and a weekly vinegar wipe-down, will keep your glass, tile, and fixtures looking freshly cleaned without ever letting buildup become a weekend-long project again.

Complete Your Cleaning Kit
Grab a squeegee, microfiber cloths, and a dedicated soap scum spray to keep your bathroom looking freshly cleaned all week long.
Shop Cleaning Essentials on Amazon