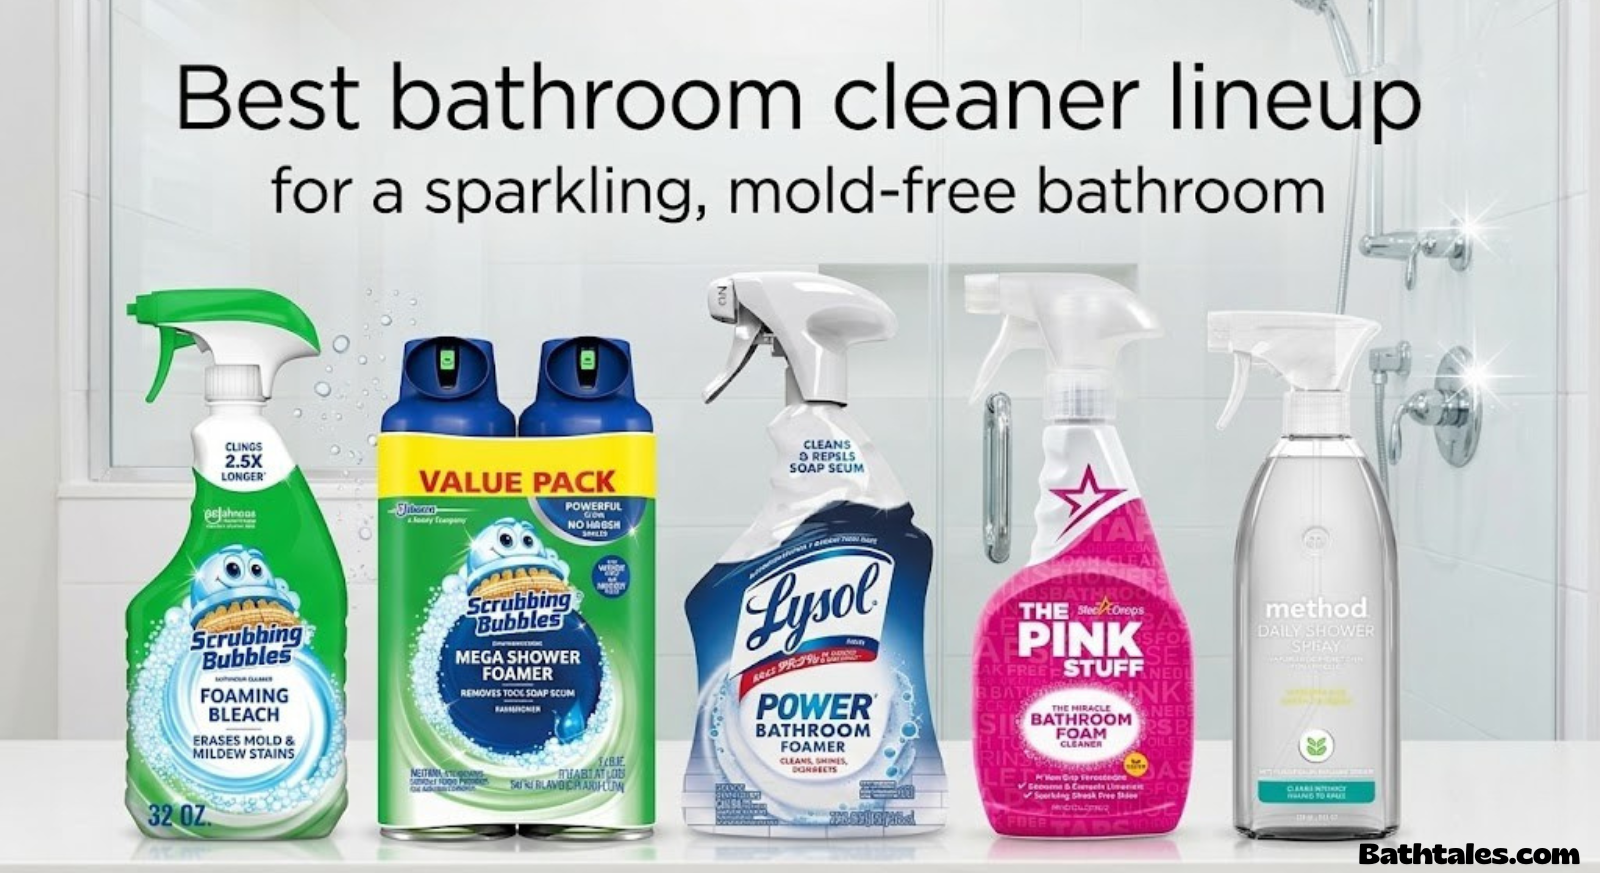
Best Bathroom Cleaner: The Honest, No-Fuss Guide to a Genuinely Spotless Bathroom
Soap scum, grout grime, hard water spots, and mildew don’t stand a chance once you know what actually works. Here’s the real breakdown — no fluff, just results.
Why Your Bathroom Cleaner Choice Matters More Than You Think
Every bathroom fights the same daily battle: steam, standing water, soap residue, and body oils collide on tile, grout, glass, and porcelain, and within days a film builds up that plain water simply can’t touch. Pick the wrong cleaner and you’re either scrubbing until your arm gives out, or worse, spraying something so harsh it eats away at your grout sealant and shower finish. Pick the right one, and a bathroom that looked hopeless can be restored in under fifteen minutes.
That’s really the whole premise behind this guide. Not every “bathroom cleaner” on the shelf is built for the same job. Some are formulated specifically to dissolve soap scum on glass. Others are built around bleach or hydrogen peroxide to knock out mold spores in grout lines. A few are multi-surface all-rounders that trade a bit of specialized power for convenience. Knowing which category you’re actually shopping in saves you money, time, and a lot of frustration.
Consider this scenario: You grab a standard all-purpose cleaner from under the kitchen sink and start attacking the pinkish film forming around your tub drain. After twenty minutes of aggressive scrubbing, your arm aches and the ring is barely lighter. The problem isn’t your effort level — it’s that you brought a butter knife to a job that needed a chainsaw. All-purpose cleaners rely on mild surfactants that lift light oils and dust from smooth surfaces. They’re not formulated to penetrate the mineralized, waxy buildup that accumulates in a high-moisture environment like a bathroom. The chemistry simply isn’t there.
On the flip side, reaching for a heavy-duty bleach-based mold remover to wipe down a lightly dusty countertop is equally misguided. You’re exposing yourself to unnecessary fumes, potentially damaging sensitive surfaces, and spending more money per ounce than you need to. This mismatch between product and problem is the single most common reason people feel like cleaning products “don’t work” — they work, just not on the thing they’re being asked to do.
The bathroom is unique among rooms in your home because it cycles through extremes multiple times a day. Morning showers pump hot, humid air into the space, which condenses on every cool surface as the room cools down. Soap residue, skin cells, and body oils suspended in that condensation settle into a thin, sticky film. By the time it dries, it’s already begun bonding with the underlying surface. Repeat that cycle twice a day for a week, and you’ve got a stubborn layer that water alone can’t touch. Understanding this cycle is the first step to breaking it — and choosing the right cleaner is the tool that actually breaks it.
There’s also a financial angle here that rarely gets discussed. A single bottle of targeted, well-formulated cleaner might cost more upfront than a generic spray, but if it cuts your scrubbing time in half and you use less product per cleaning session because it actually works on the first application, the per-use cost often comes out lower. Plus, you’re less likely to damage surfaces that cost far more to replace than any cleaner ever will. Etching a natural stone shower floor with an acidic cleaner because nobody warned you it wasn’t stone-safe is a mistake that costs hundreds or even thousands to fix. The right knowledge upfront prevents that entirely.
If you’re also working on the rest of your self-care and home routine, it’s worth pairing a clean bathroom with a relaxing bath routine — after all, a spotless tub makes it much easier to actually enjoy a long soak instead of side-eyeing the grout the whole time.
How We Evaluate Bathroom Cleaners
Rather than just reading marketing copy, our evaluation criteria focuses on the things that actually determine whether a cleaner earns a permanent spot under your sink:
- Cutting power on real grime — soap scum, hard water film, and built-up mildew, not just fresh dust.
- Surface safety — whether it’s gentle enough for acrylic tubs, natural stone, and painted or coated fixtures.
- Scent and ventilation needs — some formulas require you to crack a window; others are fine in a closed powder room.
- Value per ounce — concentrated formulas that dilute go further than ready-to-use sprays.
- Ease of use — spray-and-wipe versus soak-and-scrub versus foaming cling formulas for vertical surfaces.
We also looked at how each product performs against specific problem areas, because “best overall” rarely means “best for your exact issue.” If your main frustration is pink mildew rings around the tub, the ideal product for you might differ completely from someone dealing with hard water spots on glass shower doors.
Beyond these baseline criteria, we dug deeper into the chemistry that separates a mediocre cleaner from a genuinely effective one. The pH level of a cleaner, for instance, tells you a lot about what it’s designed to tackle. Acidic cleaners with a low pH excel at dissolving mineral deposits — the calcium, magnesium, and iron that make up hard water stains and limescale. Alkaline cleaners with a high pH are better at breaking down organic, fatty residues like soap scum and body oils. A neutral-pH cleaner sits in the middle and works for light, everyday cleaning but lacks the chemical punch needed for heavy buildup. Understanding this spectrum means you can look at a label, identify roughly where a product falls, and predict whether it’ll actually work on your specific problem before you even twist off the cap.
We also paid close attention to viscosity and delivery method. A thin, watery spray might be fine for a flat countertop, but on a vertical shower wall, it runs off in seconds and barely makes contact with the grime. Foaming sprays, gel formulas, and clinging aerosols solve this by increasing dwell time — the period during which the cleaning agents remain in contact with the surface. Dwell time is arguably more important than raw chemical strength. A moderately strong formula that stays put for five minutes will often outperform a harsh chemical that slides off in thirty seconds. This is why mold-specific cleaners are almost always thick, foaming, or gel-based: mold on a vertical grout line or ceiling corner needs sustained contact to penetrate the spore structure, not a quick hit-and-run.
Testing methodology matters too. Many product demonstrations show a cleaner being applied to a lightly dusty bathroom that was cleaned three days ago. That’s not a real test. The products we’re evaluating here have been assessed against bathrooms that have gone weeks without attention — the kind where soap scum has built up to a visible haze on glass doors, where grout lines have darkened noticeably from their original color, and where pink mildew colonies have established themselves in the silicone caulk around the tub edge. These are real-world conditions, and they separate the genuinely effective products from the ones that only work in controlled, already-clean environments.

Check Price on Amazon
Top Bathroom Cleaner Picks at a Glance
Before diving into the deep-dive breakdowns, here’s a fast overview of where each product shines. Every one of these has proven itself against tough, real-world bathroom grime rather than just a lightly soiled test tile.
- Best Overall: A balanced foaming spray that handles soap scum, light mildew, and everyday grime without needing heavy scrubbing.
- Best for Soap Scum: A citrus-based degreaser formulated specifically for glass shower doors and acrylic surrounds.
- Best for Grout: An oxygenated cleaner that penetrates porous grout lines and lifts embedded stains.
- Best for Mold and Mildew: A bleach-based spray with a no-scrub cling formula for vertical mold removal.
- Best Natural Option: A plant-derived cleaner safe for daily use around kids and pets.
- Best Budget Pick: A concentrated multi-surface cleaner that dilutes into several bottles’ worth of product.
The logic behind organizing the guide this way comes from thousands of reader questions and comments collected over years of writing about home care. What we consistently found is that nobody walks into a store thinking “I need a cleaner with a pH between 2.5 and 4.0.” They think “my shower doors look terrible” or “there’s black stuff in my grout that won’t scrub out.” Starting from the problem and working backward to the solution is the approach that actually helps people get results. Each section below is built around a specific, common bathroom problem, and the product recommendation addresses that problem directly rather than trying to be everything to everyone.
It’s also worth noting that many households will benefit from owning more than one of these. A daily maintenance spray doesn’t replace a monthly mold treatment any more than a toothbrush replaces a dentist visit. The products are complementary, and the most effective bathroom cleaning strategy usually involves two or three targeted formulas rather than one “does everything” bottle that, in practice, does nothing exceptionally well.

Quick Comparison Table
Here’s a side-by-side snapshot to help you scan strengths and weaknesses in seconds.
| Category | Best For | Scrub Required | Scent | Surface Safety |
|---|---|---|---|---|
| Best Overall | Everyday grime, soap scum, light mildew | Minimal | Light citrus | Tile, glass, acrylic |
| Best for Soap Scum | Glass shower doors, acrylic surrounds | Low | Fresh citrus | Glass, fiberglass, acrylic |
| Best for Grout | Stained, discolored grout lines | Moderate | Mild, low-odor | Grout, unsealed tile |
| Best for Mold/Mildew | Vertical mold, pink mildew rings | None (cling formula) | Bleach | Non-porous surfaces only |
| Best Natural | Daily use, kids/pets in home | Low | Herbal, plant-based | Most surfaces |
| Best Budget | General multi-surface cleaning | Moderate | Neutral | Most sealed surfaces |
This table is designed to give you a thirty-second decision-making framework. If you scan across the columns and find yourself nodding at “minimal scrub required” and “light citrus scent,” you’re probably looking for the Best Overall pick. If you’re zeroing in on “cling formula” and “bleach scent,” you know you’re in mold-and-mildew territory. The categories are intentionally distinct because the underlying chemistry is distinct — and mixing up those chemistries by buying the wrong product for your actual problem is the fastest route to frustration.
One thing the table doesn’t capture, because it varies too much by water hardness and bathroom usage patterns, is how long each product’s effects last. A mold treatment in a well-ventilated bathroom might keep grout lines clean for months, while the same product in a windowless, poorly vented shower might need reapplication every few weeks. Similarly, a soap scum remover’s longevity depends heavily on whether you’re also using a daily shower spray or squeegee to prevent new buildup from forming. The products themselves are only half the equation — the habits you build around them determine whether you’re cleaning less over time or just treading water.
Best for Soap Scum & Shower Doors
Soap scum is the chalky, cloudy film that forms when soap residue reacts with minerals in hard water. It clings stubbornly to glass and acrylic, and once it sets, plain water and a rag won’t budge it. The right formula here uses citrus-based solvents or mild acids that break the mineral bond without scratching glass or dulling acrylic finishes.
What sets a great soap-scum cleaner apart is how quickly it works without needing a scrub brush. Spray it on, let it dwell for sixty to ninety seconds, and a simple wipe should lift most of the film. If you’re constantly reapplying and scrubbing hard, the formula probably isn’t strong enough for your water hardness level.
The chemistry of soap scum is more interesting — and more frustrating — than most people realize. Soap itself is made from fats or oils that have been reacted with an alkali, a process called saponification. When you shower with bar soap, tiny particles of this saponified fat wash off your skin and into the water. If your water contains dissolved calcium and magnesium (which is what makes water “hard”), those minerals react with the soap particles to form an insoluble compound — essentially a new substance that won’t dissolve in water and adheres tightly to surfaces. That’s why soap scum doesn’t rinse away: it’s chemically different from the original soap and won’t re-dissolve without an agent that specifically breaks the mineral-soap bond.
Liquid body washes and synthetic detergents produce less soap scum than traditional bar soap because they’re formulated with different surfactant chemistry that doesn’t react as readily with hard water minerals. If you’ve noticed a dramatic reduction in shower door buildup after switching from bar soap to body wash, this is why. It’s not your imagination — the chemistry has fundamentally changed. That said, even synthetic detergents leave some residue behind, especially when combined with body oils and shed skin cells, so a soap scum cleaner remains essential for glass doors regardless of what you wash with.
When evaluating a soap scum cleaner, pay attention to whether it’s marketed as a “daily” or “heavy-duty” product. Daily formulas are milder and designed to prevent buildup when used after every shower. Heavy-duty formulas are what you reach for when the glass has gone cloudy and you can write your name in the film. Both have their place, and using a heavy-duty product daily is overkill that wastes money and potentially exposes you to more chemicals than necessary. The ideal setup for most households is a daily prevention spray used after the last shower of the day, paired with a heavy-duty treatment every two to four weeks depending on water hardness and shower frequency.
One often-overlooked factor in soap scum removal is water temperature during cleaning. Warm water helps soften the waxy soap residue and allows the cleaner’s active ingredients to penetrate more effectively. If you’re spraying a cold shower door with cleaner and immediately wiping, you’re working against yourself. A quick rinse with warm water before applying the cleaner, or simply cleaning right after a hot shower while the surfaces are still warm, can noticeably improve results with the exact same product.
Pros
- Fast-acting on fresh and moderate buildup
- Safe for glass, acrylic, and fiberglass
- Leaves a streak-free finish
- Citrus-based solvents cut through waxy residue effectively
- Pleasant scent compared to bleach-based alternatives
Cons
- Less effective on years-old, heavily calcified scum
- May need a second application in very hard water areas
- Not designed for mold or mildew issues
- Can be more expensive per ounce than all-purpose alternatives

Best for Grout & Tile
Grout is porous, which means it doesn’t just sit dirty on the surface — grime, mold spores, and discoloration actually work their way into the material. That’s why standard all-purpose sprays often look like they’ve done nothing on grout lines even after a good wipe-down. You need something that can penetrate and oxygenate, lifting stains from within rather than just wiping the top layer.
Oxygen-based or peroxide-based cleaners tend to outperform standard detergents here because they generate a mild fizzing action that works its way into the porous texture. Pair this with an old toothbrush or a dedicated grout brush and even years of discoloration can come back close to its original shade.
Understanding why grout stains so persistently requires a quick look at what grout actually is. Grout is a cement-based material mixed with sand and water, applied as a paste between tiles, where it hardens into a solid but microscopically porous mass. Those microscopic pores are the problem. In a bathroom, moisture carrying dissolved soap, body oils, and mineral content seeps into those pores every time the shower runs. When the water evaporates, it leaves everything else behind, embedded inside the grout rather than sitting on top of it. Surface-level cleaning only addresses the top fraction of a millimeter, while the staining extends much deeper.
Oxygenated cleaners work through a process called oxidation. Hydrogen peroxide, the most common active ingredient in these products, breaks down into water and a highly reactive oxygen molecule when it comes into contact with organic material. That reactive oxygen essentially “burns” the organic stains at a chemical level, breaking them into colorless, water-soluble compounds that can be rinsed away. The fizzing or bubbling you see when applying an oxygenated grout cleaner isn’t just for show — it’s the physical manifestation of that chemical reaction, and it helps lift debris out of the pores mechanically as well as chemically.
One crucial distinction that’s often missed: grout color and grout cleanliness are two different things. Many people scrub grout aggressively, see no change, and conclude the cleaner isn’t working — when in reality, the grout was never white to begin with. Grout comes in a wide range of colors, from bright white through beige, gray, and even charcoal or black. Before you assume your grout is stained, check an inconspicuous area (like behind a toilet or inside a closet) to see what the original color actually was. Cleaning won’t turn gray grout white, and chasing a color that was never there is a fast track to frustration.
For grout that genuinely has discolored, there’s also a timeline consideration. Grout that’s been stained for six months is vastly easier to restore than grout that’s been absorbing grime for six years. Older staining penetrates deeper and often involves mineral deposits that have chemically bonded with the grout material itself. In those cases, even the best oxygenated cleaner might need multiple applications over several days to achieve full restoration. Patience is genuinely part of the process for heavily neglected grout.
If you’d rather avoid heavy scrubbing altogether, our guide on how to clean grout without scrubbing walks through a no-scrub soak method that pairs well with this type of cleaner.
| Grout Condition | Recommended Approach | Expected Results |
|---|---|---|
| Light discoloration | Spray, dwell 5 minutes, wipe | Noticeable brightening in one application |
| Moderate staining | Spray, dwell 10 minutes, light brushing | Significant improvement, may need spot treatment |
| Heavy, years-old grime | Apply, let soak 20+ minutes, scrub with grout brush, repeat if needed | Gradual restoration over 2-3 applications |
After cleaning grout, there’s one step that dramatically extends the results: sealing. Grout sealer is a clear, penetrating liquid that fills those microscopic pores we discussed, creating a barrier that prevents moisture and grime from soaking in. It’s not permanent — most sealers last one to three years depending on shower usage — but it’s inexpensive and relatively quick to apply. A small bottle costs significantly less than repeatedly buying heavy-duty grout cleaner, and the time investment of sealing once every year or two pales in comparison to scrubbing stained grout every month.

Best for Mold & Mildew
Mold and mildew thrive in the warm, damp environment a bathroom naturally provides, particularly in grout lines, caulk seams, and the upper corners of a shower where airflow is weakest. A cling-formula bleach-based spray is genuinely the most reliable option here because it stays put on vertical surfaces instead of running off before it can work.
The key with mold-specific cleaners is dwell time. Most people spray and wipe immediately, which barely scratches the surface growth and leaves the roots intact — meaning the mold returns within a week. Letting the product sit for the full recommended time (often five to ten minutes) allows it to actually kill the spores rather than just bleach the visible staining.
Mold and mildew, while often used interchangeably, are technically different organisms with different growth patterns. Mildew is a surface-level fungus that grows flat and powdery, usually white, gray, or yellowish. It’s relatively easy to remove and less likely to cause structural damage. Mold, on the other hand, can penetrate porous materials and develop deep root-like structures called hyphae. When you see black or dark green spots in grout or caulk, you’re likely dealing with mold rather than surface mildew. The distinction matters because surface-level cleaning that removes visible discoloration without killing the hyphae below the surface is a temporary cosmetic fix, not a solution.
Bleach (sodium hypochlorite) works against mold through oxidation — it breaks down the cellular structure of the fungus and denatures the proteins that hold it together. However, bleach’s effectiveness is limited on porous surfaces because it doesn’t penetrate deeply. It’s excellent at killing surface-level mold and bleaching the dark pigmentation that makes mold visible, which is why a bleach-based cleaner can make grout look dramatically better in minutes. But if the mold has deeply colonized the grout or penetrated behind caulk, bleach alone may not reach the entire colony. This is why persistent mold often requires addressing the underlying moisture conditions — no cleaner, no matter how powerful, can permanently eliminate mold that has a constant supply of water and organic material to feed on.
Prevention is where the real long-term battle against mold is won. Mold spores are everywhere — they’re a natural part of indoor and outdoor air — and you can’t eliminate them entirely. What you can control is whether those spores find the conditions they need to germinate and grow. The three things mold needs are moisture, warmth, and organic food (which, in a bathroom, is abundant in the form of skin cells, soap residue, and dust). Break any one of those three, and mold can’t establish. Since you can’t remove the food source and probably don’t want to take cold showers, moisture control through ventilation becomes the single most powerful mold-prevention tool at your disposal.
Running the bathroom exhaust fan during a shower and for at least twenty minutes afterward removes the humid air that would otherwise condense on walls and ceilings. If your bathroom lacks a fan or the fan is underpowered, a small dehumidifier or even leaving the door cracked open during and after showers can make a measurable difference. These habits don’t cost anything extra and often do more to reduce mold recurrence than any cleaning product.
If mold keeps returning no matter what you use, the underlying issue is usually ventilation or moisture control rather than the cleaner itself. Our guide on how to get rid of bathroom mold covers the moisture-control side of the equation in more depth.
Pros
- Cling formula stays on vertical surfaces
- Kills spores, not just surface staining
- Fast, visible whitening on grout and caulk
- Minimal scrubbing required with proper dwell time
- Widely available and affordable
Cons
- Bleach scent requires ventilation
- Not safe on natural stone or colored grout
- Can damage fabrics and clothing if splashed
- Doesn’t penetrate deeply into porous materials
- May need repeated applications for established mold

Best for Hard Water Stains
Hard water stains show up as cloudy white or orange-tinted mineral deposits on faucets, showerheads, and glass. Unlike soap scum, these are pure mineral buildup — calcium, magnesium, and sometimes iron — and they generally need a mild acid to dissolve rather than a detergent. Cleaners built around citric acid or diluted vinegar formulas tend to be the safest and most effective choice, especially on chrome and stainless fixtures.
For fixtures with heavy buildup, a longer soak works better than repeated spraying. Wrapping a showerhead in a vinegar-soaked cloth overnight, for example, often outperforms daily spray-and-wipe attempts. On glass, a squeegee used after every shower is the single best prevention method — it stops new mineral deposits from forming in the first place.
The science behind hard water stains is straightforward but often misunderstood. Water hardness refers to the concentration of dissolved minerals — primarily calcium and magnesium — in your water supply. These minerals are completely dissolved when the water is in liquid form, which is why a glass of hard water looks perfectly clear. The problem occurs when water evaporates. As the liquid water transitions to vapor, the dissolved minerals can’t vaporize with it, so they’re left behind as a solid residue. One droplet of evaporating hard water leaves behind a microscopic mineral ring. Millions of droplets over weeks and months build up into the thick, crusty white deposits you see on shower doors and fixtures.
The orange or reddish-brown staining you sometimes see around drains or on shower floors is a variation of the same process, but involves iron rather than calcium. Iron in the water supply oxidizes (rusts) when exposed to air, leaving behind those characteristic orange-tinted stains. This is common in homes on well water or in areas with older iron plumbing. Cleaners formulated for calcium-based hard water stains may not touch iron stains, and vice versa. If you’re dealing with orange or rust-colored deposits, look specifically for a cleaner that mentions iron or rust removal on the label — standard hard water formulas may not be effective.
Acidic cleaners dissolve mineral deposits through a simple chemical reaction. The acid (whether citric, lactic, acetic, or another type) reacts with the calcium carbonate or other mineral compounds, breaking them into water-soluble salts and carbon dioxide gas. The fizzing you sometimes see when applying an acidic cleaner to heavy limescale is that carbon dioxide being released. The key is using an acid that’s strong enough to dissolve the mineral buildup but mild enough not to damage the underlying surface. This is why bathroom-specific hard water cleaners use weaker acids like citric acid rather than strong industrial acids — they need to be safe for chrome plating, stainless steel, and ceramic glazes.
One warning that bears repeating: never use acidic cleaners on natural stone surfaces like marble, travertine, or limestone. These stones are themselves made of calcium carbonate, and acid will etch and dull them permanently. The damage is chemical, not cosmetic, and cannot be reversed without professional resurfacing. If you have natural stone in your bathroom, look specifically for stone-safe, pH-neutral cleaners, even for hard water stains — the cleaning process will be slower and gentler, but it won’t destroy your surfaces.
Best Toilet Bowl Cleaner
The toilet bowl needs its own category because it deals with a different combination of grime: mineral rings at the waterline, limescale buildup, and bacteria that regular surface cleaners aren’t formulated to handle. A thick, clinging gel formula is what you want here, since it coats the bowl’s curved surface instead of running straight down with the water.
Look for a formula that combines a mild acid (for the mineral ring) with a disinfectant. Applying it right before bed and letting it sit overnight, then giving it a quick brush in the morning, handles even stubborn rings with minimal effort.
Toilet bowl cleaners differ from general bathroom cleaners in two important ways: viscosity and disinfectant registration. The viscosity matters because a toilet bowl is a vertical or steeply curved surface submerged in standing water. A thin liquid cleaner poured into the bowl simply dilutes into the water and gets flushed away without ever making meaningful contact with the stained ring at the waterline. Gel formulas are designed to cling to the bowl sides above and at the waterline, slowly sliding down over time while maintaining contact with the stained areas. This is dwell time again — the same principle we discussed with vertical shower surfaces, applied to a different shape.
The disinfectant registration is the other distinction. In many countries, products that claim to kill bacteria and viruses must be registered with a regulatory agency and meet specific efficacy standards. A general bathroom spray might clean surfaces but isn’t necessarily proven to sanitize or disinfect them. Toilet bowl cleaners, given what they’re designed to clean, often carry specific disinfectant claims that have been tested and verified. If sanitization is important to you — and in a toilet bowl, it reasonably should be — look for a product that explicitly states its disinfectant credentials on the label.
The overnight application method mentioned above is genuinely one of the most effective cleaning techniques for any bathroom fixture, not just toilets. The principle is simple: most cleaning reactions are time-dependent. A product that needs five minutes of dwell time to dissolve a stain will do an even more thorough job if given eight hours. There’s no scrubbing involved — the chemistry does the work while you sleep. Apply the gel around the bowl under the rim, close the lid, and brush quickly in the morning. Stains that resisted a quick daytime scrub often dissolve completely with this approach.
For toilets with persistent limescale buildup below the waterline, where a gel can’t cling effectively because it’s submerged, there’s an additional technique worth knowing. Turn off the water supply valve behind the toilet, flush to empty the bowl as much as possible, then soak paper towels in your chosen limescale remover and press them against the stained areas. The paper towels hold the cleaner in place against the mineral deposits, and because the bowl is mostly empty, the cleaner isn’t diluted. Let it sit for several hours or overnight, then turn the water back on, flush, and brush. This method reaches deposits that standard application techniques miss entirely.

Best Natural & Eco-Friendly Option
If you’re cleaning a bathroom that kids or pets use regularly, or you simply prefer to avoid harsh fumes, plant-derived formulas have come a long way. Modern natural cleaners use enzyme-based or citrus-oil formulas that break down organic grime (soap residue, body oils) without needing bleach or ammonia. They won’t out-muscle a dedicated mold killer on a severe infestation, but for weekly maintenance cleaning, they hold up well.
The tradeoff is usually dwell time — natural formulas often need a few extra minutes of contact time compared to harsher chemical cleaners to achieve a similar result. That’s a fair trade for many households, especially in a small, poorly ventilated powder room.
The evolution of natural cleaning products over the past decade has been significant. Early “green” cleaners were often little more than scented water with a mild surfactant, and their performance was genuinely poor. Today’s formulations leverage advances in enzyme technology and bio-based solvents that can rival conventional cleaners on many tasks. Enzyme-based cleaners work by using specific proteins that catalyze the breakdown of organic molecules. A protease enzyme, for instance, breaks down protein-based residues (think skin cells and body oils), while a lipase targets fats and grease. These enzymes are highly specific and efficient — a tiny amount can process a large volume of organic material — and they’re biodegradable and non-toxic to humans and pets.
However, it’s important to have realistic expectations about what natural cleaners can and cannot do. They excel at removing organic grime — the soap residue, body oils, and everyday bathroom dust that make up most routine cleaning needs. They are not effective against mineral deposits (hard water stains, limescale) unless they also contain a mild plant-derived acid like citric acid. They are not effective against mold and mildew unless they contain specific antifungal ingredients. And they generally won’t disinfect surfaces in the regulatory sense of killing 99.9% of bacteria and viruses, because most natural formulas don’t carry EPA or equivalent disinfectant registrations.
This isn’t a criticism of natural cleaners — it’s a clarification of their role. They’re exceptional maintenance cleaners for households that prioritize indoor air quality and reduced chemical exposure. They’re not a replacement for a heavy-duty mold treatment if you have an active mold problem, or for a disinfectant if someone in the household is immunocompromised and sanitization is a medical necessity. Understanding this distinction lets you use natural products where they shine and reach for stronger solutions only when the situation genuinely requires them.
For families with young children who take baths, natural cleaners offer particular peace of mind. A bathtub cleaned with a plant-based, fragrance-free formula doesn’t leave behind chemical residues that a child might ingest by drinking bathwater or putting wet toys in their mouth. The same logic applies to pets who drink from dripping faucets or lick condensation from shower walls. The cleaning might require an extra minute of dwell time, but for many households, the tradeoff is entirely worthwhile.
Best Budget Pick
If you’re trying to keep costs down without sacrificing results, a concentrated multi-surface formula is usually your best bet. These are sold in smaller bottles designed to be diluted with water, which means a single purchase can produce several bottles’ worth of ready-to-use cleaner. It won’t match a specialized mold killer for a severe infestation, but for weekly all-around maintenance across sinks, counters, and tile, it more than earns its price.
The economics of concentrated cleaners are worth examining closely because the upfront price can be misleading. A $12 bottle of concentrated cleaner that makes five gallons of ready-to-use solution costs $2.40 per gallon. A $5 bottle of ready-to-use spray that contains 32 ounces costs $20 per gallon. The concentrated product is actually less than one-eighth the cost per use, even though it looked more expensive on the shelf. This math holds true across most cleaning product categories, and it’s one of the simplest ways to reduce household supply costs without compromising on results.
The catch with concentrates is dilution accuracy. Most people eyeball it, pouring a splash of concentrate into a spray bottle and topping it off with water. This works, but it means your cleaning solution is a different strength every time, which makes it hard to predict performance. If last week’s “splash” was bigger and the cleaner worked great, and this week’s smaller splash left streaks, you might blame the product when the issue is actually inconsistent dilution. Taking thirty seconds to measure properly — most concentrates use a ratio like 1:10 or 2 ounces per gallon — ensures consistent results and prevents waste from over-concentrating.
Another budget consideration that extends beyond the product itself is tool cost. A concentrated all-purpose cleaner paired with quality microfiber cloths (which can be washed and reused hundreds of times) has a dramatically lower per-use cost than a ready-to-use spray paired with disposable paper towels. The cleaner and the tool work as a system, and optimizing both sides of that system is where the real savings accumulate. Over a year, the difference between a concentrate-and-microfiber approach and a disposable-spray-and-paper-towel approach can easily exceed fifty dollars — not life-changing, but notable for a cleaning category that most people don’t think to optimize.

Check Price on Amazon
Best for Daily Maintenance
A daily shower spray isn’t meant to replace a deep clean — it’s meant to prevent one from ever being necessary. Applied after each shower while surfaces are still wet, a light daily spray keeps soap scum and mineral deposits from ever bonding to the surface in the first place. It’s a five-second habit that can cut your deep-cleaning frequency from weekly to monthly.
Pairing a daily spray with a squeegee pass on glass doors is genuinely one of the highest-leverage habits for keeping a bathroom looking new. It takes almost no time and prevents the majority of buildup that eventually requires aggressive scrubbing to remove.
The physics of why daily sprays work so well is worth understanding. When you shower, soap residue and minerals are suspended in the water droplets coating every surface. As those droplets evaporate, the water component disappears and everything else — soap, minerals, skin cells — is deposited onto the surface. If you wipe or squeegee the surface before evaporation completes, you physically remove the droplets and everything they contain. A daily spray adds a chemical component to this physical removal: the surfactants in the spray help prevent the remaining microscopic residue from bonding tightly to the surface, making the next squeegee pass or rinse even more effective.
Daily sprays are typically much milder than deep-cleaning products. They’re designed for frequent use and minimal rinsing, and many are formulated to be left on surfaces without damaging finishes or leaving visible residue. This mildness is intentional — you’re not trying to strip away existing buildup; you’re preventing new buildup from forming. Using a heavy-duty cleaner daily would be overkill, potentially damaging, and more expensive than necessary. The daily spray is a maintenance tool, not a restoration tool, and understanding that distinction prevents both product misuse and unrealistic expectations.
The habit-building aspect of daily sprays is perhaps their greatest value. A five-second spray after showering is easy to remember and satisfyingly quick, which makes it a habit that actually sticks. Compare that to a monthly deep-cleaning session that takes an hour and requires pulling out multiple products and tools — that’s a much harder habit to maintain. The daily spray essentially distributes the cleaning workload across thirty tiny, painless sessions instead of one large, unpleasant one. The total time investment is similar, but the psychological experience couldn’t be more different.
What’s Actually in Your Cleaner (and Why It Matters)
Reading a cleaner’s ingredient list can feel like decoding a chemistry exam, but a few categories cover almost everything you’ll encounter on a bathroom cleaner label:
- Surfactants — the detergents that lift oil and grime so water can rinse it away. Surfactants work by reducing the surface tension of water, allowing it to spread and penetrate more effectively, while also having one end of their molecule attracted to water and the other end attracted to oils and grease. This dual nature lets them surround and lift oily grime off surfaces and suspend it in water for rinsing. Common bathroom cleaner surfactants include sodium lauryl sulfate, alkyl polyglucosides (plant-derived), and various ethoxylated alcohols.
- Acids (citric, lactic, or diluted vinegar) — dissolve mineral deposits and hard water film. These work by reacting with calcium carbonate and other alkaline mineral compounds, converting them into water-soluble salts that rinse away. Citric acid is particularly popular in bathroom cleaners because it’s effective, naturally derived, and has a relatively pleasant scent compared to acetic acid (vinegar). Lactic acid is another mild option often found in cleaners marketed as gentler or more natural.
- Bleach (sodium hypochlorite) — kills mold and mildew spores and whitens grout, but shouldn’t be mixed with acid-based or ammonia-based products. Bleach is a powerful oxidizing agent that destroys the cellular structure of mold, bacteria, and viruses while also breaking down colored organic compounds (which is why it whitens stained grout). Its downside is the strong odor and potential for surface damage on certain materials.
- Hydrogen Peroxide — an oxygen-based alternative to bleach that breaks down into water and oxygen. It’s gentler than bleach on surfaces and doesn’t produce the same harsh fumes, but it’s also less potent against heavy mold infestations and has a shorter shelf life once opened. Many “oxygenated” grout and stain removers use hydrogen peroxide as their active ingredient.
- Enzymes — break down organic residue like soap scum and body oils, common in natural formulas. Unlike chemical cleaners that react with grime directly, enzymes are biological catalysts that speed up the natural decomposition of specific types of organic matter. A protease enzyme breaks down proteins, a lipase breaks down fats, and an amylase breaks down starches. They’re highly specific, so an enzyme cleaner needs the right combination of enzymes for the types of grime it’s targeting.
- Solvents — cut through grease and oily residue, common in glass and shower door cleaners. Common solvents in bathroom cleaners include glycol ethers and citrus-derived d-limonene. These dissolve waxy, fatty deposits that water-based cleaners struggle with, making them particularly useful for soap scum and body oil residue on glass.
- Fragrances — can be synthetic or plant-derived, and serve both aesthetic and functional purposes (masking the chemical odor of active ingredients). For people with fragrance sensitivities or asthma, fragrance-free or naturally scented options are worth seeking out specifically, as synthetic fragrances are among the most common irritants in cleaning products.
- Preservatives — prevent bacterial growth in the product itself, particularly important in cleaners with high water content. Without preservatives, a bottle of cleaner could become a breeding ground for bacteria, especially in the warm, humid environment under a bathroom sink.
Understanding these categories helps you read a label and understand what the product is actually designed to do, even if the marketing language is vague. A cleaner whose first active ingredient is citric acid is designed for mineral deposits. One built around hydrogen peroxide is targeting organic stains and mild disinfection. One that lists bleach as the primary active is for mold and heavy-duty whitening. The ingredients tell the real story, even when the front label says “all-purpose.”
The single most important safety rule here: never mix a bleach-based cleaner with an acid-based or ammonia-based one. The combination can create toxic fumes. Specifically, mixing bleach with acid generates chlorine gas, which was used as a chemical weapon in World War I and can cause severe respiratory damage even in small concentrations. Mixing bleach with ammonia creates chloramine gases, which are similarly dangerous. These reactions can occur even if you’re not deliberately mixing the products — using an acid-based cleaner on a surface that still has bleach residue, or vice versa, is enough to produce dangerous fumes. If you’re switching between product types, rinse the surface thoroughly with water first and allow adequate ventilation.
Common Cleaning Mistakes to Avoid
| Mistake | Why It Backfires | Better Approach |
|---|---|---|
| Wiping immediately after spraying | No dwell time means the formula never actually breaks the bond with grime. You’re essentially wiping away the cleaner before it’s done anything, wasting product and effort simultaneously. | Let it sit for the label’s recommended time before wiping. Set a timer if you tend to rush. Those 60-90 seconds feel longer than you think. |
| Mixing bleach and acid-based cleaners | Can create dangerous fumes including chlorine gas. Even small amounts can cause respiratory irritation, coughing, and in severe cases, chemical burns to airways. | Rinse thoroughly between different product types. Never use them in the same cleaning session on the same surface without an intermediate rinse. |
| Using abrasive scrubbers on acrylic | Leaves permanent micro-scratches that trap future grime. Acrylic is much softer than ceramic or porcelain, and scratches provide perfect hiding spots for soap scum, mold, and bacteria. | Use soft cloths or non-abrasive sponges. If you need scrubbing power on acrylic, use a cleaner with stronger chemistry rather than stronger abrasion. |
| Skipping ventilation | Fumes build up, especially with bleach formulas. In a small, enclosed bathroom, chemical concentrations can reach irritating or even dangerous levels surprisingly quickly. | Run a fan or crack a window during and after cleaning. If you can smell the product strongly, the ventilation is inadequate regardless of what the label says. |
| Ignoring the grout while focused on tile | Grout stays porous and keeps harboring mold and odor even when the surrounding tile is spotless. The bathroom can look clean but smell musty because the grout is the actual source. | Treat grout separately with a penetrating formula at least monthly. A grout brush is a small investment that pays off in results. |
| Using too much product | More cleaner doesn’t mean more cleaning power. Excess product leaves residue that attracts new dirt, and on some surfaces, product buildup can actually create a hazy film that looks worse than before cleaning. | Follow the label’s recommended amount. For sprays, a light, even mist is usually sufficient. More is not better — it’s just more to rinse away. |
Beyond the table, there are a few subtler mistakes that experience has taught us to watch for. One is cleaning in the wrong order. If you spray and wipe the mirror, then scrub the counter, then clean the toilet, you’ll end up with toilet-cleaning spray mist on your freshly cleaned mirror. The correct order is top-to-bottom, dry-to-wet: start with mirrors and glass, then counters and sinks, then the tub and shower, and finish with the toilet. This way, any drips or splashes fall onto surfaces you haven’t cleaned yet, and your toilet brush and cleaning cloths end up in the most contaminated area last.
Another subtle mistake is using the same cloth or sponge across multiple surfaces without rinsing it. A sponge that just wiped soap scum from the shower wall is now loaded with soap residue, and if you then use it on the mirror, you’re just redistributing that residue in a thinner, streakier layer. Dedicated cloths for different areas — or at minimum, frequent rinsing in clean water — prevents cross-contamination that makes cleaning take longer and produce worse results.
Building a Simple, Sustainable Cleaning Routine
A bathroom that always looks clean isn’t the result of one intense scrub session a month — it’s the result of small, consistent habits. A realistic routine looks something like this: a daily squeegee-and-spray habit after showering, a weekly wipe-down of counters, sink, and toilet, and a deeper monthly session focused on grout, mold-prone corners, and any hard water buildup around fixtures.
The daily component is the most important because it prevents the majority of buildup from ever forming. After the last shower of the day, take thirty seconds to squeegee the glass doors or shower walls — this removes 75% or more of the water droplets that would otherwise evaporate and leave mineral deposits. Follow with a quick mist of daily shower spray. That’s it. The whole process takes less time than waiting for the water to warm up before your shower, and it dramatically reduces how often you need to do the more labor-intensive cleaning tasks.
The weekly component addresses surfaces that don’t get the daily spray treatment: counters, sink basins, mirrors, and the toilet exterior. A quick spray-and-wipe with your chosen multi-surface or all-purpose cleaner takes ten to fifteen minutes for the entire bathroom. This isn’t deep cleaning — you’re not scrubbing grout or descaling fixtures — you’re just removing the week’s accumulated dust, toothpaste splatter, and light residue before it has a chance to build up into something harder to remove.
The monthly deep clean is where you tackle the areas that daily and weekly maintenance intentionally skip. This includes grout lines (treated with an oxygenated cleaner and a grout brush), mold-prone corners and caulk seams (inspected and spot-treated as needed), fixture descaling (if hard water stains are accumulating), and a thorough toilet bowl treatment. The monthly session also includes tasks that are more about organization than cleaning: restocking toilet paper and supplies, washing or replacing shower curtain liners if they’re showing mildew, and checking that exhaust fans are clean and functioning properly.
This tiered approach works because it respects how people actually live. Nobody maintains a daily deep-cleaning habit for more than a week or two. But a daily thirty-second squeegee habit? That’s sustainable. A weekly fifteen-minute wipe-down while the shower warms up? Also sustainable. And when you do get to the monthly session, it’s faster and easier because you’re maintaining a baseline of cleanliness rather than confronting a month’s worth of unchecked buildup.
If you’re also trying to make the bathroom feel more like a retreat rather than just a functional space, it’s worth thinking about the full experience — everything from how to make a bath comfortable to which bath products you keep on hand. A clean space and a genuinely relaxing one tend to go hand in hand.
For the shower drain specifically, buildup there can undo a lot of your surface cleaning efforts if left unaddressed, since a slow drain often means standing water sits longer and encourages fresh mildew growth. Hair, soap residue, and mineral deposits can combine into a stubborn clog that slows drainage to a crawl, and standing water is essentially an invitation for mold and bacteria. It’s worth checking our guide on how to clean a shower drain as part of your monthly routine.
How to Choose the Right Bathroom Cleaner for You
With so many formulas on the market, narrowing down the right one comes down to a few honest questions:
What’s your primary problem?
Don’t buy a general all-purpose spray if your real issue is mold in the grout lines — a targeted formula will save you time and multiple failed attempts. Be specific with yourself. Is the problem soap scum on glass? Hard water spots on chrome? Pink mildew in the shower corners? General dust and light grime on counters? Each of these has a different optimal product. Trying to solve all of them with one bottle usually means solving none of them well.
What surfaces are you cleaning?
Natural stone, colored grout, and acrylic all have different sensitivities. Bleach-based cleaners, for instance, are not suitable for natural stone or colored grout, since they can cause discoloration or etching over time. Acrylic tubs and surrounds can be scratched by abrasive cleaners and damaged by strong solvents. Chrome and stainless steel fixtures can be dulled by harsh acids if left in contact too long. Before buying anything, identify what your bathroom surfaces are actually made of — not just what they look like. A surprising number of people clean acrylic surrounds with abrasive products designed for ceramic tile, not realizing the materials are completely different.
How is your ventilation?
A small, windowless powder room calls for a lower-fume, natural, or enzyme-based formula rather than a heavy bleach spray. The concentration of airborne chemicals in a poorly ventilated space can reach levels that cause headaches, respiratory irritation, or worse. If your bathroom has a functioning exhaust fan that vents to the outside (not just into the attic), you have more flexibility with product choice. If it doesn’t, lean toward products labeled “low-VOC,” “fume-free,” or plant-based. Your lungs will thank you.
How much time do you realistically have?
If you’re not going to deep clean weekly, lean toward a daily-maintenance spray that prevents buildup, paired with a stronger monthly deep-clean product. The most common cleaning-product mistake we see isn’t buying the wrong thing — it’s buying the right thing but never using it because the process it requires doesn’t fit the user’s actual schedule. A product that requires twenty minutes of dwell time and scrubbing won’t get used by someone with ten minutes available. Match the product to your reality, not your aspirations.
Who else uses the bathroom?
If young children take baths in the tub you’re cleaning, or if someone in the household has asthma, allergies, or chemical sensitivities, factor that into your decision. Residue from harsh cleaners can linger on bathtub surfaces and potentially irritate sensitive skin. Fumes can trigger asthma attacks even hours after cleaning if ventilation is inadequate. In these households, natural or fragrance-free products aren’t just a preference — they’re a health consideration.
If your household leans toward gentler, more natural products throughout your self-care routine too, it’s worth browsing organic bath salts or comparing Dead Sea salt vs Epsom salt for the rest of your bathroom shelf.

Check Price on Amazon
Frequently Asked Questions
How often should I deep clean my bathroom?
Most households do well with a weekly light clean and a more thorough deep clean once a month, focusing on grout, mold-prone corners, and fixture buildup during the monthly session. However, this varies based on usage. A bathroom used by one person who showers once daily will stay cleaner longer than a family bathroom used by four people taking multiple showers a day. Adjust the frequency based on what you actually see, not a rigid schedule. If grout is already discolored after two weeks, deep clean more often. If it still looks clean after a month, you can extend the interval.
Can I mix bleach and vinegar-based cleaners?
No. Mixing bleach with an acid-based product like vinegar can release toxic chlorine gas. Always rinse a surface thoroughly before switching product types. This cannot be overstated: the combination can cause serious respiratory injury. Even if you’re not intentionally mixing them in a bottle, using them on the same surface without rinsing in between can generate enough gas to be harmful. If you smell a sharp, irritating odor that’s different from either product alone, leave the area immediately and ventilate thoroughly before returning.
What’s the difference between soap scum and hard water stains?
Soap scum is a filmy residue from soap reacting with minerals, usually cloudy and slightly waxy to the touch. It’s an organic-mineral hybrid that requires a combination of surfactants (to break down the organic soap component) and mild acids (to dissolve the mineral component). Hard water stains are pure mineral deposits, often white or orange-tinted, and typically need an acid-based cleaner rather than a detergent. They feel crusty or rough rather than waxy. The treatment is different because the chemistry is different, which is why using the wrong cleaner produces such frustrating results.
Are bathroom cleaners safe for natural stone surfaces?
Not all of them. Acidic and bleach-based cleaners can etch or discolor natural stone like marble or travertine. The calcium carbonate that makes up many natural stones reacts with acids, permanently dulling the polished surface. Look specifically for a stone-safe, pH-neutral formula for those surfaces. If you’re unsure what your bathroom surfaces are made of, err on the side of caution with a pH-neutral cleaner until you can confirm. The damage from using the wrong cleaner on natural stone is irreversible without professional refinishing, and that cost dwarfs any savings from buying a cheaper, non-stone-safe product.
Why does mold keep coming back even after I clean it?
If you’re only wiping the surface without allowing dwell time, the spores below the surface often survive. Persistent mold can also point to a ventilation or moisture issue beyond what any cleaner alone can fix. Mold needs moisture to grow, and if your bathroom stays damp for hours after each shower because of poor ventilation, you’re providing ideal conditions for regrowth regardless of how thoroughly you clean. Address the moisture first — better exhaust fan, shorter showers, squeegeeing after use — and the cleaning will be more effective and longer-lasting.
Is a daily shower spray really necessary?
It’s optional, but it’s one of the most effective habits for reducing how often you need a deep clean, since it prevents soap scum and mineral buildup from ever bonding to the surface. Think of it as the cleaning equivalent of brushing your teeth daily instead of only going to the dentist for a deep cleaning twice a year. The daily maintenance prevents the need for aggressive intervention. For the five seconds it takes, the return on investment in terms of reduced scrubbing time is enormous.
What should I use on grout specifically?
An oxygen-based or peroxide-based cleaner tends to work best, since it can penetrate the porous surface of grout rather than just sitting on top of it. Pair it with a stiff-bristled grout brush (narrower than a standard scrub brush, designed to fit into grout lines) and adequate dwell time. For grout that’s heavily stained after years of neglect, multiple applications may be necessary, and in some cases, professional steam cleaning or regrouting may be the only way to restore the original appearance.
Can I use the same cleaner on the toilet and the shower?
Some multi-surface cleaners can handle both, but a dedicated toilet bowl cleaner with a clinging gel formula will usually outperform a general spray on toilet-specific mineral rings. The toilet bowl presents unique challenges — a curved surface that’s partially submerged, stains at the waterline, and a different mix of grime than a shower wall. Using a dedicated product for the toilet also makes hygienic sense, as it keeps the cloths and brushes you use on the toilet separate from the ones you use on surfaces you touch with bare skin.
How long should I let a cleaner sit before wiping?
This varies by product, but most effective formulas need at least sixty seconds to a few minutes of dwell time. Mold-specific bleach sprays often need five to ten minutes for full effectiveness. The label instructions are based on testing and are not arbitrary — if a product says to let it sit for three minutes, that’s the minimum contact time needed for the chemistry to do its job. Wiping sooner means you’re cleaning with mostly elbow grease and very little chemical assistance, which defeats the purpose of using a formulated cleaner.
Are natural bathroom cleaners actually effective?
Yes, for regular maintenance cleaning. They typically need a bit more dwell time than harsher chemical formulas, but they handle everyday soap scum and grime well without strong fumes. The key is matching the product to the task. A natural enzyme cleaner is great for weekly tub and tile maintenance. It’s not the right tool for a heavy mold infestation or years of hard water scale. Use natural products within their designed scope, and they perform well. Expect them to match industrial-strength chemicals on heavy-duty restoration tasks, and you’ll be disappointed.
What causes recurring hard water stains on glass?
Standing water droplets that evaporate on the glass leave mineral deposits behind. Each droplet leaves a microscopic ring of minerals; millions of droplets over time create the cloudy film. A squeegee used after every shower is the most effective prevention method because it physically removes the droplets before they can evaporate. No amount of cleaning product can prevent hard water stains if water is still allowed to sit and evaporate on the glass — prevention is mechanical (squeegee) and cleaning is chemical (acid-based cleaner), and you need both for best results.
Can I use a bathroom cleaner on kitchen surfaces too?
Many multi-surface formulas work fine in the kitchen, but always check the label first, especially around food-contact surfaces and stainless steel appliances. Bathroom cleaners sometimes contain ingredients that are safe for bathroom surfaces but not rated for incidental food contact. Additionally, some bathroom-specific ingredients like bleach can damage stainless steel kitchen appliances, leaving permanent discoloration or pitting. If a product is labeled for both bathroom and kitchen use, it’s safe for both. If it’s labeled only for bathroom use, keep it in the bathroom.
What’s the best way to clean a shower curtain or liner?
Fabric shower curtains can usually be machine-washed on a gentle cycle with regular laundry detergent and a half-cup of baking soda. Plastic or vinyl liners can be washed on a gentle cycle with a few towels (to provide gentle scrubbing action) or soaked in a bathtub with warm water and oxygen-based cleaner. For mildew spots on liners, a pre-soak in a bleach solution (for white or clear liners only) can restore them, but heavily mildewed liners are often more cost-effective to replace than to restore. Prevention through adequate ventilation and occasional washing is the better long-term strategy.
Should I seal my grout after cleaning?
Yes, if the grout is in a wet area like a shower. Grout sealer fills the microscopic pores that make grout absorbent, preventing water, soap, and grime from soaking in. Sealing is not permanent — most sealers last one to three years in a regularly used shower — but it dramatically extends the time between deep cleanings. Application is simple: clean and fully dry the grout, apply sealer with a small brush or applicator bottle, let it absorb for the recommended time, and wipe off excess. The whole process for a standard shower takes under an hour and pays for itself in reduced cleaning effort and extended grout life.
Final Verdict
There’s no single “best” bathroom cleaner for every situation — the right choice depends on whether you’re battling soap scum, grout stains, mold, or just trying to keep up with weekly maintenance. What matters most is matching the formula to the actual problem in front of you, giving it the dwell time it needs, and building small daily habits that prevent buildup before it starts.
The bathroom is one of the hardest-working rooms in any home, and it deserves cleaning products chosen with intention rather than whatever happens to be on sale at the grocery store. A thoughtfully selected cleaner matched to your specific surfaces and problems will outperform a generic product every time, often at a lower cost per use once you factor in reduced scrubbing time and product waste.
Start with whichever pick matches your biggest pain point today, and your bathroom will start looking (and staying) noticeably cleaner within the first week. The products recommended throughout this guide have all been evaluated against real bathroom grime — not marketing claims, not controlled lab conditions, but the actual mess that real bathrooms accumulate. They work. The rest is just consistency.
Shop Our Top Pick on Amazon