How to Get Rid of Bathroom Mold (Without Scrubbing Yourself Into a Corner)
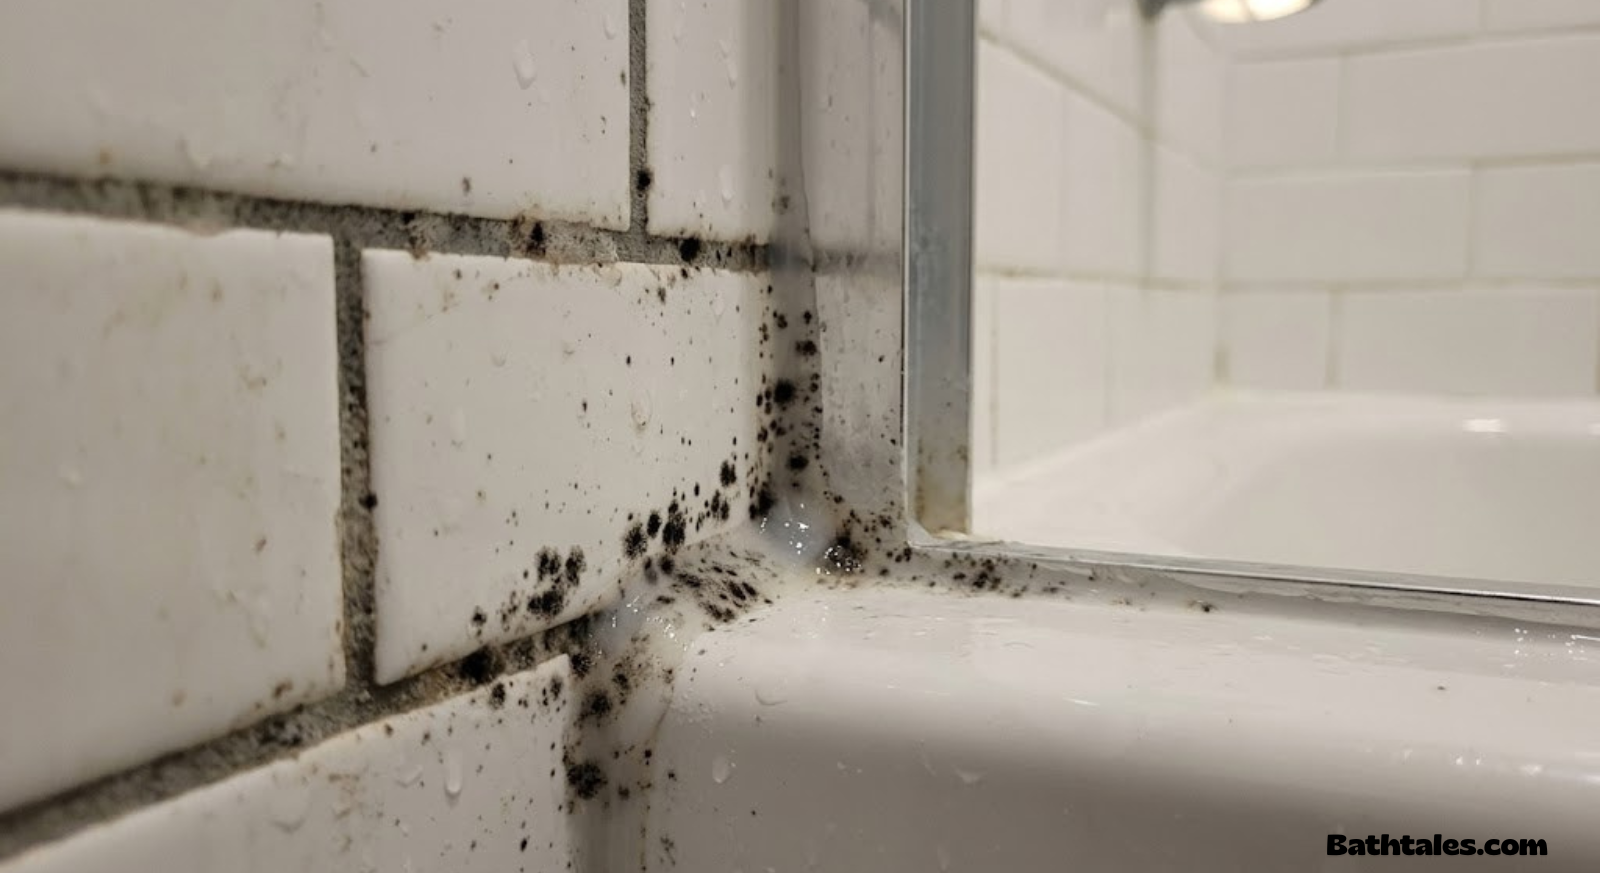
Black spots creeping across your grout, a musty smell that won’t leave, that fuzzy ring around the tub caulk — bathroom mold is one of those problems that always seems to come back no matter how hard you scrub. This guide walks through exactly why mold keeps showing up, how to kill it for good on every bathroom surface, and how to stop it from returning.
Why Mold Keeps Growing in Your Bathroom
Bathrooms are basically a greenhouse for mold. Every hot shower pumps warm, humid air into a small, often poorly ventilated room, and that moisture settles onto grout lines, caulk, ceiling corners, and any porous surface it can find. Mold spores are already floating in the air of every home — they don’t need to be introduced from outside. All they need to start colonizing a surface is moisture, a food source (soap residue, skin cells, dust, or the organic fillers in some caulks), and a lack of airflow to dry things out between uses.
That’s why the same few spots tend to reappear over and over: the grout lines closest to the shower head, the caulk bead where the tub meets the tile, the ceiling directly above the shower, and the folds of a shower curtain that never fully dries. Understanding this cycle matters because scrubbing away visible mold without fixing the underlying moisture and ventilation problem just buys you a few weeks before it’s back.
If your bathroom routine already includes a soak, pairing mold prevention with a relaxing habit like a warm bath using bath salts for relaxation and sleep doesn’t have to work against your mold-prevention efforts — the key is what happens after the water drains, which we’ll cover in the prevention section.
It also helps to understand that not all mold species behave the same way. The dark, sometimes greenish-black patches most people notice on grout and caulk are usually Cladosporium or Aspergillus, both common indoor molds that thrive specifically in damp, low-light environments. The powdery gray film that shows up on shower curtains and vinyl liners is more often mildew, a related but distinct organism that grows on the surface rather than embedding into the material. Neither is usually the toxic “black mold” (Stachybotrys chartarum) that gets so much attention online — that species needs sustained, heavy water damage to establish itself and is far less common in a normally-functioning bathroom than people assume.
Temperature plays a role too. Most household mold species grow fastest in the 60–80°F range, which happens to be almost exactly the ambient temperature of a bathroom after a hot shower has warmed the air and every surface has cooled back down with a thin layer of condensation on it. That combination of warmth, moisture, and a lightly organic food source (soap film, skin oils, dust) is essentially a standing invitation, which is why bathrooms develop mold far faster than, say, a similarly humid but cooler basement.
Is It Actually Mold? (Mold vs. Mildew vs. Soap Scum)
Not every dark spot in a bathroom is mold, and treating the wrong problem wastes time and money. Here’s a quick way to tell them apart before you commit to a full mold-removal routine.
| Issue | Appearance | Texture | Common Location |
|---|---|---|---|
| Mold | Black, green, or dark brown spots, sometimes fuzzy | Slightly raised, fuzzy or slimy | Grout, caulk, ceiling, under sinks |
| Mildew | Gray or white powdery patches | Flat, powdery | Shower curtains, damp fabric, grout surface |
| Soap scum | Dull white or gray film | Waxy, chalky | Tile walls, glass doors, tub |
| Hard water stains | White or rust-colored crust | Rough, crusty | Faucets, drains, glass |
A simple test: dab a small amount of diluted household bleach on the spot. If it lightens noticeably within a couple of minutes, you’re dealing with mold or mildew. If nothing changes, you’re more likely looking at soap scum or mineral buildup, which needs a different cleaning approach — see our guide on how to remove soap scum for that.
Another useful clue is smell. Mold and mildew both tend to produce a musty, earthy odor caused by microbial volatile organic compounds, even in spots too small or too new to see clearly yet. Soap scum and hard water deposits, by contrast, are essentially odorless. If you’re catching a persistent musty smell in a bathroom that looks visually clean, it’s worth checking less obvious spots — behind the toilet, under the sink cabinet, along the baseboards, and inside the overflow drain of the tub — since mold can establish itself in these hidden areas well before it becomes visible on an exposed surface.
It also helps to look at the pattern of the discoloration rather than just its color. Mold and mildew tend to spread in irregular, spotty clusters that follow moisture patterns — denser near a showerhead, thinner further away. Soap scum and mineral scale, on the other hand, usually build up in a more uniform film that follows water flow lines, like the path water takes running down a glass door or across a faucet.

RMR-86 Instant Mold Stain Remover
A fast-acting spray that lifts mold and mildew stains from grout and caulk on contact, without heavy scrubbing.
Check Price on AmazonSafety First: What to Wear and Ventilate
Mold removal isn’t dangerous for most healthy adults when it’s confined to small areas like grout lines or caulk, but it’s still worth taking basic precautions, especially if you’re sensitive to mold or have asthma or allergies.
- Gloves: Rubber or nitrile gloves protect your skin from both mold spores and cleaning chemicals.
- Eye protection: Splashback from spray bottles, especially bleach-based ones, can irritate eyes.
- A mask or respirator: An N95 mask keeps you from inhaling loosened spores while scrubbing.
- Ventilation: Run the exhaust fan, open a window, or prop the door open. Never mix bleach with ammonia-based cleaners — the combination produces toxic fumes.
- Old clothing: Bleach splatters will ruin fabric, so wear something you don’t mind bleaching.
Never mix cleaning products. Combining bleach with ammonia, vinegar, or other acidic cleaners can create dangerous chloramine gas. Stick to one product at a time and rinse the surface before switching.
Supplies You’ll Need
Most bathroom mold jobs can be done with a handful of inexpensive supplies you may already have, plus one or two dedicated products for stubborn spots.
Basic Kit
- Rubber gloves and a mask
- Old toothbrush or grout brush
- Spray bottle
- Microfiber cloths
- White vinegar or hydrogen peroxide
- Baking soda
For Stubborn or Widespread Mold
- Chlorine bleach (diluted) or a commercial mold remover gel
- Grout pen or grout sealer for after-cleaning
- Fresh silicone caulk and a caulk removal tool
- Squeegee for daily maintenance
- Dehumidifier for chronic humidity
Step-by-Step: Removing Mold From Every Surface
Bathroom mold shows up on several different materials, and each one responds best to a slightly different technique. Below are dedicated, illustrated methods for grout and tile, silicone caulk, ceilings and painted walls, and fabric surfaces like curtains and bath mats.
Method 1: Grout and Tile Mold
Grout is porous, which means mold doesn’t just sit on the surface — it works its way into the material itself. That’s why grout mold often looks like it’s “returning” even after a good scrub: you removed the surface layer but left spores embedded deeper in the grout.
Mix your cleaning solution
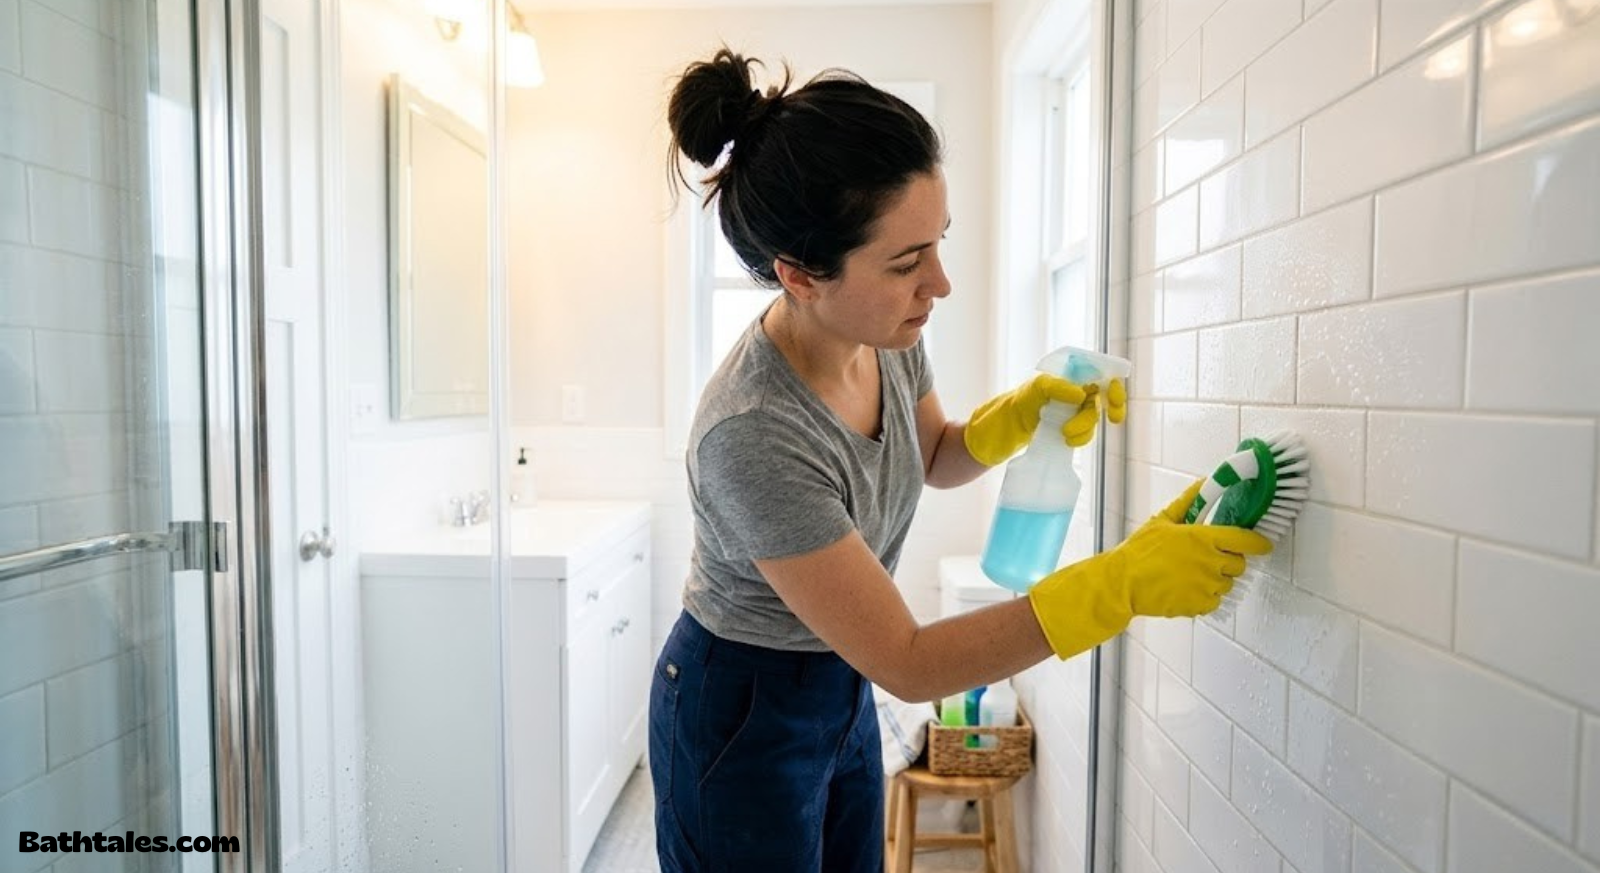
For light to moderate mold, mix equal parts white vinegar and water in a spray bottle. For heavier buildup, use a solution of 1 part bleach to 3 parts water, or a dedicated grout-safe mold remover.
Saturate the moldy grout lines
Spray the solution directly onto the affected grout lines and let it sit for 10–15 minutes. This dwell time lets the solution penetrate the porous surface rather than just sitting on top of it.
Scrub with a stiff grout brush
Use an old toothbrush or dedicated grout brush and scrub in small circular motions, working along the length of each grout line. Rinse the brush frequently.
Rinse and dry completely
Rinse thoroughly with clean water, then dry the area with a towel or squeegee. Leaving grout damp gives any remaining spores exactly what they need to regrow.
Seal the grout once it’s fully dry
After the grout is completely dry (usually 24 hours), apply a penetrating grout sealer. This fills the microscopic pores in the grout so moisture — and mold — can’t take hold as easily.
For grout that’s badly stained even after cleaning, a grout pen or re-grouting the worst sections is often faster than continuing to scrub. And if the surrounding tile has heavy scale buildup as well, our how to clean grout without scrubbing guide covers soak-based methods that pair well with this process.
A common mistake with grout mold is treating only the visible line and ignoring the tile immediately surrounding it. Mold spores that get knocked loose while scrubbing don’t disappear — they settle onto the nearest available surface, which is usually the adjacent tile. Wiping down the full tile face, not just the grout seam, with the same solution helps make sure you’re not just relocating the problem a few millimeters away. It’s also worth paying extra attention to horizontal grout lines low on the wall and along the tub or shower floor, since these hold standing moisture the longest after each use and are almost always the first spots to show regrowth.
If you’re dealing with an entire shower’s worth of grout rather than a few isolated spots, working in sections rather than trying to spray and scrub the whole area at once keeps the solution from drying out before you get to it with the brush. A rough rule of thumb is to treat about a three-foot section at a time, working from the top down so any drips land on grout you haven’t cleaned yet rather than re-soiling a section you just finished.

Stiff-Bristle Grout Cleaning Brush Set
An ergonomic, angled brush designed specifically to reach into narrow grout lines without damaging tile.
Check Price on AmazonMethod 2: Silicone Caulk Mold
Caulk mold is one of the most stubborn types because mold often grows underneath the surface of the silicone itself, not just on top of it. Surface cleaning can lighten the stain temporarily, but if the mold has worked its way through the caulk, replacement is usually the only permanent fix.
Try surface treatment first
Soak paper towels or cotton coils in bleach or a hydrogen peroxide solution and press them directly against the moldy caulk line. Leave them in place for several hours or overnight.
Rinse and evaluate
Remove the cotton coil, rinse the area, and check how much of the stain lifted. Light discoloration usually fades; dark mold that persists means it has grown into the caulk itself.
Remove the old caulk if mold persists
Use a caulk removal tool or utility knife to score along both edges of the bead, then peel it away. Clean any residue left behind with rubbing alcohol.
Clean and dry the gap fully
Wipe the exposed gap with rubbing alcohol to kill any remaining spores, then let it air dry completely — at least a few hours — before recaulking.
Apply fresh, mold-resistant caulk
Load a caulk gun with a mold-resistant silicone caulk, cut the tip at a 45-degree angle, and run a smooth, continuous bead along the gap. Smooth it with a caulk tool or a wet finger before it skins over.
Tip: Choose a caulk labeled specifically “mold-resistant” or “kitchen & bath” — these contain fungicidal additives that standard caulk doesn’t.

Mold-Resistant Kitchen & Bath Silicone Caulk
Waterproof, flexible caulk formulated with fungicide to resist mold regrowth around tubs, sinks, and showers.
Check Price on AmazonMethod 3: Ceiling and Wall Mold
Mold on a bathroom ceiling, usually directly above the shower, is almost always a ventilation problem. Painted drywall isn’t as porous as grout, so surface cleaning tends to work well here — but if you skip fixing the humidity issue, it comes back within weeks.
Protect the floor and mix your solution
Lay down a towel or drop cloth. Mix a solution of 1 part bleach to 4 parts water, or use a 3% hydrogen peroxide spray for a gentler option on painted surfaces.
Spray the affected ceiling area
Using a spray bottle or a sponge dipped in solution, apply an even coat over the moldy patch and a few inches beyond its visible edges.
Let it dwell, then wipe gently
Give the solution 10 minutes to work, then wipe with a microfiber cloth or soft sponge. Avoid hard scrubbing on painted surfaces, which can strip paint and create a rougher surface that’s easier for mold to grip.
Dry and inspect
Point a fan at the ceiling or run the exhaust fan for at least 30 minutes to fully dry the area. Check for any staining that remains once dry.
Repaint with mold-resistant paint if staining remains
For persistent shadowing, a coat of mold-resistant or bathroom-specific paint seals the surface and adds a fungicidal barrier against future growth.
Method 4: Shower Curtains, Mats, and Fabric
Shower curtains and bath mats trap moisture between folds and against the floor, making them prime mold targets. Most fabric and vinyl bathroom items can be treated in a washing machine rather than scrubbed by hand.
Machine wash with detergent and vinegar
Wash on a warm or hot cycle with regular detergent plus a half-cup of white vinegar added to the rinse cycle. Add a couple of old towels to help scrub the fabric as it agitates.
Air dry fully extended
Hang the curtain or mat fully spread out, not bunched, so air reaches every part of the fabric. Avoid the dryer for vinyl curtains, which can warp under heat.
Going forward, closing the curtain fully after each shower (rather than leaving it bunched at one end) lets it dry faster and cuts down mold recurrence significantly.

Compact Bathroom Dehumidifier
A small electric dehumidifier that pulls excess moisture from the air between showers, cutting the humidity mold depends on.
Check Price on AmazonNatural vs. Chemical Cleaners Compared
Every mold-removal method comes with tradeoffs between strength, safety, and how long the results last. Here’s how the most common options stack up against one another.
Natural Options (Vinegar, Baking Soda, Peroxide)
- No harsh fumes, safer around kids and pets
- Won’t discolor colored grout or fabric
- Inexpensive and always on hand
- Good for light, surface-level mold
Chemical Options (Bleach, Commercial Sprays)
- Kills mold faster and more thoroughly on deep stains
- Can discolor grout, fabric, and colored caulk
- Requires ventilation and careful handling
- Best for severe or recurring mold
| Cleaner | Best For | Kill Rate on Deep Mold | Surface Safety |
|---|---|---|---|
| White vinegar | Light surface mold, general upkeep | Moderate | Safe on most surfaces except natural stone |
| 3% hydrogen peroxide | Painted walls, ceilings | Good | Safe, non-bleaching in most cases |
| Baking soda paste | Scrubbing without scratching | Mild, best combined | Safe on tile and fiberglass |
| Diluted bleach | Grout, caulk, tile | Very high | Can discolor colored materials |
| Commercial mold gel/spray | Deep-set caulk and grout stains | Very high | Follow label; test small area first |
Preventing Mold From Coming Back
Removing mold is only half the job — without changing the conditions that let it grow in the first place, most bathrooms see regrowth within a month or two. These habits address the root causes: moisture, poor airflow, and organic residue.
- Run the exhaust fan during every shower and for at least 20–30 minutes afterward.
- Squeegee the walls and glass immediately after showering to cut standing moisture dramatically.
- Leave the door or window cracked when possible to encourage airflow.
- Wash bath mats weekly and hang them to dry rather than leaving them bunched on the floor.
- Wipe down caulk lines once a week with a quick vinegar spray to prevent buildup before it starts.
- Fix leaks promptly — even a small drip behind a wall or under a sink creates chronic humidity that surface cleaning can’t fix.
- Consider a dehumidifier in bathrooms without windows or strong ventilation.
If your bathroom routine includes regular baths, a good habit is rinsing and drying the tub surround right after you drain the water — see our full deep clean a bathroom guide for a room-by-room maintenance schedule that folds mold prevention into your normal cleaning routine. It also pairs naturally with keeping your drains clear, since standing water anywhere in the bathroom adds to ambient humidity — our how to clean a shower drain guide covers that specifically.
Small habit, big difference: Bathrooms that get a 20-second squeegee wipe-down after every shower see dramatically less mold regrowth than those that don’t, even without any other change in cleaning routine.

Silicone Shower Squeegee with Hook
A quick daily wipe-down tool that removes standing water from tile and glass in seconds, cutting mold-feeding moisture.
Check Price on AmazonQuick Fixes for Renters and Rentals
If you’re renting, some of the permanent fixes above — replacing caulk, repainting a ceiling, or installing a dehumidifier — may not be practical or may need landlord approval first. There are still several things you can do without altering the unit permanently.
- Document and report it early. Photograph any mold as soon as you notice it and let your landlord or property manager know, especially if it’s tied to a leak or poor ventilation that’s a structural issue rather than a cleaning one.
- Use removable solutions. A tension-mounted shower caddy or portable fan can improve airflow without any drilling or permanent installation.
- Stick to surface cleaning methods. Vinegar, hydrogen peroxide, and commercial mold sprays handle most grout and caulk mold without needing to replace anything.
- Ask before repainting. Many leases require landlord sign-off before repainting, even for maintenance reasons, so check your lease or ask directly before applying mold-resistant paint yourself.
In many cases, chronic mold in a rental — especially anything tied to a leak, poor ventilation from a broken exhaust fan, or window condensation — is technically a habitability issue the landlord is responsible for addressing, not just a cleaning task for the tenant. It’s worth knowing your local tenant rights if the same mold keeps returning despite your best efforts.
How Different Bathroom Materials Respond to Mold Treatment
Not every bathroom is finished the same way, and the material behind your mold problem changes both how fast it grows and how you should treat it.
| Surface | Why Mold Grows There | Recommended Treatment |
|---|---|---|
| Ceramic/porcelain tile | Non-porous itself, but grout lines between tiles are porous | Vinegar or diluted bleach on grout; simple wipe-down on tile face |
| Natural stone (marble, travertine) | Porous stone absorbs moisture directly | pH-neutral stone cleaner only — avoid vinegar and bleach, which etch stone |
| Fiberglass/acrylic shower units | Smooth but scratches easily, trapping residue in micro-grooves | Baking soda paste or a soft-bristle brush with mild cleaner |
| Painted drywall | Paint film breaks down under repeated condensation | Hydrogen peroxide, gentle wipe, mold-resistant repaint if needed |
| Vinyl/silicone caulk | Flexible material with organic fillers mold can colonize | Bleach-soaked coils; full replacement if staining persists |
Natural stone deserves special mention because it’s the one surface where the “just use vinegar” advice can backfire. Marble, travertine, and other calcium-based stones are chemically reactive to acids, so vinegar, lemon juice, or any acidic cleaner will etch and dull the surface over repeated use, even if it does technically kill some mold in the process. If your bathroom has natural stone tile or countertops, stick to a cleaner explicitly labeled safe for stone, and consider testing any new product in an inconspicuous spot first.
When to Call a Professional
Most bathroom mold is a DIY-friendly problem, but a few warning signs mean it’s time to bring in a mold remediation specialist or a contractor rather than continuing to clean it yourself.
Call a Professional If:
- Mold covers an area larger than roughly 10 square feet
- Mold keeps returning within days despite thorough cleaning and drying
- You notice soft, spongy, or discolored drywall or subfloor
- A musty smell persists even when no mold is visible
- Anyone in the household has severe mold allergies or respiratory conditions
DIY Is Usually Fine If:
- Mold is limited to grout, caulk, or a small ceiling patch
- The surface underneath is solid, not soft or crumbling
- There’s no hidden leak feeding ongoing moisture
- This is a first occurrence, not a chronic recurring issue
Recurring mold behind tile or under flooring often points to a plumbing leak that surface cleaning will never fully resolve — in those cases, a plumber needs to address the water source before any cleaning routine will hold.
Frequently Asked Questions
Does vinegar really kill bathroom mold?
Yes, undiluted white vinegar kills a large percentage of common household mold species on contact and continues working as it dries. It’s gentler than bleach and won’t discolor grout or fabric, making it a solid first choice for light to moderate mold.
Is bleach or vinegar better for mold?
Bleach kills surface mold very effectively but only on non-porous surfaces, since it can’t penetrate porous materials like grout or wood to reach roots underneath. Vinegar is mildly acidic and can penetrate porous surfaces slightly better, making it more effective long-term on grout even though it feels less “strong” than bleach.
Why does mold keep coming back in the same spot?
If mold returns quickly in the same location, moisture is still reaching that spot — from poor ventilation, a leak, or simply not drying the area after use. Cleaning removes visible mold but doesn’t fix the moisture source, so it regrows unless that root cause is addressed.
Can bathroom mold make you sick?
For most healthy people, brief exposure to small amounts of common bathroom mold isn’t a major health risk, but it can trigger allergy-like symptoms such as sneezing, coughing, or skin irritation, especially with prolonged exposure. People with asthma, mold allergies, or weakened immune systems should take extra precaution and consider professional removal for larger infestations.
How long does it take to get rid of mold in a bathroom?
Surface mold on grout, caulk, or tile can usually be cleaned in under an hour, though bleach or vinegar treatments often need a 10–15 minute dwell time to fully work. Deeper mold in caulk that requires replacement, or ceiling mold that needs repainting, can take a full afternoon including drying time.
What kills black mold permanently?
No single product guarantees mold never returns, since that depends on controlling moisture, not just the cleaning agent. That said, a bleach solution or a dedicated mold-killing spray combined with fixing ventilation and drying habits comes closest to a permanent fix on non-porous surfaces like tile and caulk.
Why is there mold on my bathroom ceiling specifically?
Heat and steam naturally rise, so the ceiling directly above the shower collects the most concentrated moisture in the room. Without an exhaust fan pulling that humid air out, condensation forms on the ceiling repeatedly, creating ideal conditions for mold even if the rest of the bathroom stays relatively dry.
Should I replace moldy caulk or just clean it?
If the mold is only staining the surface of the caulk, cleaning with bleach or peroxide often lifts it completely. If the discoloration remains after a thorough cleaning attempt, mold has likely grown into the caulk itself, and replacing it is the only way to fully remove it.
Does a bathroom fan actually prevent mold?
Yes — running an exhaust fan during and after showers is one of the single most effective mold-prevention habits, since it removes the humid air before it condenses on cool surfaces like ceilings, mirrors, and tile. Bathrooms without adequate ventilation see mold return far more often, regardless of how well they’re cleaned.
Can I use hydrogen peroxide instead of bleach?
Yes, 3% hydrogen peroxide is an effective, less harsh alternative to bleach for most bathroom surfaces, including painted walls and colored grout where bleach might cause discoloration. It won’t work quite as fast on heavy, set-in stains, but it’s a safer everyday option.
What’s the fastest way to remove mold before guests arrive?
A commercial instant mold and mildew stain remover spray is the fastest option for visible improvement, often lightening stains within minutes without heavy scrubbing. It’s a good short-term fix, but pairing it with the full cleaning steps above ensures the results actually last beyond a quick touch-up.
The Bottom Line
Bathroom mold is stubborn mostly because bathrooms are built to trap the exact conditions mold loves — heat, humidity, and low airflow. The good news is that between targeted cleaning for grout, caulk, ceilings, and fabric, and a few small daily habits like running the fan and squeegeeing the walls, most households can keep their bathroom mold-free without an ongoing battle. Start with the surface that’s bothering you most, work through the matching method above, and layer in the prevention habits so you’re not repeating the same deep clean every few weeks.
Looking to round out your bathroom care routine? Check out our guides on best bathroom cleaners and how to clean grout without scrubbing for more room-specific tips.

Ready to tackle it today?
Start with a fast-acting mold stain remover for immediate results on grout and caulk.
Shop Mold Removers on Amazon